Ryobi GDA300 Operation Manual
Ryobi GDA300 Manual
 |
View all Ryobi GDA300 manuals
Add to My Manuals
Save this manual to your list of manuals |
Ryobi GDA300 manual content summary:
- Ryobi GDA300 | Operation Manual - Page 1
INSTRUCTIONS WARNING: To reduce the risk of injury, do not attempt to use this product until you have read thoroughly and understand completely this operator's manual and the operator's manual for the RYOBI garage door opener. Ensure compatibility or service personnel. TROUBLESHOOTING PROBLEM - Ryobi GDA300 | Operation Manual - Page 2
support de charpente où aucun fil électrique, câble de service public, tuyau ou autre obstruction ne passe. Ne pas respecter ces instructions ído y comprendido por completo tanto este manual del operador como el de Sistema de apertura para portón de garaje RYOBI. Asegúrese de que la compatibilidad y
-
 1
1 -
 2
2
 |
 |

Fig. 3
Fig. 4
C
A
B
D
OPERATOR’S MANUAL
MANUEL D’UTILISATION
MANUAL DEL OPERADOR
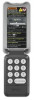
OUTDOOR KEYPAD FOR
RYOBI GARAGE DOOR OPENERS
CLAVIER EXTÉRIEUR POUR OUVRE-PORTE DE GARAGE RYOBI
PANEL EXTERIOR PARA EL SISTEMA DE APERTURA PARA PORTÓN DE
GARAJE RYOBI
GDA300
A - Key hole (trou piriforme, bocallave)
B - Pencil (crayon, lápiz)
C - Screwdriver (tournevis, destornillador)
D - Top screw (vis supérieure, tornillo superior)
WARNING:
To reduce the risk of injury, do not attempt to use this product until you have
read thoroughly and understand completely this operator’s manual and the
operator’s manual for the RYOBI garage door opener. Ensure compatibility
and fit before using this accessory. Do not use this accessory if a part is
damaged or missing.
Install keypad in sight of garage door and at least five feet above the floor.
Always keep the moving door in sight and away from people and objects until
it is completely closed. No one should cross the path of the moving door.
Do not allow to be used as a toy. Close attention is necessary when used by
children.
Save these instructions. Refer to them frequently and use them to instruct
others who may use this product.
PACKING LIST
Outdoor Keypad, 9 Volt Battery, Screws, Operator’s Manual
SYMBOLS
The following signal words and meanings are intended to explain the levels
of risk associated with this product.
SYMBOL / SIGNAL
MEANING
DANGER:
Indicates a hazardous situation, which, if not avoided,
will result in death or serious injury.
WARNING:
Indicates a hazardous situation, which, if not avoided,
could result in death or serious injury.
CAUTION:
Indicates a hazardous situation, that, if not avoided,
may result in minor or moderate injury.
NOTICE:
(Without Safety Alert Symbol) Indicates information
considered important, but not related to a potential
injury (e.g. messages relating to property damage).
Some of the following symbols may be used on this product. Please study
them and learn their meaning. Proper interpretation of these symbols will allow
you to operate the product better and safer.
SYMBOL / NAME
DESIGNATION/EXPLANATION
Safety Alert
Indicates a potential personal injury hazard.
Read
Operator’s
Manual
To reduce the risk of injury, user must read and
understand operator’s manual before using
this product.
Moving Door
To avoid death or serious personal injury, stay
clear of the garage door while it is moving and
never attempt to run or walk under moving
garage door.
ASSEMBLY
INSTALLING THE OUTDOOR KEYPAD
See Figures 1 - 2.
WARNING:
Do not use garage door opener if keypad does not start and stop the motor
after it has been programmed. An opener that cannot be controlled with
a keypad is dangerous, can result in death or serious personal injury, and
must be repaired.
WARNING:
Make sure the keypad is mounted high enough to prevent unauthorized
activation of the garage door opener. It should be placed at least 5 feet above
the floor so that it is inaccessible to children. Unauthorized activation of the
opener can result in death or serious personal injury.
WARNING:
Do not start or stop the garage door opener if there is a person or object
in the path of the door, the door has not been properly balanced, or if you
cannot see the doorway. Failure to follow these instructions can result in
death or serious personal injury.
WARNING:
Only install screws, bolts, anchors, and other hardware into sound structural
supports in areas where no electrical wires, utility cables, pipes, or other
obstructions are located. Failure to follow these instructions can result in
death, electrical shock, or other serious personal injury.
NOTE:
For convenience, we recommend you program the outdoor keypad before
installing. See
Programming the Outdoor Keypad
for instructions.
Find desired location outdoors and in sight of the garage door.
NOTE:
The keypad should be at least 5 feet above the floor so it is
inaccessible to children.
Use a pencil to mark screw hole placement and install top screw.
Place the wide portion of the key hole over the head of the top screw.
Slide the keypad down until the top screw is inside the narrow portion of the
key hole.
Remove the battery cover.
Use a level to be sure the keypad is in a vertical position, then install bottom
screw into the screw hole.
Install 9-volt battery.
Replace battery cover.
IMPORTANT SAFETY INSTRUCTIONS
991000836
10-1-18 (REV:05)
Fig. 1
A
B
C
D
Fig. 2
A - Battery cover (couvercle du logement de pile, tapa del compartimiento para
la batería)
B - Battery (pile, batería)
C - Bottom screw (vis inférieure, tornillo inferior)
D - Screw hole (trou de vis, orificio para el tornillo)
OPERATION
PROGRAMMING THE OUTDOOR KEYPAD
See Figures 3 - 4.
If you haven’t already done so, install a 9-volt battery into the outdoor keypad.
Press and hold the
1
button. With the
1
button still depressed, press the
ON/
PROGRAM
button, then release both. The LEDs on the keypad will flash two
times and then remain lit.
Slowly enter your desired PIN (4 digits). The LEDs on the keypad will flash
one time as each number is pressed. After your pin is entered, the LEDs will
flash three times and remain lit for a few seconds. This indicates the PIN has
been accepted and the keypad is ready to be paired with your garage door
opener.
Press and hold the
PROGRAM
button on the garage door opener’s console
until the garage door opener’s LED lights turn off and the light behind the
PROGRAM
button on the console flashes three times. This indicates the
console is in programming mode.
Press the
ON/PROGRAM
button on the outdoor keypad, then enter your
PIN. The light behind the
PROGRAM
button on the garage door opener’s
console will flash three times, then the garage door opener’s LED lights will
turn on.
Within 30 seconds after the LED lights turn on, press the
0
button on the
keypad. Once the garage door moves, the set-up is complete.
To operate the garage door opener after initial set-up, press the
ON/
PROGRAM
button on the keypad, then enter your PIN.
NOTE:
In order to change the PIN or reset a forgotten PIN, repeat all of the
steps listed in this section, including syncing the outdoor keypad to the garage
door opener.
SETTING UP A TEMPORARY PIN
See Figure 4.
It is possible to set up a temporary PIN for use by visitors or service personnel.
This PIN will remain available only until the next time you enter your regular PIN
on the keypad.
To set up a temporary PIN:
Press and hold the
3
button, then press the
ON/PROGRAM
button. The
LEDs on the keypad will flash three times.
Enter your current PIN. The LEDs on the keypad will briefly flash twice.
Enter the desired temporary PIN. The LEDs on the keypad will briefly flash
three times and the temporary PIN is now ready to use.
To operate the garage door opener using the temporary PIN, press the
ON/
PROGRAM
button on the keypad, then enter the temporary PIN.
NOTE:
Remember that the temporary PIN will be automatically deleted the next
time your regular PIN is entered on the outdoor keypad.
A - Garage door opener console (console de l’ouvre-porte de garage, consola
del sistema de apertura para portón de garaje)
B - PROGRAM button (bouton de PROGRAM, botón PROGRAM)
C - LED lights (ampoules DEL, luces LED)
A
C
The outdoor keypad can be used to open and close the RYOBI Garage Door
Opener. For security, the outdoor keypad allows you to set up a custom four
digit personal identification (PIN) code.
ONE WORLD
TECHNOLOGIES, INC.
P.O. Box 1288, Anderson, SC 29622
1-800-525-2579
www.ryobitools.com
This product has a Three-year
Limited Warranty.
For Warranty details go to
www.ryobitools.com
B
TROUBLESHOOTING
PROBLEM
POSSIBLE CAUSE
SOLUTION
Garage door can
not be opened or
closed with keypad
The garage door is
locked.
Press the LOCK button on
the indoor keypad to unlock
the door.
Outdoor keypad
does not
work or works
intermittently.
Keypad not programmed
correctly
The keypad’s signal is
obstructed
Keypad is mounted on a
metallic surface
Battery inside keypad is
low on charge or dead.
Entered PIN too quickly
Program the keypad as
described in
Operation
Move keypad to a different
location
Offset keypad from metal
surface or relocate keypad.
Replace battery
Enter PIN slowly. Ensure
keypad LED flashes for each
number.