Ryobi P100 English Manual
Ryobi P100 Manual
 |
UPC - 033287135448
View all Ryobi P100 manuals
Add to My Manuals
Save this manual to your list of manuals |
Ryobi P100 manual content summary:
- Ryobi P100 | English Manual - Page 1
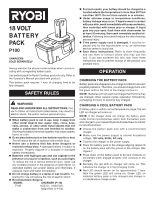
18 VOLT BATTERY PACK P100 CHARGERS SOLD SEPARATELY Always mention the above model number when communicating with us regarding battery pack. Use battery pack for Ryobi Cordless products only. Refer to the Operator's Manual provided with product. This battery pack requires 1 hour of charging time to - Ryobi P100 | English Manual - Page 2
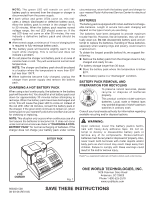
battery pack and should be replaced. After normal usage, a minimum of 1 hour of charging time is required to fully recharge battery pack. The battery pack will become slightly warm to the touch while charging. This is normal and does not indicate a problem. Do not place the charger and battery
-
 1
1 -
 2
2
 |
 |
Always mention the above model number when communi-
cating with us regarding battery pack.
Use battery pack for Ryobi Cordless products only. Refer to
the Operator’s Manual provided with product.
This battery pack requires 1 hour of charging time to be
fully charged.
SAFETY RULES
For best results, your battery should be charged in a
location where the temperature is more than 50°F but
less than 100°F. Do not store outside or in vehicles.
Under extreme usage or temperature conditions,
battery leakage may occur. If liquid comes in contact
with your skin, wash immediately with soap and water,
then neutralize with lemon juice or vinegar. If liquid
gets into your eyes, flush them with clean water for
at least 10 minutes, then seek immediate medical at-
tention.
Following this rule will reduce the risk of serious
personal injury.
If the power supply cord is damaged
, it must be re-
placed only by the manufacturer or by an authorized
service center to avoid risk.
Save these instructions.
Refer to them frequently
and use them to instruct others who may use this
tool. If you loan someone this tool, loan them these
instructions also to prevent misuse of the product and
possible injury.
WARNING!
READ AND UNDERSTAND ALL INSTRUCTIONS.
Fail-
ure to follow all instructions listed below, may result in
electric shock, fire and/or serious personal injury.
When battery pack is not in use, keep it away from
other metal objects like: paper clips, coins, keys,
nails, screws, or other small metal objects that can
make a connection from one terminal to another.
Shorting the battery terminals together may cause sparks,
burns, or a fire.
Do not place battery tools or their batteries near fire or heat.
This will reduce the risk of explosion and possibly injury.
Never use a battery that has been dropped or
received a sharp blow.
A damaged battery is subject to
explosion. Properly dispose of a dropped or damaged
battery immediately.
Batteries vent hydrogen gas and can explode in the
presence of a source of ignition, such as a pilot light.
To reduce the risk of serious personal injury, never use
any cordless product in the presence of open flame. An
exploded battery can propel debris and chemicals. If
exposed, flush with water immediately.
Do not charge battery in a damp or wet location.
Fol-
lowing this rule will reduce the risk of electric shock.
Recommended chargers:
MODEL
CHARGER (P110)
P100
1423701, 140237021,
140237023 or P130
18 VOLT
BATTERY
PACK
P100
CHARGERS
SOLD SEPARATELY
OPERATION
CHARGING THE BATTERY PACK
Battery packs are shipped in a low charge condition to prevent
possible problems. Therefore, you should charge them until
the green LED on the front of the charger comes on.
NOTE:
Batteries will not reach full charge the first time they
are charged. Allow several cycles (operation followed by
recharging) for them to become fully charged.
CHARGING A COOL BATTERY PACK
If battery pack is within normal temperature range, the red
LED on charger will come on.
NOTE:
If the charger does not charge the battery pack
under normal circumstances, return both the battery pack
and charger to your nearest Ryobi Authorized Service Center
for electrical check.
Charge the battery pack only with a recommended
charger.
Make sure the power supply is normal household
voltage,
120 volts, 60 Hz, AC only
.
Connect the charger to the power supply.
Place the battery pack in the charger aligning raised rib
on the battery pack with the groove in the charger.
See
Figure 1.
Press down on the battery pack to be sure contacts on
the battery pack engage properly with contacts in the
charger.
Normally the red LED on charger will come on. This
indicates the charger is in fast charging mode.
Red LED should remain on for approximately 1 hour
then the green LED will come on. Green LED on
indicates battery pack is fully charged and charger is
in maintenance charge mode.