Ryobi P1812 User Manual
Ryobi P1812 Manual
 |
View all Ryobi P1812 manuals
Add to My Manuals
Save this manual to your list of manuals |
Ryobi P1812 manual content summary:
- Ryobi P1812 | User Manual - Page 1
Operation 5-6 Maintenance 7 Illustrations 8-9 Parts Ordering and Service Back page TABLE DES MATIÈRES Avertissements de sécurit risk of injury, the user must read and understand the operator's manual before using this product. AVERTISSEMENT : Pour réduire les risques de - Ryobi P1812 | User Manual - Page 2
For use with 18V nickel-cadmium and 18V lithium-ion battery packs or a key left attached to a rotating part of the power tool may result in Do not use on a ladder or unstable support. Stable footing on a solid surface enables better with the power tool or these instructions to operate the power tool. - Ryobi P1812 | User Manual - Page 3
tool, accessories and tool bits etc. in accordance with these instructions, taking into account the servicing a power tool, use only identical replacement parts. Follow instructions in the Maintenance section of this manual. Use of unauthorized parts or failure to follow Maintenance instructions - Ryobi P1812 | User Manual - Page 4
. SYMBOL NAME DESIGNATION/EXPLANATION Safety Alert Indicates a potential personal injury hazard. Read Operator's Manual To reduce the risk of injury, user must read and understand operator's manual before using this product. Eye Protection Always wear eye protection with side shields marked - Ryobi P1812 | User Manual - Page 5
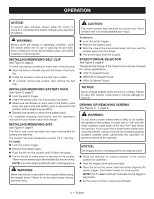
screws into metal studs For complete charging instructions, see the operator's manuals for your battery pack and charger. VARIABLE whistling or ringing noise coming from the switch during use is a normal part of the switch function. DIRECTION OF ROTATION SELECTOR (FORWARD/REVERSE/CENTER LOCK) - Ryobi P1812 | User Manual - Page 6
instructions, see the operator's manuals for your battery pack and charger. INSTALLING/REMOVING BITS . Contact with a "live" wire will make exposed metal parts of the tool "live" and shock the operator. If driver is not designed to be used as a drill. Place the direction of rotation selector in - Ryobi P1812 | User Manual - Page 7
MAINTENANCE WARNING: When servicing, use only identical replacement parts. Use of any other part could create a hazard or cause product damage. GENERAL MAINTENANCE Avoid using solvents when cleaning plastic parts. Most plastics are susceptible to damage from various types of commercial solvents - Ryobi P1812 | User Manual - Page 8
es d'aération. Ne pas utiliser l'outil sur une échelle ou un support instable. Une bonne tenue et un bon équilibre permettent de mieux contrôler familiarisé avec l'outil ou ces instructions utiliser l'outil. Dans les mains de personnes n'ayant pas reçu des instructions adéquates, les outils sont - Ryobi P1812 | User Manual - Page 9
moins 10 minutes, puis contacter immédiatement un médecin. Le respect de cette règle réduira les risques de blessures graves. Conserver ces instructions. Les consulter fréquemment et les utiliser pour instruire les autres utilisateurs éventuels. Si cet outil est prêté, il doit être accompagné de - Ryobi P1812 | User Manual - Page 10
SYMBOLES Les termes de mise en garde suivants et leur signification ont pour but d'expliquer le degré de risques associé à l'utilisation de ce produit. SYMBOLE SIGNAL SIGNIFICATION DANGER : Indique une situation extrêmement dangereuse qui, si elle n'est pas évitée, aura pour conséquences des - Ryobi P1812 | User Manual - Page 11
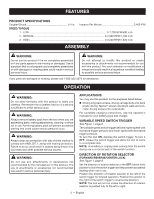
CARACTÉRISTIQUES FICHE TECHNIQUE Coupleur 6,35 mm (1/4 po) Vitesse d'impact 0-3 400 IPM VITESSE/COUPLE 1 - BASSE 0-1 700 RPM / 45 Nm (400 po-lb) 2 - MOYEN 0-2 500 RPM / 124,3 Nm (1,100 po-lb) 3 - RAPIDE 0-3 200 RPM / 203,4 Nm (1,800 po-lb) ASSEMBLAGE AVERTISSEMENT : Ne pas utiliser le produit - Ryobi P1812 | User Manual - Page 12
UTILISATION Positionner le sélecteur de sens de rotation du côté gauche de la gâchette pour faire fonctionner vers l'avant. Positionner le sélecteur de sens de rotation du côté droit de la gâchette pour inverser le sens de rotation. NOTE : L'outil ne peut fonctionner que si le sélecteur de sens de - Ryobi P1812 | User Manual - Page 13
UTILISATION AVIS : La clé à choc n'est pas conçue pour être utilisée comme une perceuse. Appuyer sur le sélecteur de sens de rotation dans le sens désiré. Tenir la tournevis à percussion d'une main. Placer l'embout sur la tête de la vis et appuyer lentement sur la gâchette. Nous recommandons - Ryobi P1812 | User Manual - Page 14
ADVERTENCIAS DE SEGURIDAD PARA HERRAMIENTAS ELÉCTRICAS ADVERTENCIA Lea todas las advertencias de seguridad y las instrucciones. El incumplimiento de las advertencias e instrucciones puede ocasionar descarga eléctrica, fuego o lesiones graves. Guarde todas las advertencias e instrucciones para - Ryobi P1812 | User Manual - Page 15
a una herramienta eléctrica, sólo utilice piezas de repuesto idénticas. Siga las instrucciones señaladas en la sección Mantenimiento de este manual. El empleo de piezas no autorizadas o el incumplimiento de las instrucciones de mantenimiento puede significar un riesgo de descarga eléctrica o de - Ryobi P1812 | User Manual - Page 16
DENOMINACIÓN/EXPLICACIÓN Alerta de seguridad Indica un peligro posible de lesiones personales. Lea el manual del operador Para reducir el riesgo de lesiones, el usuario debe leer y comprender el manual del operador antes de usar este producto. V min no .../min Protección ocular Alerta de - Ryobi P1812 | User Manual - Page 17
Siempre retire el paquete de baterías de la herramienta cuando esté ensamblando partes, realizando ajustes, limpiando o cuando ésta no esté en uso. Retirando metálicos Para ver las instrucciones de carga completas, consulte el manual del operador de los paquetes de baterías y cargadores. GATILLO DEL - Ryobi P1812 | User Manual - Page 18
antes de comenzar a utilizarla. Oprima los pestillos para extraer el paquete de baterías. Para obtener instrucciones específicas de carga, lea el manual del operador que se incluye con el cargador y la batería. INSTALACIÓN/DESMONTAR DE LAS BROCAS Vea la figura 4, página 9. PORTABROCAS DE CARGA - Ryobi P1812 | User Manual - Page 19
personal, trabaje en áreas bien ventiladas, y con equipo de seguridad aprobado, tal como las caretas para el polvo especialmente diseñadas para filtrar partículas microscópicas. Este producto tiene una garantía limitada de tres años. Puede c onsultar los detalles de la garantía en www.ryobitools - Ryobi P1812 | User Manual - Page 20
variable, gatillo del interruptor de velocidad variable) D - MAG TRAY™ screw holder (compartiment à vis, compartimiento para tornillos) Fig. 1 Fig. 2 B C E - Bit storage (rangement d'embouts, lugar de almacenamiento para brocas) F - Tri-beam LED (ampoule à del à trois, luz LED de tres) G - Belt - Ryobi P1812 | User Manual - Page 21
de verrouillage, ranura de aseguramiento) C - Auto-load chuck (mandrin à serrage automatique, portabrocas de carga automática) D - To eject bit (pour éjecter l'embout, para expulsar la punta) Fig. 5 CORRECT OPERATION / UTILISATION ADÉQUATE / FUNCIONAMIENTO CORRECTO Fig. 7 A B D C A - HIGH - Ryobi P1812 | User Manual - Page 22
NOTES/NOTAS - Ryobi P1812 | User Manual - Page 23
NOTES/NOTAS - Ryobi P1812 | User Manual - Page 24
MANUEL D'UTILISATION/CLÉ À CHOCS MANUAL DEL OPERADOR/DESTORNILLADOR DE IMPACTO P237 To request service, purchase replacement parts, locate an Authorized Service Center and obtain Customer or Technical Support: Visit www.ryobitools.com or call 1-800-525-2579 If any parts or accessories are damaged or
-
 1
1 -
 2
2 -
 3
3 -
 4
4 -
 5
5 -
 6
6 -
 7
7 -
8
-
9
-
10
-
11
-
12
-
13
-
14
-
15
-
16
-
17
-
18
-
19
-
20
-
21
-
22
-
23
-
24
 |
 |

OPERATOR’S MANUAL
MANUEL D’UTILISATION
MANUAL DEL OPERADOR
18 VOLT IMPACT DRIVER
CLÉ À CHOCS 18 V
DESTORNILLADOR DE IMPACTO DE 18 V
P237
WARNING:
To reduce the
risk of injury, the user must read and
understand the operator’s manual
before using this product.
SAVE THIS MANUAL FOR
FUTURE REFERENCE
ADVERTENCIA:
Para reducir
el riesgo de lesiones, el usuario debe leer
y comprender el manual del operador
antes de usar este producto.
AVERTISSEMENT :
Pour
réduire les risques de blessures,
l’utilisateur doit lire et veiller à bien
comprendre le manuel d’utilisation avant
d’employer ce produit.
GUARDE ESTE MANUAL
PARA FUTURAS CONSULTAS
CONSERVER CE MANUEL
POUR FUTURE RÉFÉRENCE
TABLE OF CONTENTS
****************
General Power Tool Safety Warnings
........................................................
2-3
Impact Driver Safety Warnings
..........
3
Symbols
.............................................
4
Features
.............................................
5
Assembly
...........................................
5
Operation
........................................
5-6
Maintenance
......................................
7
Illustrations
......................................
8-9
Parts Ordering and Service
............................................
Back page
TABLE DES MATIÈRES
****************
Avertissements de sécurité générales
relatives aux outils électriques
........
2-3
Avertissements de sécurité relatifs
clé à chocs
.........................................
3
Symboles
...........................................
4
Caractéristiques
.................................
5
Assemblage
.......................................
5
Utilisation
.......................................
5-7
Entretien
.............................................
7
Illustrations
......................................
8-9
Commande de pièces et dépannage
.........................................
Page arrière
ÍNDICE DE CONTENIDO
****************
Advertencias de seguridad para
herramientas eléctrica
...................
2-3
Advertencias de seguridad de
destornillador de impacto
..................
3
Símbolos
............................................
4
Características
...................................
5
Armado
..............................................
5
Funcionamiento
.............................
5-7
Mantenimiento
...................................
7
Illustraciones
..................................
8-9
Pedidos de piezas y servicio
......................................
Pág. posterior