Ryobi P320 Operation Manual
Ryobi P320 Manual
 |
View all Ryobi P320 manuals
Add to My Manuals
Save this manual to your list of manuals |
Ryobi P320 manual content summary:
- Ryobi P320 | Operation Manual - Page 1
MANUEL D'UTILISATION MANUAL DEL OPERADOR 18 GA COrdless bRAD NAILER cloueuse À parquet sans fil de calibre 18 clavadora de puntillas inalambrica calibre 18 P320 ACCEPTS ALL ONE+ BATTERY PACKS COMPATIBLE AVEC TOUS LE Piles ONE+ ACEPTA TODOS LOS PAQUETES DE BATERÍAS ONE+ batterIES and chargerS sold - Ryobi P320 | Operation Manual - Page 2
that have the switch on invites accidents. shock, fire and/or serious injury. Save all warnings and instructions for future reference. The term "power tool" in the warnings refers to your mains-operated (corded) power tool or battery-operated (cordless) power tool. Work Area SAFETY Keep work - Ryobi P320 | Operation Manual - Page 3
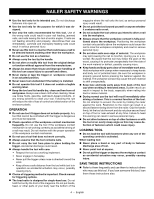
section of this manual. Use of unauthorized parts or failure to follow Maintenance instructions may create a risk of shock or injury. nailer SAFETY WARNINGS Always assume that the tool contains nails. Careless handling of the nailer can result in unexpected firing of nails and personal injury - Ryobi P320 | Operation Manual - Page 4
of triggering method is important. Check manual for triggering options. The brad nailer is designed for single-hand use. Do not hold the tool by the front of the magazine. Do not put hands, head, or other parts of your body near the bottom of the magazine where the nail exits the tool, as serious - Ryobi P320 | Operation Manual - Page 5
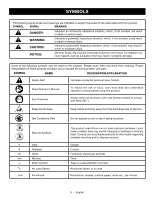
symbols will allow Manual To reduce the risk of injury, user must read and understand operator's manual Volts Amperes Hertz Minutes Direct Current No Load Speed Per Minute This product uses lithium-ion or nickel-cadmium batteries. Local, state or federal laws may prohibit disposal of batteries - Ryobi P320 | Operation Manual - Page 6
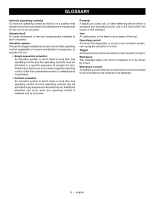
is in a position that allows the tool to be actuated or that satisifes one requirement for the tool to be actuated. Actuate (tool) To cause movement A staple, pin, brad, nail, or other fastening device which is designed and manufactured for use in the tools within the scope of this standard. Jam An - Ryobi P320 | Operation Manual - Page 7
Motor 18 Volt DC Magazine Capacity 105 Nails Nailer Speed up to 60 shots/min. Nail Type 18 gauge Brad Nail Length 5/8 - 2 in. KNOW YOUR brad nailer See Figure 1, page 14. The safe use of this product requires an understanding of the information on the product and in this operator's manual as - Ryobi P320 | Operation Manual - Page 8
parts. Attach belt clip See Figure 2, page 14. The belt clip can be installed on the left or right side of the nailer battery pack from the tool when you are assembling parts, making adjustments, cleaning, or when not in use. Removing battery pack will tool for the purposes listed below: Finish and - Ryobi P320 | Operation Manual - Page 9
the magazine is securely locked in place. Reinstall battery, and reactivate nailer by pressing the worklight grip switch. setting the AIR pressure See Figure 7, page 15. The amount of air pressure required will depend on the size of the nail and the workpiece material. Begin testing the depth of - Ryobi P320 | Operation Manual - Page 10
worklights are flashing, install fully charged battery. If light continue to flash, see Troubleshooting section for more information. removing nails from the tool See Figure 12, page 15. WARNING: Remove the battery pack before removing nails or clearing a jammed nail. Failure to do so could result - Ryobi P320 | Operation Manual - Page 11
. Lithium-ion and nickel-cadmium batteries must be recycled or disposed of properly. Also, never touch both terminals with metal objects and/or body parts as short circuit may result. Keep away from children. Failure to comply with these warnings could result in fire and/ or serious injury. 11 - Ryobi P320 | Operation Manual - Page 12
troubleshooting PROBLEM POSSIBLE CAUSE Work-contacting element does not Low nails depress fully - tool does not operate. Work-contacting element is jammed Tool operates properly, but fasteners do Air pressure is too low not drive fully Depth of drive isn't deep enought Nail is too long for - Ryobi P320 | Operation Manual - Page 13
instructions. Ne pas suivre l'ensemble des avertissements et des instructions piles au nickel-cadmium et au lithium-ion de 18 V, consulter le supplément de raccordement pour chargeur Ne pas utiliser l'outil sur une échelle ou un support instable. Une bonne tenue et un bon équilibre permettent de - Ryobi P320 | Operation Manual - Page 14
hors de la portée des enfants et ne laisser personne n'étant pas familiarisé avec l'outil ou ces instructions utiliser l'outil. Dans les mains de personnes n'ayant pas reçu des instructions adéquates, les outils sont dangereux. Entretenir les outils motorisés. Vérifier qu'aucune pièce mobile n'est - Ryobi P320 | Operation Manual - Page 15
RÈGLES DE SÉCURITÉ RELATIVES AUX cloueuse Toujours porter une protection oculaire aven écran de L'outil ne doit être utilisé que pour les applications protection latéra certifiée conforme à la norme ANSI pour lesquelles il est conçu. Ne pas décharger des Z87.1. Les lunettes de vue ordinaires - Ryobi P320 | Operation Manual - Page 16
pas appuyer sur la gâchette ou sur le mécanisme de contact, car l'outil pourrait éjecter une agrafe, risquant blesser quelqu'un. Conserver ces instructions Les consulter fréquemment et les utiliser pour instruire les autres utilisateurs éventuels. Si cet outil est prêté, il doit être accompagné de - Ryobi P320 | Operation Manual - Page 17
et le corps à l'écart de de la décharge de l'outil. V min no .../min Avertissement concernant l'humidité Surface brûlante Symboles de recyclage Volts Minutes Courant continu Vitesse à vide Par minute Ne pas exposer à la pluie ou l'humidité. Pour éviter les risques de blessures ou de dommages - Ryobi P320 | Operation Manual - Page 18
GLOSSAIRE Activer (commandes de l'outil) Mettre une commande sur une position déclenchant ou permettant de déclencher l'outil. Actionner (outil) Causer le mouvement des pièces conçues pour chasser une agrafe. Système de déclenchement Gâchette, déclencheur par contact et / ou autre commande qui, - Ryobi P320 | Operation Manual - Page 19
18 Volt DC Capacité du magasin 105 clous Vitesse d'enfoncement des pièces de fixation jusqu'à 60 tirs/min. Type de pièces de fixation Calibre 18 pour ajuster la force et obtenir un meilleur contrôle. TECHNOLOGIE AirStrike™ Airstrike™ Technology offre la commodité d'un outil sans fil et s' - Ryobi P320 | Operation Manual - Page 20
produit doit être assemblé. n Avec précaution, sortir l'produit et les accessoires de la boîte. S'assurer que toutes les pièces figurant sur la liste de contrôle sont incluses. AVERTISSEMENT : Ne pas utiliser le produit si, en le déballant, vous constatez que des éléments figurant dans la - Ryobi P320 | Operation Manual - Page 21
de pression d'air dépend de la dimension des clous et du type de matériau à clouer. Begin testing the depth of drive by driving a test nail into the same type of workpiece material used for the actual job. Retirer le bloc-piles, s'il est installé. Tourner le cadran de pression d'air - Ryobi P320 | Operation Manual - Page 22
UTILISATION RÉGLAGE DE PROFONDEUR D'ENFONCEMENT Voir la figure 8, page 14. La profondeur d'enfoncement du clou peut être réglée au-delà de la pression d'air. Pour déterminer la profondeur, régler d'abord la pression d'air, puis faire un essai d'enfoncement avec un clou. Pour obtenir la profondeur - Ryobi P320 | Operation Manual - Page 23
UTILISATION RETRAIT DE CLOUS DE L'OUTIL Voir la figure 12, page 14. AVERTISSEMENT : Retirer le bloc-piles avant de retirer ou de dégager les clous. Ne pas prendre cette précaution peut causer des blessures graves. Retirer le bloc-piles. Pour retirer une bande de clous de l'outil, presser le - Ryobi P320 | Operation Manual - Page 24
DÉpannage PROBLÈME CAUSE POSSIBLE SOLUTION La pièce de déclenchement par contact Quantité faible de clous Recharger des clous n'est pas complètement enfoncée - La pièce de déclenchement par contact Retirer la pile et déloger les débris l'outil ne fonctionne pas est bloquée L'outil - Ryobi P320 | Operation Manual - Page 25
Cargue las baterías solamente con el cargador indicado. Para utilizar con paquetes de baterías de níquel-cadmio de 18 V o de iones de litio de 18 V, consulte el folleto de la herramienta/aparato/paquete de baterías/cargador complementario 987000-432. SEGURIDAD PERSONAL Permanezca alerta, preste - Ryobi P320 | Operation Manual - Page 26
a una herramienta eléctrica, sólo utilice piezas de repuesto idénticas. Siga las instrucciones señaladas en la sección Mantenimiento de este manual. El empleo de piezas no autorizadas o el incumplimiento de las instrucciones de mantenimiento puede significar un riesgo de descarga eléctrica o de - Ryobi P320 | Operation Manual - Page 27
Familiarícese con su herramienta eléctrica. Lea cuidadosamente el manual del operador. Aprenda sus usos y limitaciones, así como los posibles de los anteojos de seguridad que ofrecen protección frontal y lateral contra partículas que salen disparadas. Siempre póngase protección ocular con la - Ryobi P320 | Operation Manual - Page 28
lesiones. Es importante el método de disparo elegido. Estudie el manual, en el cual se describen las diferentes formas de disparar. Las la herramienta: Nunca coloque las manos ni ninguna parte del cuerpo en el área de la herramienta donde sale disparado el sujetador (clavo o grapa, según sea - Ryobi P320 | Operation Manual - Page 29
área de la herramienta por donde sale disparado el sujetador. Alerta de condiciones húmedas No exponga la unidad a la lluvia ni la use en lugares húmedos. Superficie caliente Símbolos de reciclado V min no .../min Volts Minutos Corriente continua Velocidad en vacío Por minuto Para reducir el - Ryobi P320 | Operation Manual - Page 30
introducción de sujetadores (clavos o grapas, según sea el caso) de la herramienta. Control de accionamiento Es un control que, por separado o como parte de un sistema de accionamiento de una herramienta, sirve para accionarla. Gatillo Es un control de accionamiento de una herramienta el cual maneja - Ryobi P320 | Operation Manual - Page 31
hasta 60 disparos/min. Tipo de sujetador Calibre 18 Longitud de los clavos de puntilla 5/8 a en la herramienta misma y en este manual, y se debe comprender también el más control. TECNOLOGÍA AIRSTRIKE™ La tecnología AirStrike™ ofrece conveniencia inalámbrica partículas microscópicas. 8 - Español - Ryobi P320 | Operation Manual - Page 32
incluye) para ajustar firmemente. ADVERTENCIA: Si hay piezas dañadas o faltantes, no utilice esta producto sin haber reemplazado todas las piezas. Usar este producto con partes dañadas o faltantes puede causar lesiones serias al operador. 9 - Español - Ryobi P320 | Operation Manual - Page 33
á instalado. Con la punta de la herramienta en dirección opuesta a su cuerpo, presione el botón para soltar el cargador que se encuentra en la parte trasera del cargador y deslice la tapa del cargador para abrirlo. Coloque clavos de puntilla en el canal con las puntas de los clavos hacia abajo - Ryobi P320 | Operation Manual - Page 34
FUNCIONAMIENTO NOTA: En determinadas condiciones, es posible que la unidad no pueda aplicar un clavo cuando se lleve el indicador de presión de aire al ajuste MÁXIMO de presión. Es posible que el usuario deba reducir el ajuste de presión para la operación deseada. AJUSTE DE LA PROFUNDIDAD DE - Ryobi P320 | Operation Manual - Page 35
de baterías. Para extraer una cinta de clavos de la herramienta, presione el botón para soltar el cargador que se encuentra en la parte trasera del cargador y deslice la tapa el cargador para abrirlo. Extraiga los clavos. Cierre el cargador. CÓMO QUITAR UN CLAVO DE PUNTILLA ATASCADO Vea - Ryobi P320 | Operation Manual - Page 36
correcciÓn de problema PROBLEMA CAUSA POSIBLE SOLUCIÓN El elemento que entra en contacto con Pocos clavos Vuelva a cargar clavos la pieza de trabajo no baja por completo; El elemento que entra en contacto con Retire la batería y limpie los restos de la herramienta no funciona la pieza de - Ryobi P320 | Operation Manual - Page 37
NOTAS - Ryobi P320 | Operation Manual - Page 38
contact (contact de déclenchement, disparador de contacto) L - Jam release (déblocage, soltador) M- Depth of drive adjustment (réglage de oprima los pestillos) B - Battery pack (bloc-piles, bateriás) 14 6inch 64 315 2042 53 426i4nch inch 1 a A - Brad nails (clous à parquet, puntillas - Ryobi P320 | Operation Manual - Page 39
release button (bouton de dégagement du magasin, botón para soltar) B - Brad nails (clous à parquet, puntillas) Fig. 13 1 2 3 A a A - - Screwdriver (tournevis, destornillador) B - Latch (loquet, pestillo) C - Jam release (déblocage, soltador) A - Mode selector (sélecteur de mode, selector de - Ryobi P320 | Operation Manual - Page 40
18 GA COrdless bRAD NAILER cloueuse À parquet sans fil de calibre 18 clavadora de puntillas inalambrica calibre 18 P320 • Parts and Service Prior to requesting service or purchasing replacement parts, please obtain your model and serial number from the product data plate. • MODEL NUMBER SERIAL
-
 1
1 -
 2
2 -
 3
3 -
 4
4 -
 5
5 -
 6
6 -
 7
7 -
8
-
9
-
10
-
11
-
12
-
13
-
14
-
15
-
16
-
17
-
18
-
19
-
20
-
21
-
22
-
23
-
24
-
25
-
26
-
27
-
28
-
29
-
30
-
31
-
32
-
33
-
34
-
35
-
36
-
37
-
38
-
39
-
40
 |
 |

OPERATOR’S MANUAL
MANUEL D’UTILISATION
MANUAL DEL OPERADOR
18 GA CORDLESS BRAD NAILER
CLOUEUSE À PARQUET SANS FIL DE
CALIBRE 18
CLAVADORA DE PUNTILLAS
INALAMBRICA CALIBRE 18
P320
ACCEPTS ALL ONE+ BATTERY PACKS
COMPATIBLE AVEC TOUS LE PILES ONE+
ACEPTA TODOS LOS PAQUETES DE BATERÍAS ONE+
BATTERIES AND CHARGERS SOLD SEPARATELY
PILES ET CHARGEURS VENDUS SÉPARÉMENT
LAS BATERÍAS Y CARGADORES SE VENDEN POR SEPARADO
WARNING:
To reduce the
risk of injury, the user must read and
understand the operator’s manual
before using this product.
ADVERTENCIA:
Para reducir
el riesgo de lesiones, el usuario debe leer
y comprender el manual del operador
antes de usar este producto.
AVERTISSEMENT :
Pour
réduire les risques de blessures,
l’utilisateur doit lire et veiller à bien
comprendre le manuel d’utilisation avant
d’employer ce produit.
INCLUDES
Brad Nailer, Belt Clip, Brad Nails, Opera-
tor’s Manual
****************
TABLE OF CONTENTS
General Power Tool Safety Warnings
........................................................
2-3
Nailer Safety Warnings
....................
3-4
Symbols
..............................................
5
Glossary
.............................................
6
Features
..............................................
7
Assembly
............................................
8
Operation
.......................................
8-10
Maintenance
.....................................
11
Troubleshooting
................................
12
Figures (Illustrations)
...................
14-15
Parts Ordering
and Service
........................
Back page
INCLUT
Cloueuse à parquet, clip de ceinture, clous
à parquet, manuel d’utlisation
****************
TABLE DES MATIÈRES
Règles de sécurité générales relatives
aux outils électriques
......................
2-3
Avertissements de sécurité relatifs
cloueuse à parquet
.........................
4-5
Symboles
............................................
6
Glossaire
.............................................
7
Caractéristiques
.................................
8
Assemblage
........................................
9
Utilisation
....................................
10-12
Entretien
...........................................
12
Dépannage
.......................................
13
Figures (illustrations)
....................
14-15
Commande de pièces
et dépannage
...................
Page arrière
INCLUYE
Clavadora de puntillas, agrafe de courroie,
puntillas, manual del operador
****************
ÍNDICE DE CONTENIDO
Advertencias de seguridad para
herramientas eléctrica
...................
2-3
Advertencias de clavadora
de puntillas
....................................
4-5
Símbolos
............................................
6
Glosario de términos
.........................
7
Características
...................................
8
Armado
..............................................
9
Funcionamiento
.........................
10-12
Mantenimiento
.................................
12
Corrección de problemas
................
13
Figuras (illustraciones)
...............
14-15
Pedidos de piezas
y servicio
.......................
Pág. posterior
4
1
2
3
5
6
inch