Ryobi P825 Operation Manual 1
Ryobi P825 Manual
 |
View all Ryobi P825 manuals
Add to My Manuals
Save this manual to your list of manuals |
Ryobi P825 manual content summary:
- Ryobi P825 | Operation Manual 1 - Page 1
Assembly 6-7 Operation 7-10 Adjustments 11 Maintenance 11 Accessories 11 Illustrations 12-14 Parts Ordering and Service Back page INCLUT : Scie circulaire, clé à lame, manual del utilisation TABLE DES MATIÈRES Règles de sécurité générales relatives aux outils électriques - Ryobi P825 | Operation Manual 1 - Page 2
be drawn into air vents. Do not use on a ladder or unstable support. Stable footing on a solid surface enables better control of the power tool in and do not allow persons unfamiliar with the power tool or these instructions to operate the power tool. Power tools are dangerous in the hands - Ryobi P825 | Operation Manual 1 - Page 3
connection from one terminal to servicing a power tool, use only identical replacement parts. Follow instructions in the Maintenance section of this manual. Use of unauthorized parts or failure to follow Maintenance instructions important to support the work or straight edge guide. This improves the - Ryobi P825 | Operation Manual 1 - Page 4
operating properly, they must be serviced before use. Lower guard may operate Lower guard should be retracted manually only for special cuts such as other practical way to secure and support the workpiece to a stable platform. instructions. Refer to them frequently and use them to instruct - Ryobi P825 | Operation Manual 1 - Page 5
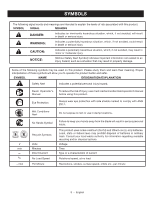
. SYMBOL NAME DESIGNATION/EXPLANATION Safety Alert Indicates a potential personal injury hazard. Read Operator's Manual To reduce the risk of injury, user must read and understand operator's manual before using this product. Eye Protection Always wear eye protection with side shields marked - Ryobi P825 | Operation Manual 1 - Page 6
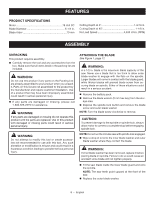
FEATURES PRODUCT SPECIFICATIONS Motor 18 Volt DC Blade Diameter 5-1/2 in. Blade Arbor 10 mm Cutting Depth at 0 1-9/16 in. Cutting Depth at 45 1-1/8 in. No Load Speed 4,400 r/min. (RPM) ASSEMBLY UNPACKING This product requires assembly. n Carefully remove the tool and any accessories from - Ryobi P825 | Operation Manual 1 - Page 7
pack is secured in the saw before beginning operation. Depress the latches to remove the battery pack. For complete charging instructions, see the operator's manuals for your battery pack and charger. WARNING: Battery tools are always in operating condition. Therefore, switch should always be - Ryobi P825 | Operation Manual 1 - Page 8
sharp, and properly set blades. Never make cuts with dull blades. Support the workpiece properly before beginning a cut. Use steady, even pressure when Squeeze the switch trigger. Always let the blade reach full speed, then guide the saw into the workpiece. WARNING: The blade coming in contact - Ryobi P825 | Operation Manual 1 - Page 9
cut. Always place the saw on the workpiece that is supported, not the "cut off" piece. Place the workpiece with cut, align the line of cut with the outer blade guide notch on the base. Since blade thicknesses vary, always . It can be used to measure up to one inch to the left side of the blade. - Ryobi P825 | Operation Manual 1 - Page 10
on the workpiece. Start the saw and let the blade reach full speed. Guide the saw into the workpiece and make the cut. Release the trigger and allow the workpiece. Start the saw and let the blade reach full speed. Guide the saw into the workpiece and make the cut. WARNING: Always cut in - Ryobi P825 | Operation Manual 1 - Page 11
tightened can result in serious injury. MAINTENANCE WARNING: When servicing, use only identical replacement parts. Use of any other 800-525-2579: 5-1/2 in. Thin Kerf Blade...670973029 Edge Guide Kit...201985001 WARNING: Current attachments and accessories available for use with this tool - Ryobi P825 | Operation Manual 1 - Page 12
es d'aération. Ne pas utiliser l'outil sur une échelle ou un support instable. Une bonne tenue et un bon équilibre permettent de mieux contrôler familiarisé avec l'outil ou ces instructions utiliser l'outil. Dans les mains de personnes n'ayant pas reçu des instructions adéquates, les outils sont - Ryobi P825 | Operation Manual 1 - Page 13
à celles d'origine pour les réparations. Se conformer aux instructions de la section Entretien de ce manuel. L'usage de pièces non , ce qui peut électrocuter l'utilisateur. Pour la refente, toujours utiliser un guide longitudinal ou une règle. Ceci accroît la précision de la coupe et - Ryobi P825 | Operation Manual 1 - Page 14
Les planches de grande taille ont tendance à ployer sous leur propre poids. Des supports doivent être placés sous la planche, de chaque côté, près du trait de consigne réduira les risques de blessures graves. Conserver ces instructions. Les consulter fréquemment et les utiliser pour instruire les - Ryobi P825 | Operation Manual 1 - Page 15
SYMBOLES Les termes de mise en garde suivants et leur signification ont pour but d'expliquer le degré de risques associé à l'utilisation de ce produit. SYMBOLE SIGNAL SIGNIFICATION DANGER : Indique une situation extrêmement dangereuse qui, si elle n'est pas évitée, aura pour conséquences des - Ryobi P825 | Operation Manual 1 - Page 16
CARACTÉRISTIQUES FICHE TECHNIQUE Moteur 18 V C.C. Diamètre de la lame 140 mm (5-1/2 po) Axe de lame 10 mm Profondeur de coupe à 0 40 mm (1-9/16 po) Profondeur de coupe à 45 29 mm (1-1/8 po) Vitesse à vide 4 400 r/min (RPM) ASSEMBLAGE DÉBALLAGE Ce produit doit être assemblé. n Avec pré - Ryobi P825 | Operation Manual 1 - Page 17
la lame en cours de coupe. Coupe avec une lame émoussée, encrassée ou mal réglée. Support incorrect de la pièce à couper. Coupe forcée. Coupe de planches humides ou voilées. coupes droites. Toujours utiliser un guide pour le sciage en long. Ceci évite la déviation de la lame. 7 - Français - Ryobi P825 | Operation Manual 1 - Page 18
supérieure. Tenir la base à plat contre la planche à couper et élever ou abaisser la lame, de manière à ce que le repère du support s'aligne sur l'encoche de la garde. Serrer fermement le bouton de réglage de profondeur de coupe. 8 - Français - Ryobi P825 | Operation Manual 1 - Page 19
TRANSVERSALE ET REFENTE Voir la figure 14, page 14. Pour effectuer une coupe transversale ou une refente, aligner l'encoche extérieure de la base du guide de lame sur le trait de coupe. Différentes lames étant d'épaisseurs différentes, toujours effectuer un essai sur une chute, afin de déterminer le - Ryobi P825 | Operation Manual 1 - Page 20
lame parvenir à l'arrêt complet. Retirer la scie de la pièce. Finir les coins avec une scie à main ou une scie sauteuse. Pour utiliser le guide de chant : Fixez la pièce. Maintenez fermement sa face contre le bord de la pièce. Guidez la scie le long du chant pour - Ryobi P825 | Operation Manual 1 - Page 21
ACCESSOIRES Rechercher ces accessoires où vous avez acheté ce produit ou en appelant au 1-800-525-2579 : Lame de 5 1/2 po...670973029 Guide de chant...201985001 AVERTISSEMENT : Les outils et accessoires disponibles actuellement pour cet outil sont listés ci-dessus. Ne pas utiliser d'outils ou - Ryobi P825 | Operation Manual 1 - Page 22
ADVERTENCIAS DE SEGURIDAD GENERALES PARA LA HERRAMIENTA ELÉCTRICA ADVERTENCIA Lea todas las advertencias de seguridad y las instrucciones. El incumplimiento de las advertencias e instrucciones puede ocasionar descarga eléctrica, fuego o lesiones graves. Guarde todas las advertencias e instrucciones - Ryobi P825 | Operation Manual 1 - Page 23
a una herramienta eléctrica, sólo utilice piezas de repuesto idénticas. Siga las instrucciones señaladas en la sección Mantenimiento de este manual. El empleo de piezas no autorizadas o el incumplimiento de las instrucciones de mantenimiento puede significar un riesgo de descarga eléctrica o de - Ryobi P825 | Operation Manual 1 - Page 24
ADVERTENCIAS DE SEGURIDAD SIERRA CIRCULAR con ésta. El contragolpe puede ocasionar que la sierra salte hacia atrás. Sin embargo, el operador puede controlar la fuerza del contragolpe si toma las precauciones apropiadas. Cuando esté atorándose la hoja, o esté interrumpiéndose el corte por alguna - Ryobi P825 | Operation Manual 1 - Page 25
de seguridad Indica un peligro posible de lesiones personales. no .../min V A Hz min Lea el manual del operador Para reducir el riesgo de lesiones, el usuario debe leer y comprender el manual del operador antes de usar este producto. Protección ocular Siempre póngase protección ocular con - Ryobi P825 | Operation Manual 1 - Page 26
CARACTERÍSTICAS ESPECIFICACIONES DEL PRODUCTO Motor 18 V c.c. Diámetro de la hoja 5-1/2 pulg. (140 mm) Árbol de la hoja de corte 10 mm Profundidad de corte a 0 40 mm (1-9/16 pulg. ) Profundidad de corte a 45 29 mm (1-1/8 pulg.) Velocidad en vacío 4 400 r/min. (RPM) ARMADO DESEMPAQUETADO - Ryobi P825 | Operation Manual 1 - Page 27
de comenzar a utilizarla. Oprima los pestillos para extraer el paquete de baterías. Para obtener instrucciones específicas de carga, lea el manual del operador que se incluye con el cargador y la batería. ADVERTENCIA: Las herramientas de baterías siempre están en condiciones de funcionamiento - Ryobi P825 | Operation Manual 1 - Page 28
FUNCIONAMIENTO Para protegerse y evitar contragolpes, evite prácticas peligrosas como las siguientes: Ajustar de forma incorrecta la profundidad de la hoja. Cortar nudos o clavos contenidos en la pieza de trabajo. Torcer la hoja al efectuar un corte. Cortar con una hoja desafilada, mal - Ryobi P825 | Operation Manual 1 - Page 29
FUNCIONAMIENTO AJUSTE DE LA PROFUNDIDAD DE LA HOJA Vea la figura 10, página 13. Siempre mantenga la hoja a un ajuste de profundidad correcto. Para todo tipo de cortes, la hoja no debe sobrepasar 1/4 pulg. (6,35 mm) por abajo de la pieza de trabajo. Cuanto mayor es la profundidad de la hoja mayor es - Ryobi P825 | Operation Manual 1 - Page 30
FUNCIONAMIENTO FORMA DE EFECTUAR CORTES A BISEL Vea la figura 19, página 14. Sujete la sierra firmemente con ambas manos, como se muestra. Deje descansar el borde frontal de la base en la pieza de trabajo. Encienda la sierra y permita a la hoja alcanzar su velocidad máxima. Guíe la sierra - Ryobi P825 | Operation Manual 1 - Page 31
AJUSTES AJUSTE DEL TOPE DE BISEL A 0° Afloje la perilla de ajuste de bisel. Afloje la tuerca hexagonal que sujeta el tornillo de ajuste. Gire el tornillo e ajuste y ajuste la base hasta que quede en escuadra con respecto a la hoja de la sierra. Apriete la tuerca hexagonal y la perilla de - Ryobi P825 | Operation Manual 1 - Page 32
3 5405 5405 C 2320 E D E F G I - Bevel adjustment knob (bouton de réglage de biseau, perilla de ajuste de bisel) J - Optional edge guide lock knob (not included) (bouton de guide de bordures optionnelle [non compris], perilla de la perilla de la guía de bordes optativa [no se incluye]) K - Depth - Ryobi P825 | Operation Manual 1 - Page 33
ón expuesta de la hoja bajo la pieza de trabajo) Fig. 9 A B WRONG (INCORRECT, INCORRECTO) Fig. 12 5405 3022 Fig. 7 CORRECT SUPPORT (SUPPORT CORRECT, SOPORTE CORRECTO) A - Lock-off button (bouton de verrouillage, botón del seguro de apagado) B - Switch trigger (gâchette de commutateur, gatillo - Ryobi P825 | Operation Manual 1 - Page 34
(boîtier du moteur, alojamiento del motor) C - Bevel adjustment knob (bouton de réglage de biseau, perilla de ajuste de bisel) D - 45° blade guide notch (encoche guide de lame à 45°, muesa guía de la hoja a 45°) E - Guideline (ligne de coupe, línea guía) Fig. 19 B C A - Lower blade guard handle - Ryobi P825 | Operation Manual 1 - Page 35
NOTAS 15 - Ryobi P825 | Operation Manual 1 - Page 36
1-800-525-2579 for immediate service. Please obtain your model and serial number from the product data plate. This product is covered under a 3-year limited Warranty. Proof of purchase is required. MODEL NUMBER SERIAL NUMBER RYOBI is a registered trademark of Ryobi Limited and is used pursuant
-
 1
1 -
 2
2 -
 3
3 -
 4
4 -
 5
5 -
 6
6 -
 7
7 -
8
-
9
-
10
-
11
-
12
-
13
-
14
-
15
-
16
-
17
-
18
-
19
-
20
-
21
-
22
-
23
-
24
-
25
-
26
-
27
-
28
-
29
-
30
-
31
-
32
-
33
-
34
-
35
-
36
 |
 |
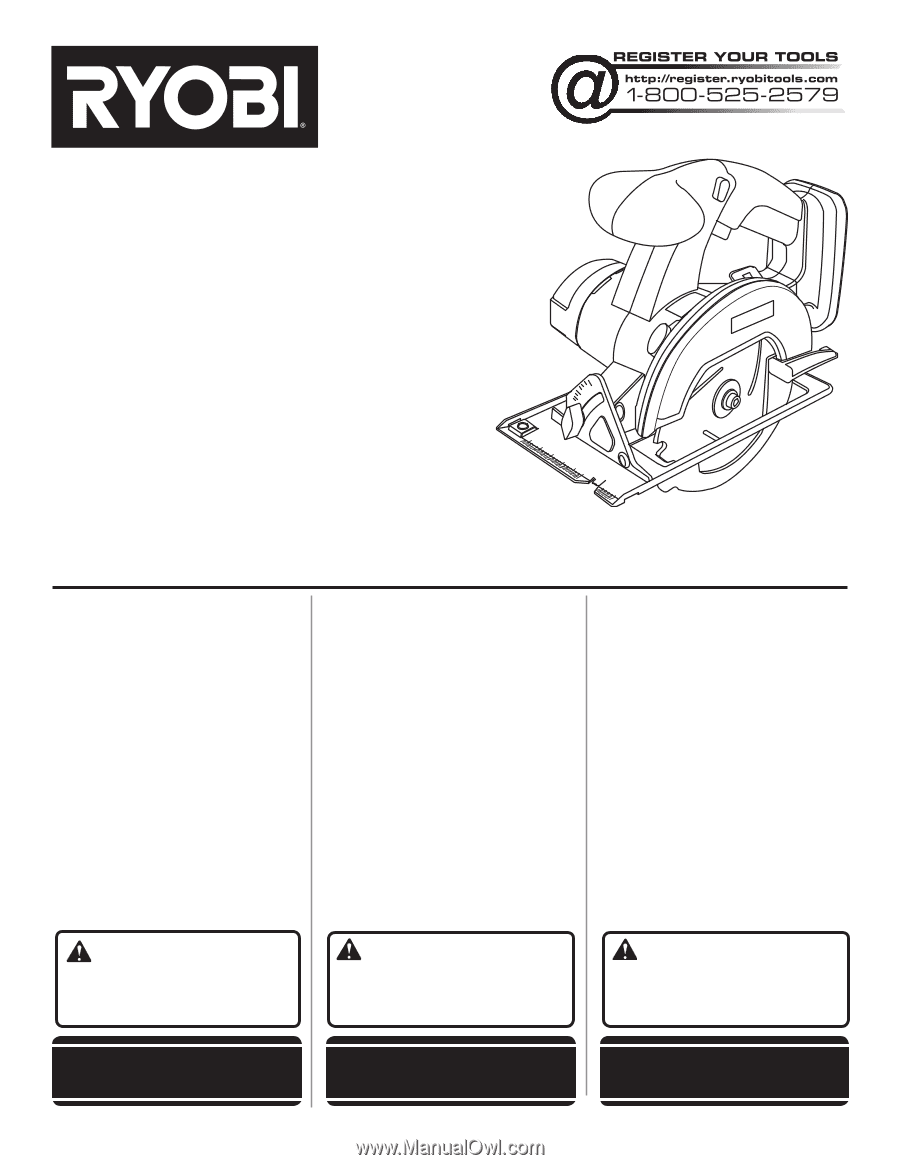
OPERATOR’S MANUAL
MANUEL D’UTILISATION
MANUAL DEL OPERADOR
5-1/2 in. 18 VOLT CIRCULAR SAW
SCIE CIRCULAIRE DE 140 mm (5-1/2 po) 18 V
SIERRA CIRCULAR DE 140 mm (5-1/2 pulg.)18 V
P501G
WARNING:
To reduce the
risk of injury, the user must read and
understand the operator’s manual
before using this product.
ADVERTENCIA:
Para reducir
el riesgo de lesiones, el usuario debe leer
y comprender el manual del operador
antes de usar este producto.
INCLUDES:
Circular Saw, Blade Wrench,
Operator’s Manual
TABLE OF CONTENTS
****************
General Power Tool Safety Warnings
........................................................
2-3
Circular Saw Safety Warnings
.........
3-4
Symbols
..............................................
5
Features
..............................................
6
Assembly
.........................................
6-7
Operation
.......................................
7-10
Adjustments
.....................................
11
Maintenance
.....................................
11
Accessories
......................................
11
Illustrations
..................................
12-14
Parts Ordering and Service
............................................
Back page
INCLUT :
Scie circulaire, clé à lame, manual
del utilisation
TABLE DES MATIÈRES
****************
Règles de sécurité générales relatives
aux outils électriques
......................
2-3
Avertissements de sécurité relatifs
scie circulaire
..................................
3-4
Symboles
............................................
5
Caractéristiques
.................................
6
Assemblage
.....................................
6-7
Utilisation
......................................
7-10
Réglage
............................................
11
Entretien
...........................................
11
Accessiores
......................................
11
Illustrations
..................................
12-14
Commande de pièces et dépannage
.........................................
Page arrière
INCLUYE:
Sierra circular, llave de la hoja,
manual del operador
ÍNDICE DE CONTENIDO
****************
Advertencias de seguridad para
herramientas eléctrica
...................
2-3
Advertencias de seguridad de
sierra circular
.................................
3-4
Símbolos
............................................
5
Características
...................................
6
Armado
..........................................
6-7
Funcionamiento
...........................
7-10
Adjustments
.....................................
11
Mantenimiento
.................................
11
Accesorios
.......................................
11
Illustraciones
..............................
12-14
Pedidos de piezas y servicio
......................................
Pág. posterior
SAVE THIS MANUAL FOR
FUTURE REFERENCE
AVERTISSEMENT :
Pour
réduire les risques de blessures,
l’utilisateur doit lire et veiller à bien
comprendre le manuel d’utilisation avant
d’employer ce produit.
GUARDE ESTE MANUAL
PARA FUTURAS CONSULTAS
CONSERVER CE MANUEL
POUR FUTURE RÉFÉRENCE