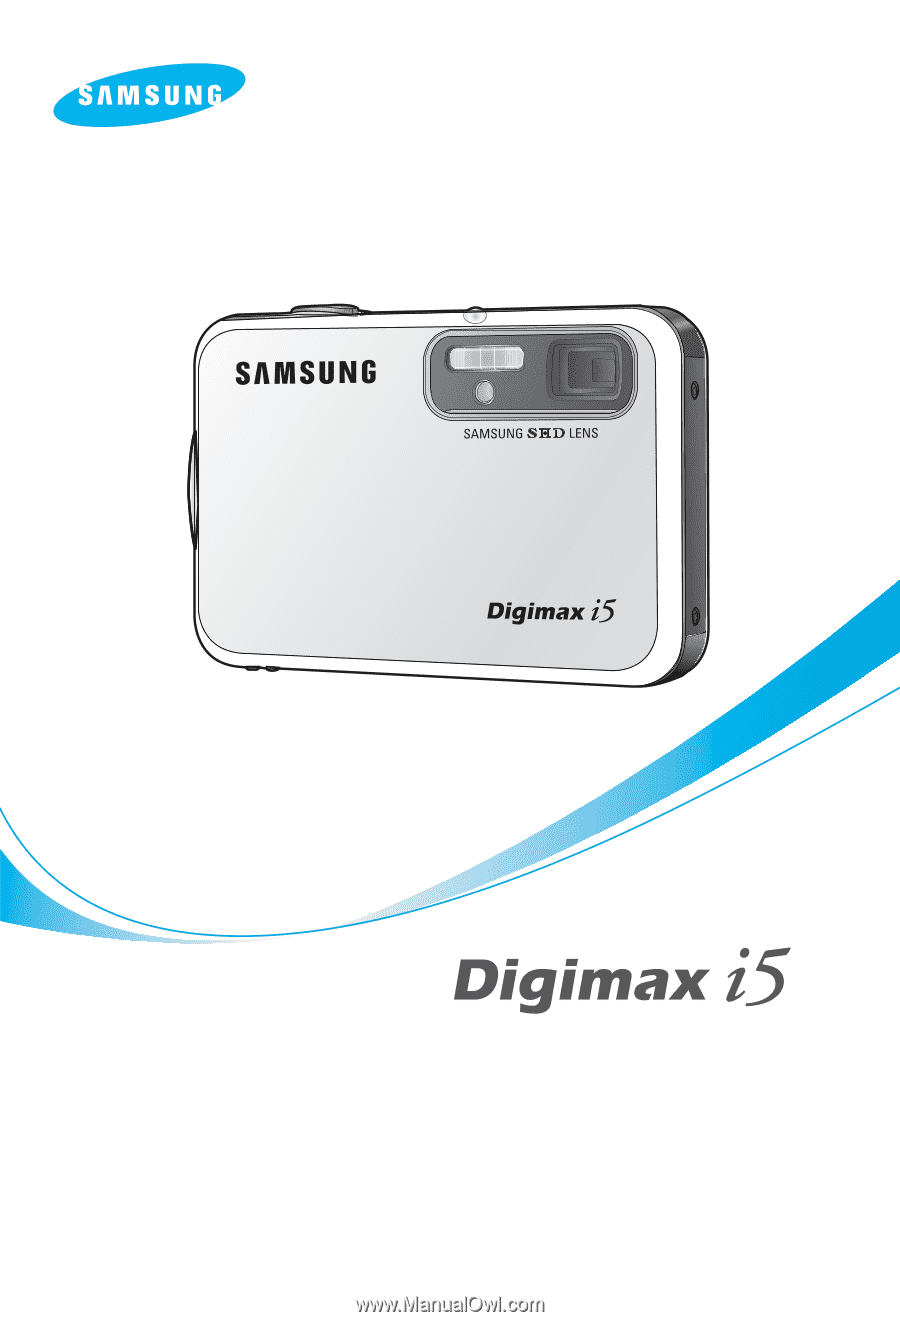
Samsung 120552 User Manual
Samsung 120552 - Digimax i5 5MP Digital Camera Manual
 |
UPC - 044701005384
View all Samsung 120552 manuals
Add to My Manuals
Save this manual to your list of manuals |
Samsung 120552 manual content summary:
- Samsung 120552 | User Manual - Page 1
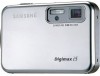
User's Manual Thank you for buying a Samsung Camera. This manual will guide you through using the camera, including capturing images, downloading images and using the application software. Please read this manual carefully before using your new camera. ENGLISH - Samsung 120552 | User Manual - Page 2
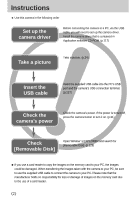
Instructions ■ Use this camera in the following order Set up the camera driver Before connecting PC, be sure to use the supplied USB cable to connect the camera to your PC. Please note that the manufacturer holds no responsibility for loss or damage of images on the memory card due to the use - Samsung 120552 | User Manual - Page 3
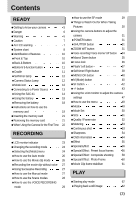
Using the SAC-41 14 ■Using the battery 18 ■Removing the battery 18 ●Instructions on how to use the memory card 19 ●Inserting the memory card 21 ● movie clip without voice 27 ■Using Successive Recording 27 ■How to use the Manual mode 27 ■How to use the Scene modes 28 ■How to use - Samsung 120552 | User Manual - Page 4
●Start up image 104 ●Start up sound 105 ●Shutter sound 105 ●Important notes 106 ●Warning indicator 108 ●Before contacting a service centre 109 ●Specifications 112 SOFTWARE ●Software Notes 114 ●System Requirements 114 ●About the software 115 ●Setting up the application software - Samsung 120552 | User Manual - Page 5
buying a Samsung Digital Camera. ● Prior to using this camera, please read the user manual thoroughly. ● When you require After Sales service, please bring names appearing in this manual are registered trademarks of their respective companies. This manual contains instructions on using this camera - Samsung 120552 | User Manual - Page 6
a foreign object enter the camera, do not use it. Switch off the camera, and then disconnect the power source. You must contact your dealer or Samsung Camera Service centre. Do not continue to use the camera as this may cause a fire or electric shock. ■ Do not insert or drop metallic or inflammable - Samsung 120552 | User Manual - Page 7
If it is not installed and used in accordance with the instructions, it may cause harmful interference to radio communication. There is . ■ Use a different socket away from the affected device. ■ Please contact a Samsung agent or a radio/TV engineer. •This device complies with part 15 of the - Samsung 120552 | User Manual - Page 8
The contents can vary depending on the sales region. To buy the optional equipment, contact your nearest Samsung dealer or Samsung service centre. < Included items > Pouch User manual, Product warranty Camera strap Software CD (see p.115, 116) DPOF compatible printer (see p.85) SD memory card - Samsung 120552 | User Manual - Page 9
System chart Computer System Requirements PictBridge compatible printer(see p.89) For Windows •PC with processor better than MMX Pentium 233MHz (XP : Pentium II 300MHz) •Windows 98/98SE/2000/ME/XP •Minimum 32MB RAM (XP : 128MB) •140MB of available hard-disk space •USB port •CD-ROM drive •800x600 - Samsung 120552 | User Manual - Page 10
Identification of features Front & Top Shutter button Power button Flash Self-timer lamp/ Auto Focus lamp SF mode button Microphone Speaker Optical 3X zoom lens/ Lens cover ※ Take care not to press the lens, lens cover and camera by force. This may cause the camera malfunction. Back & Bottom M( - Samsung 120552 | User Manual - Page 11
Identification of features Bottom / 5-function button Memory card slot Battery chamber Battery holder Battery chamber cover Voice memo/ Voice recording/ UP button MENU/ OK button FLASH/ LEFT button SELF-TIMER/ RIGHT button Macro / DOWN button Play & Pause button Cradle ■ You can recharge your - Samsung 120552 | User Manual - Page 12
The lamp blinks ■ Mode icon : Refer to page 40, 41 for more information about the camera mode setting. MODE MOVIE CLIP VOICE RECORDING AUTO MANUAL SF PLAY Icon MODE NIGHT SCENE PORTRAIT CHILDREN LANDSCAPE CLOSE UP TEXT Icon MODE SUNSET DAWN BACKLIGHT FIREWORKS BEACH&SNOW - Icon - 《12》 - Samsung 120552 | User Manual - Page 13
on the following shooting conditions Using the fully charged battery 640X480 image size 30fps frame rate ※ These figures are measured under Samsung's standard conditions and Shooting conditions and may vary depending on the way of user's usage. INFORMATION Important information about battery - Samsung 120552 | User Manual - Page 14
Connecting to a Power Source Using the SAC-41 If you have access to a mains supply, using an SAC-41 allows the camera to be used for long periods of time. Plug the SAC-41 into the DC connection terminal on the camera or cradle. Before turning on the camera power with an SAC-41, insert the - Samsung 120552 | User Manual - Page 15
Connecting to a Power Source ■ How to charge the rechargeable battery (SLB-0737) with the SAC-41. ● Charging with the camera 1. Insert the rechargeable battery into the battery chamber. 2. Put the SAC-41 into your power socket and DC connection terminal of the camera. Charging LED ■ Important - Samsung 120552 | User Manual - Page 16
Connecting to a Power Source ■ Charging LED of the SAC-41 Status Using the cradle Being Charged Red LED is on Charging is complete Green LED is on Charging error Red LED is off or blinking Direct to the camera Red LED is on Green LED is on Red LED is off or blinking ● If there is a - Samsung 120552 | User Manual - Page 17
inserted - The terminals of battery are dirty or damaged If the battery is inserted properly and the charge indicator continues to blink, contact the nearest Samsung Camera Service Center. ● Refer to the user manual for more information about using the SBC-L5. 《17》 - Samsung 120552 | User Manual - Page 18
are inserted with the correct polarity(+/-). 1. Open the battery chamber cover by pushing in the direction of the arrow. 2. Insert the battery taking note of the polarity (+ / -). 3. To close the battery chamber cover, push it until it clicks. Removing the battery 1. Turn off the camera power - Samsung 120552 | User Manual - Page 19
Instructions on how to use the memory card ● Be sure to format the memory card ( you will need to purchase a new memory card. Wear and tear on the memory card is not covered by the Samsung warranty. ● The memory card is an electronic precision device. Do not bend, drop or subject the memory card to - Samsung 120552 | User Manual - Page 20
Instructions on how to use the memory card INFORMATION ● Don't remove the memory card when the camera status lamp is blinking as this may cause damage to data in the memory card. ■ The camera can use SD Memory Cards and MMC (Multi Media Cards). Please consult the enclosed manual for using the MMC - Samsung 120552 | User Manual - Page 21
Inserting the memory card 1. Turn off the camera's power and pull the battery chamber cover in the direction of the arrow to open. 2. Have the front of the memory card facing toward the front of the camera (lens) and the card pins toward the back of the camera (LCD monitor), and then push the memory - Samsung 120552 | User Manual - Page 22
When Using the Camera for the First Time ■ Charge the rechargeable battery fully before using the camera for the first time. ■ When the camera is turned on for the first time, a menu will be displayed to set date, time and language in the LCD monitor. This menu will not be displayed after setting up - Samsung 120552 | User Manual - Page 23
LCD monitor indicator ■ The LCD monitor displays information about the shooting functions and selections. ⑳ ⑨⑩ ⑪ [Image & Full Status] No. Description Icons 1 Recording mode 2 Battery 3 Continuous shot 4 Flash 5 Self-timer 6 Macro 7 Metering 8 Card inserted indicator 9 - Samsung 120552 | User Manual - Page 24
can select the desired working mode by the M (Mode) button located on the back of the camera and [Mode], [Mode set] menu. Auto, manual, movie clip, scene (night, portrait, children, landscape, text recognition, close-up, sunset, dawn, backlight, fireworks, beach & snow) camera modes are available - Samsung 120552 | User Manual - Page 25
located on the back of the camera and the mode selection menu will display. 7. To select the Auto, Manual, Movie clip or Scene modes, press the Left/Right button. To move between the Auto, Manual, Movie clip menu line and Scene menu line, press the Up/Down button. AUTO Set : OK/M [Mode - Samsung 120552 | User Manual - Page 26
Starting the recording mode ■ How to use the Auto mode Use this for shooting basic still images. 1. Select the [Full] sub menu on the [Mode] menu (p.24). 2. Select the Auto mode by pressing the M (Mode) button (p.25). 3. Point the camera towards the subject and compose the image by using the LCD - Samsung 120552 | User Manual - Page 27
configure all functions except the aperture value and shutter speed. 1. Select the [Full] sub menu on the [Mode] menu (p.24). 2. Select the Manual mode by pressing the M (Mode) button (p.25). 3. Point the camera towards the subject and compose the image by using the LCD monitor. 4. Press the - Samsung 120552 | User Manual - Page 28
Starting the recording mode ■ How to use the Scene modes Use the menu to easily configure optimal settings for a variety of shooting situations. 1. Select the [Full] sub menu on the [Mode] menu (p.24). 2. Select the Scene mode by pressing the M (Mode) button (p.25). 3. Point the camera towards the - Samsung 120552 | User Manual - Page 29
Starting the recording mode ■ How to use the VOICE RECORDING mode A voice recording can be recorded for as long as the available recording time of the memory capacity allows. (Max: 1 hour) 1. In any mode with the exception of the Movie clip, select the VOICE RECORDING mode by pressing the Voice - Samsung 120552 | User Manual - Page 30
Slow synchro mode is selected in a low lighting condition, the camera shake warning indicator ( ) may appear on the LCD monitor. In this case, support the camera on a solid surface or change the flash mode to flash shot mode. ■ Backlight compensated shots : When taking an outdoor shot, avoid facing - Samsung 120552 | User Manual - Page 31
Using the camera buttons to adjust the camera ■ The recording mode function can be set up by using the camera buttons. POWER button ● Used for turning the camera's power on / off. ● If there is no operation during the specified time, the camera's power will be turned off automatically to save - Samsung 120552 | User Manual - Page 32
ZOOM W/ T button ■ This camera has a 3X optical zoom and a 5X digital zoom function. Using both will offer a total zoom ratio of 15X. ● TELE Zoom Optical zoom TELE Digital zoom TELE : Pressing the ZOOM T button. This will zoom into the subject i.e. the subject will appear nearer. : When the - Samsung 120552 | User Manual - Page 33
ZOOM W/ T button INFORMATION ● Images taken using the digital zoom may take a little longer for the camera to process. Allow time for this to take place. ● The digital zoom cannot be used in movie clip shots. ● If the Zoom buttons are being pressed during the Movie clip shots, the voice will not - Samsung 120552 | User Manual - Page 34
Voice recording( ) / Voice memo( ) / UP button ■ While the menu is showing, press the UP button to move up the submenu cursor. When the menu is not displayed on the LCD monitor, the UP button operates as the voice recording ( ) or voice memo ( ) button. You can record your voice or add your voice- - Samsung 120552 | User Manual - Page 35
] [Auto macro ( )] [Super macro ( )] [Macro ( )] ■ Types of focus modes and focus ranges (W: Wide, T: Tele) Mode Focus Type Auto ( ) Manual ( ) Auto macro ( ) Super macro ( ) Macro ( ) Focus range W : 5 ~ Infinity T : 50 ~ Infinity W : 1 ~ 5 (Wide only) W : 5 ~ 50 T : 25 ~ 50 (Unit : cm - Samsung 120552 | User Manual - Page 36
Macro( ) / Down button (Focusing) ■ Available focusing method, by recording mode ( O: Selectable , X: Not selectable, ∞: Infinity focus range) Mode Auto macro X O X O Super macro X X O X macro O X O X Normal O X O X Mode SCENE Auto macro X X X X XO X X X XX Super - Samsung 120552 | User Manual - Page 37
Flash ( ) / Left button ■ When the menu is displayed on the LCD monitor, pressing the LEFT button makes the cursor shift to the left tab. ■ When the menu is not displayed on the LCD monitor, the LEFT button operates as the FLASH ( ) button. ● Selecting the flash mode 1. Press the M (Mode) button - Samsung 120552 | User Manual - Page 38
Flash ( ) / Left button ● Flash mode indicator Menu tab Flash mode Description Auto flash If the subject or background is dark, the camera flash will operate automatically. Auto & Red eye reduction If a subject or background is dark, the camera flash will work automatically and will reduce - Samsung 120552 | User Manual - Page 39
Self-timer ( ) / Right button ■ When the menu is displayed on the LCD monitor, pressing the Right button makes the cursor shift to the right tab. The right button can also be used to move to a sub menu to select a different setting. When the menu is not displayed on the LCD monitor, the RIGHT button - Samsung 120552 | User Manual - Page 40
and STILL IMAGE mode. There is no menu available when the VOICE RECORDING mode is selected. [Menu off] Pressing the MENU button Mode Set Auto Manual Movie Night portrait Children [Menu on] ■ OK button - When the menu is displayed on the LCD monitor, this button is used for shifting the cursor - Samsung 120552 | User Manual - Page 41
the Mode button Pressing the Right button Auto Set : OK/M [Mode selection menu] Pressing the Up button Pressing the Left button Manual Set : OK/M [Manual mode] Movie Set : OK/M [Movie clip mode] Night Set : OK/M [Scene mode] Pressing the Left/Right button Portrait Set : OK/M [Selecting - Samsung 120552 | User Manual - Page 42
SF button ■ Pressing the SF button selects the SF(Safety Flash) mode In poor indoor light conditions, Safety Flash will help you get a good image without the use of a flash. As children are sensitive of using flash, this is suitable function for taking children. ● Things to watch out for using the - Samsung 120552 | User Manual - Page 43
+/- button ■ You can use the +/- button to adjust the values for the RGB, ISO, white balance, exposure compensation and Long Time shutter speed. ■ When the SF is selected, ISO value is fixed as AUTO and Exposure value is fixed as 0.0EV. Main menu RGB ISO WHITE BALANCE Exposure compensation Sub - Samsung 120552 | User Manual - Page 44
+/- button ■ ISO : You can select the ISO sensitivity when taking pictures. The speed or specific light-sensitivity of a camera is rated by ISO numbers. ● Selecting an ISO Sensitivity 1. Press the +/- button, and then use the UP and DOWN buttons to select the ISO icon( ). The ISO menu bar will - Samsung 120552 | User Manual - Page 45
exposure value, the exposure indicator ( ) will be displayed on the bottom of the LCD monitor. ※ A negative exposure compensation value reduces the exposure. Note that a positive exposure compensation value increases the exposure and the LCD monitor will appear white or you may not get good pictures - Samsung 120552 | User Manual - Page 46
to take the picture. ■ Aperture values and shutter speeds changed by zoom scale are listed below. Supported Aperture Values : AUTO, WIDE : F3.5 ~ F6.3, TELE : F4.5 ~ F8.0 Supported Shutter Speeds : AUTO, 1 ~ 16S Large/Small (Press left button) Aperture Value F 3.5 1 S Large/Small (Press right - Samsung 120552 | User Manual - Page 47
Mode Mode set Size (Still image) Size (Movie) Quality Sub menu Camera working mode Page Still & Movie p.49 Full Auto Manual Movie Night Portrait Children Landscape Close up p.50 Text Sunset Dawn Backlight Firework Beach & Snow 2592X1944 2272X1704 2048X1536 1600X1200 p.51 1024X768 - Samsung 120552 | User Manual - Page 48
Using the LCD monitor to adjust the camera settings Menu tab Main menu Sub menu Camera working mode Page Frame Rate 30fps 15fps p.52 Metering Multi Spot p.53 Shooting Single Continuous p.53 Soft Normal Sharpness p.54 Vivid - OSD Full OSD Basic OSD Information Save Mode - p. - Samsung 120552 | User Manual - Page 49
appears. However, there is no menu for Voice Recording mode ( ). 2. Use the LEFT and RIGHT buttons to navigate through the menus. Mode Set Auto Manual Movie Night portrait Children Press the LEFT or RIGHT button. Mode Still & Movie Full Press the LEFT or RIGHT button. Size 2592 X 1944 2272 - Samsung 120552 | User Manual - Page 50
] [Portrait] [Children] [Landscape] [Close up] [Text] [Sunset] [Dawn] [Backlight] [Firework] [Beach & Snow] : For shooting basic still image : You can still manually configure all functions except the aperture value and Mode Set shutter speed. : For taking a movie clip : Use this for shooting - Samsung 120552 | User Manual - Page 51
Size ■ You can select the image size appropriate for your application. Mode STILL IMAGE mode MOVIE CLIP mode Icon 5M 4M 3M 2M 1M VGA 640 320 160 Size 2592X1944 2272X1704 2048X1536 1600X1200 1024X768 640X480 640X480 320X240 160X128 Size 2592 X 1944 2272 X 1704 2048 X 1536 1600 X 1200 1024 - Samsung 120552 | User Manual - Page 52
Quality / Frame rate ■ You can select the compression ratio appropriate for your application of the captured images. The higher the compression ratio, the lower the picture quality. Mode Icon Sub menu File Format STILL IMAGE mode S. Fine Fine Normal jpeg jpeg jpeg MOVIE CLIP mode 30FPS - Samsung 120552 | User Manual - Page 53
increases file saving time, which increases stand-by time. ※ If the [Continuous] sub menu is selected, the flash will be off automatically. Shooting Single Continuous [MANUAL mode] 《53》 - Samsung 120552 | User Manual - Page 54
Sharpness ■ You can adjust the sharpness of the picture you want to take. You cannot check the sharpness effect on the LCD monitor before you take a picture, because this function is applied only when the captured image is stored on the memory. Sharpness Soft Normal Vivid Sub menu Icon - Samsung 120552 | User Manual - Page 55
■ By using the camera's digital processor, it is possible to add special effects to your images. Effect Normal B & W Sepia Red Green Blue [MANUAL mode] Effect Normal B & W Sepia Red Green Blue [ MOVIE CLIP mode] [Normal] : No effect is added to the image. [B & W] : Captured images will be - Samsung 120552 | User Manual - Page 56
make the subject stand out from its surroundings. The subject will be sharp and in focus while making the rest out of focus. 1. Select the MANUAL mode, and press the menu button. 2. Press the LEFT/ RIGHT button and select the [Special Effect] menu tab. 3. Select the [HighLight] menu by pressing the - Samsung 120552 | User Manual - Page 57
Special Effect : Preset focus frames ● Moving and changing the focus frame You can change the focus frame after selecting a Range menu. 1. Point the camera towards the subject and compose the image by using the LCD monitor. 2. Press the +/- button. 3. The colour of focus frame turns white. Press the - Samsung 120552 | User Manual - Page 58
Special Effect : Composite shooting ■ You can combine 2 ~ 4 different shots in a still image. 1. Select the MANUAL mode, and press the menu button. 2. Press the LEFT/ RIGHT button and select the [Special Effect] menu tab. 3. Select the [Composite] menu by pressing the - Samsung 120552 | User Manual - Page 59
Special Effect : Composite shooting ● Changing a part of composite shot before taking the last shot Before taking the last composite shot, you can change a part of composite shot. 1. During the composite shots, press the +/- button. 2. A previous image will be deleted and new frame will display. If - Samsung 120552 | User Manual - Page 60
to a still image you want to capture. ■ Date & Time information will not be printed on the stored image taken with [Photo Frame] menu. 1. Select the MANUAL mode, and press the menu button. 2. Press the LEFT/ RIGHT button and select the [Special Effect] menu tab. 3. Select the [Photo Frame] menu by - Samsung 120552 | User Manual - Page 61
Movie Clip frame stabiliser ■ This function helps stabilize images captured during movie recording. You can select this menu only in the MOVIE CLIP mode. If the memory card is not inserted, this function will not operate. ● How to use this function 1. Select the MOVIE CLIP mode by pressing the M - Samsung 120552 | User Manual - Page 62
Starting play mode ■ Turn the camera on and select Play mode by pressing the play mode button ( ). The camera can now play back the images stored in the memory. ■ You can set up the PLAY mode function by using the camera buttons and LCD monitor. ■ If the memory card is inserted in the camera, all - Samsung 120552 | User Manual - Page 63
Starting play mode ● Playing back a movie clip Steps from 1-2 are the same as those to play back a still image. 3. Select the recorded movie clip that you want to play back by using the LEFT/RIGHT button. If you select a movie clip, the movie clip indicator ( ) will be displayed on the LCD - Samsung 120552 | User Manual - Page 64
Starting play mode ■ On camera movie trimming : You can extract desired frames of movie clip during the movie clip play back. ● If the running time is under 10 seconds, the movie clip can't be trimmed. 1. Select a desired movie clip in the play mode. 2. Play back the movie clip by pressing the - Samsung 120552 | User Manual - Page 65
Starting play mode ● Playing back a recorded voice Steps from 1-2 are the same as those to play back a still image. 3. Select the recorded voice that you want to play back by using the LEFT/RIGHT button. If you select a recorded voice file, the voice indicator ( ) will be displayed on the LCD - Samsung 120552 | User Manual - Page 66
LCD monitor indicator ■ The LCD monitor displays shooting information about the displayed image. ① ⑦ ② ③ ④ ⑤ ⑥ No. Description 1 Play mode 2 Battery 3 File Type 4 Voice memo 5 Protect indicator 6 DPOF indicator 7 Folder name and Stored image number Icon 100-0009 Page - p.18 - - Samsung 120552 | User Manual - Page 67
Using the camera buttons to adjust the camera ■ In Play mode, you can use the buttons on the camera to conveniently set up the Play mode functions. Play mode button ■ If you have turned on the camera by pressing the POWER button, you can press the PLAY MODE button once to switch to Play mode and - Samsung 120552 | User Manual - Page 68
Thumbnail( ) / Enlargement( ) button ■ You can view multiple pictures, enlarge a selected picture, and crop and save a selected area of an image. ● Thumbnail display 1. While an image is displayed full screen, press the thumbnail button. 2. The thumbnail display will highlight the image that had - Samsung 120552 | User Manual - Page 69
Thumbnail( ) / Enlargement( ) button ● The maximum enlargement rate in proportion to the image size. Image size 2592 2272 2048 1600 1024 640 Maximum enlargement rate X10.1 X8.8 X8.0 X6.2 X4.0 X2.5 ● Trimming : You can extract part of the image that you want and save it separately. 1. Select an - Samsung 120552 | User Manual - Page 70
Voice ( ) memo / Up button 3. Press the shutter button to start recording and voice will be recorded to the still image for 10 seconds. While the voice is recording, the recording status window will be displayed as shown alongside. 4. The recording can be stopped by pressing the shutter button again - Samsung 120552 | User Manual - Page 71
Delete ( ) button ■ This deletes images stored on the memory card. ● Deleting Images in Play Mode 1. Select an image that you want to delete by pressing the LEFT / RIGHT button and press the DELETE( ) button. 2. A message will display as shown alongside on the LCD monitor. 3. Select the submenu - Samsung 120552 | User Manual - Page 72
Left / Right / Menu / OK button ■ LEFT / RIGHT/ MENU/ OK buttons activate the following. - LEFT button : While the menu is showing, press the LEFT button to select the menu tab to the left of the cursor. - RIGHT button : While the menu is showing, press the RIGHT button to select the menu tab to the - Samsung 120552 | User Manual - Page 73
Album button ■ You can organise the captured still images into albums by using the Album button. ■ This camera has 8 albums and each album can take up to 100 images. ■ The album menu loading time depends on the memory card type. ■ How to use the album ● Selecting the album 1. In the play mode, - Samsung 120552 | User Manual - Page 74
Album button 3. Select the still images you wish to add by pressing the Up/Down/Left/Right buttons and press the Zoom T button. marks are displayed on the selected images. ※ To cancel the selection, press the Zoom T button again. 4. Press the OK button and a confirmation window will display. Select - Samsung 120552 | User Manual - Page 75
Album button ● Playing back the albums ◎ Playing back all of the albums 1. Select [All] menu and press the OK button. All of the albums will be selected. 2. Select [Slide] menu by pressing the Up/Down button and press the Right button. ※ You can select [Start], [Interval], [Repeat] and [Effect] - Samsung 120552 | User Manual - Page 76
Setting up the play back function using the LCD monitor ■ PLAY mode functions can be changed by using the LCD monitor. In the PLAY mode, pressing the MENU button displays the menu on the LCD monitor. The menus you can set up in Play mode are as follows. To capture an image after setting up the play - Samsung 120552 | User Manual - Page 77
All Pics/ Cancel No/ Yes Select/ All Pics/ Cancel - Page p.85 p.88 ■ This menu is available while the camera is connected to a PictBridge supporting printer (direct connection to the camera, sold separately) with a USB cable. Menu tab Main menu Sub menu Secondary menu Page Images One Pic All - Samsung 120552 | User Manual - Page 78
Setting up the play back function using the LCD monitor Menu tab Main menu Sub menu Type Custom Set Quality Date File Name Print DPOF Print Reset Standard Index No Yes No Yes ※ Menus are subject to change without prior notice. Secondary menu Auto Plain Photo Fastphoto Auto Draft Normal - Samsung 120552 | User Manual - Page 79
Starting the slide show ■ Images can be displayed continuously at pre-set intervals. You can view the slide show by connecting the camera to an external monitor. 1. Press the play mode button and press the menu button. 2. Press the LEFT/ RIGHT button and select the [Slide] menu tab. ● Start the - Samsung 120552 | User Manual - Page 80
Starting the slide show ● Configure slide show effects: Unique screen effects can be used for the slide show. 1. Select the [Effect] sub menu by pressing the UP/ DOWN button and press the RIGHT button. 2. Use the Up/Down Button to select the type of effect. [Cancel] : Normal display. [Effect 1] : - Samsung 120552 | User Manual - Page 81
Protecting images ■ This is used to protect specific shots from being accidentally erased (Lock). It also unprotects images that have been previously protected (Unlock). ● Protecting Images 1. Press the play mode button and press the menu button. 2. Press the LEFT/ RIGHT button and select the [ - Samsung 120552 | User Manual - Page 82
Deleting images ■ Of all the files stored in the memory card, the unprotected files in the DCIM subfolder will be deleted. Remember that this will permanently delete unprotected images. Important shots should be stored on a computer before deletion takes place. The startup image is stored in the - Samsung 120552 | User Manual - Page 83
Resize ■ Change the resolution (size) of pictures taken. Select [User image] to save an image to be the start-up image. The resized image will have a new file name. 1. Press the play mode button and press the menu button. 2. Press the LEFT/ RIGHT button and select the [Resize] menu tab. 3. Select - Samsung 120552 | User Manual - Page 84
Effect ■ By using the camera's digital processor, it is possible to add special effects to your images. 1. Press the play mode button and press the menu button. 2. Press the LEFT/ RIGHT button and select the [Effect] menu tab. 3. Select a desired sub menu by pressing the UP/ DOWN button. [B & W] - Samsung 120552 | User Manual - Page 85
Rotating an image ■ You can rotate the stored images by various degrees. Once the playback of the rotated picture is finished, it will switch back to the original state. 1. Press the play mode button and press the menu button. 2. Press the LEFT/ RIGHT button and select the [Rotate] menu tab. 3. - Samsung 120552 | User Manual - Page 86
: Select a number of prints [Cancel] : Cancel the print setup. 5. Press the OK button to confirm the setting. If an image carries DPOF instructions, the DPOF indicator ( ) will show. DPOF Standard Index Size Select All Pics Cancel Back:◀ Set:OK W◀ 0 Prints ▶T Set:OK W◀ 0 Prints ▶T Set:OK - Samsung 120552 | User Manual - Page 87
DPOF : Print size ■ You can specify the print size when printing images stored on the memory card. The [Size] menu is available only for DPOF 1.1 compatible printers. ● Setting the Print Size 1. Press the play mode button and press the menu button. 2. Press the LEFT/ RIGHT button and select the - Samsung 120552 | User Manual - Page 88
Copy To Card ■ This enables you to copy image files to the memory card. ● Copying to the Memory Card 1. Press the play mode button and press the menu button. 2. Select the [Copy to Card] menu tab by pressing the LEFT/ RIGHT button. 3. Select a desired sub menu by pressing the UP/ DOWN Copy To - Samsung 120552 | User Manual - Page 89
PictBridge ■ You can use the USB cable to connect this camera to a printer that supports PictBridge (sold separately) and print the stored images directly. Movie clips and voice files cannot be printed. ● Setting up the camera for connection with the - Samsung 120552 | User Manual - Page 90
PictBridge : Picture Selection ■ Easy printing When you connect the camera to printer in the Play back mode, you can print a picture easily. - Pressing the shutter button : Currently displayed image will be printed with the printer's default setting. - Pressing the Left / Right button : Selects a - Samsung 120552 | User Manual - Page 91
date Auto, Off, On File Name Setting whether to print the file name Auto, Off, On ※ Some menu options are not supported in all manufacturer and printer models. If not supported, the menus are still displayed in the LCD, but are not selectable. ※ If the setting values are not changed in the - Samsung 120552 | User Manual - Page 92
with the DPOF information DPOF Print No Yes Move: ※ Depending on the manufacturer and printer model, some menus may not be available. With a printer without supporting the DPOF, the menu is still displayed but not available. 《92》 - Samsung 120552 | User Manual - Page 93
will be reset. Reset No Yes Move: ※ Default print setting varies depending on the printer manufacturer. For your printer's default setting, refer to the user's guide that came with your printer. 《93》 - Samsung 120552 | User Manual - Page 94
Setup menu ■ In this mode, you can set up basic settings. You can use the setup menu in all camera modes, except Voice Recording mode. The items indicated by are default settings. Menu tab Main menu File Power Save Language Format Date&Time Imprint Sound USB Sub menu Secondary menu Series - Samsung 120552 | User Manual - Page 95
Setup menu Menu tab Main menu AF Lamp LCD Video Out Quick View Reset Sub menu Off On Dark Normal Bright NTSC PAL Off, 0.5, 1, 3 sec No Yes ※ Menus are subject to change without prior notice. Secondary menu - Page p.100 p.100 p.101 p.103 p.103 File name ■ This function allows the user to - Samsung 120552 | User Manual - Page 96
and the menu will disappear. INFORMATION ● Even if the battery and AC charger are removed and inserted again, the power off setting will be preserved. ● Note that the automatic power off function will not operate if the camera is in PC mode, slide show, playing back a voice recording, playing back - Samsung 120552 | User Manual - Page 97
Language ■ There is a choice of languages that can be displayed on the LCD monitor. Even if the battery and AC charger are removed and inserted again, the language setting will be preserved. ● Setting Language 1. In any mode with the exception of Voice Recording mode, press the MENU button. - Samsung 120552 | User Manual - Page 98
Setting up the Date / Time / Date type ■ You can change the date and time that will be displayed on the captured images and set up the date type. ● Setting Date/Time & Selecting Date Format 1. In any mode with the exception of Voice Recording mode, press the MENU button. 2. Press the LEFT/ RIGHT - Samsung 120552 | User Manual - Page 99
:OK button and press the OK button. [Computer] : Select this if you want to connect the camera to your PC. Refer to page 127 for instructions on how to connect the camera to your PC. [Printer] : Select this if you want to connect the camera to your printer. Refer to page - Samsung 120552 | User Manual - Page 100
Auto Focus lamp ■ You can turn on and off the Auto Focus lamp ● How to set up the lamp 1. In any mode with the exception of Voice Recording mode, press the MENU button. 2. Press the LEFT/ RIGHT button and select the [Setup] menu tab. 3. Select the [AF Lamp] menu by pressing the UP/ DOWN button and - Samsung 120552 | User Manual - Page 101
. Your choice of output will be governed by the type of device (monitor or TV, etc.) to which the camera is connected. PAL mode can support only BDGHI. ● Setting the Video Out Type 1. In any mode with the exception of Voice Recording mode, press the MENU button. 2. Press the LEFT/ RIGHT - Samsung 120552 | User Manual - Page 102
Selecting Video out type INFORMATION ● NTSC : U.S.A, Canada, Japan, South Korea, Taiwan, Mexico. ● PAL : Australia, Austria, Belgium, China, Denmark, Finland, Germany, U.K., Holland, Italy, Kuwait, Malaysia, New Zealand, Singapore, Spain, Sweden, Switzerland, Thailand, Norway. ● When using a TV as - Samsung 120552 | User Manual - Page 103
Quick view ■ If you enable Quick View before capturing an image, you can view the image you just captured on the LCD monitor for the duration set in the [Quick View] setup. Quick view is possible only with still images. ● Setting Quick View 1. In any mode with the exception of Voice Recording - Samsung 120552 | User Manual - Page 104
Setting up the Mycam menu ■ You can set up a start up image, start up sound and shutter sound. Every camera working mode (with the exception of Voice recording mode) has the MyCAM menu. The items indicated by are default settings. Menu tab Main menu S.Image S.Sound SH.Sound Sub menu Off - Samsung 120552 | User Manual - Page 105
Start up sound ■ You can select the sound that is activated whenever the camera is turned on. ● Setting the Startup Sound 1. In any mode with the exception of Voice Recording mode, press the MENU button. 2. Press the LEFT/ RIGHT button and select the [Mycam] menu tab. 3. Select the [S.Sound] menu - Samsung 120552 | User Manual - Page 106
Important notes Be sure to observe the following precautions! ■ This unit contains precision Doing so may result in failure or may permanently damage the unit. ■ Extremes in temperature may cause problems. - If the camera is transferred from a cold to a warm and humid environment, condensation can - Samsung 120552 | User Manual - Page 107
Important notes ■ Caution on Using the Lens - If the lens is subjected to direct sunlight, it could result in trip, you should check the camera condition. - Take a picture for testing the camera condition and prepare extra battery. - Samsung cannot be held responsible for camera malfunctions. 《107》 - Samsung 120552 | User Manual - Page 108
the memory → Take images → Insert a memory card that is holding some images File Error! ㆍFile error → Format the memory card ㆍMemory card error → Contact a camera service centre Low Battery! ㆍThere is low battery capacity → Insert charged battery 《108》 - Samsung 120552 | User Manual - Page 109
mode. Out Of Number ㆍWhen selecting too many printing pages in the PictBridge menu. → Select printing page within the limitation. Before contacting a service centre ■ Please check the following The camera doesn't switch on ㆍThere is low battery capacity → Insert charged battery (p.14 ~ 18) ㆍBattery - Samsung 120552 | User Manual - Page 110
Before contacting a service centre Camera does not take images when pressing the Shutter selected → Dis-engage flash off mode ㆍThe camera mode can't use the flash → Refer to the FLASH instruction (p.37) Incorrect date and time is displayed ㆍThe date and time have been set incorrectly or the camera - Samsung 120552 | User Manual - Page 111
Before contacting a service centre The camera buttons do not operate ㆍCamera malfunction → Remove /re-insert battery and switch is not Windows 98, 98SE, 2000, ME, XP/ Mac OS 9.2 ~ 10.3. Alternatively the PC does not support USB → Install Windows 98, 98SE, 2000, ME, XP/ Mac OS 9.2 ~ 10.3 to PC that - Samsung 120552 | User Manual - Page 112
Voice Recording (max. 1 hour) Voice Memo in Still Image (max. 10 sec.) Off, Date, Date&Time (user selectable) Modes : Auto, Manual, Scene, SF * Scene : Night, Portrait, Children, Landscape, Text, Close-up, Sunset, Dawn, Backlight, Fireworks, Beach & Snow Continuous : Single, Continuous Self - Samsung 120552 | User Manual - Page 113
149, Fine 217, Normal 275 * These figures are measured under Samsung's standard conditions and may vary depending on shooting conditions and camera settings Charging System (Cradle (Optional)) MPEG-4 VGA 30fps Movie Clip (supporting Edit on DSC) Powerful Effect (Colour, Highlight, Composite, - Samsung 120552 | User Manual - Page 114
Notes Please ensure that you read the instruction manual carefully before use. ㆍThe attached software is a camera driver and image editing software tool for Windows. ㆍUnder no circumstances should all or part of either the software or the user manual the Samsung warranty. ㆍBefore reading this manual, - Samsung 120552 | User Manual - Page 115
please visit the following site. http://www.divx.com/divx/mac/ If a movie clip can't play back on the Mac OS, use a media player that supports XviD codec (Mplayer, VideoLanClient) ■ Digimax Viewer : This is a program for viewing stored images. You can see the stored images in the memory directly on - Samsung 120552 | User Manual - Page 116
for running the automatic setup program according to the capability of the computer. If the frame does not show, run the [Windows Explorer] and select [Samsung.exe] in the CD-ROM Drive root directory. 《116》 - Samsung 120552 | User Manual - Page 117
other programs before installing the application software. ● Before installing the application software, disconnect the USB connection. You can visit the Samsung web-site through the internet. http://www.samsungcamera.com : English http://www.samsungcamera.co.kr : Korean 1. Click the [Install] menu - Samsung 120552 | User Manual - Page 118
Setting up the application software 4. If an error listed below takes place during the preview, click the [Install] button to install the XviD codec. - Only a voice plays back. - An error message displays and the movie clip does not play back. * A window shown alongside may display according to the - Samsung 120552 | User Manual - Page 119
Setting up the application software 7. The XviD information window will display. Click the [Next >] button. [Click !] 8. The destination selection window will open. Click [Next >] button. To copy to the files to another folder, click [Browse...] and choose a folder you want. [Click !] 9. A window - Samsung 120552 | User Manual - Page 120
Setting up the application software 11. The XviD codec is ready to install. Click the [Install] button. 12. Installation is complete. Click the [Finish] button. [Click !] [Click !] 13. A window where you can choose the program you want to install will appear. Click [Install]. For information on - Samsung 120552 | User Manual - Page 121
Setting up the application software INFORMATION ● If you select [Cancel] at step 14, a window for installing Digimax Reader will be displayed. 15. The Software License Agreement window will be displayed. If you agree to this, click [Yes], the window will then move to the next step. If you disagree, - Samsung 120552 | User Manual - Page 122
Setting up the application software 19. A window will be displayed as shown alongside. Click the [INSTALL] button. - Check the [MANUAL] button. Instructions for using Digimax reader will be displayed. - Click the [EXIT] button and Digimax reader installation will be cancelled and a window for - Samsung 120552 | User Manual - Page 123
Setting up the application software 23. Digimax Reader Installation is completed. Click the [Finish] button and PhotoImpression installation will be started. The system will not reboot even if the [Yes, I want to restart the computer now] option is selected. * The frame that appears may be - Samsung 120552 | User Manual - Page 124
Setting up the application software 27. A destination selection window will open. Click [Next >]. To copy to the files to another folder, click [Browse...] and choose a folder you want. 28. The [Select Components] window will appear. Click [Next >] button. [Click !] 29. A window will open, asking - Samsung 120552 | User Manual - Page 125
Setting up the application software 31. To apply changes, you must restart the computer. Select [Yes, I want to restart my computer now], and then click [Finish]. [Click !] 32. After restarting the computer, connect the PC to the camera with the USB cable. 33. Turn the camera power on. [Found New - Samsung 120552 | User Manual - Page 126
of the following measures. 1. Delete the camera driver (p.130), and re-install the driver. 2. Refer to FAQ (p.139) to check for a possible solution to the problem. 3. If your PC's central processing unit is VIA chip (This is shown in the USB Host Controller), download the patch file from the - Samsung 120552 | User Manual - Page 127
Starting PC mode • If you connect the USB cable to a USB port on your PC and then turn on the power, the camera will automatically switch to "computer connection mode". • In this mode, you can download stored images to your PC through the USB cable. ■ Connecting the camera to a PC 1. In any mode - Samsung 120552 | User Manual - Page 128
Starting PC mode ■ Downloading stored images You can download the still images stored on the camera to your PC's hard disk and print them or use a photo editing software to edit them. 1. Connect the camera to your PC with the USB cable. 2. On your computer's desktop display, select [My computer] and - Samsung 120552 | User Manual - Page 129
Starting PC mode 6. Press the right mouse button and a pop-up menu will open. Click [Paste]. 7. An image file is transferred from the camera to your PC. - By using [Digimax Viewer], you can see the stored images in the memory directly on the PC monitor and you can copy or move the image files. 《129》 - Samsung 120552 | User Manual - Page 130
Removing the USB Driver for Windows 98SE ■ To remove the USB driver, refer to the process shown below. 1. Trace [Start → Settings] and click [Control Panel]. 2. Double-click [Add/Remove programs]. 3. The [Add/Remove Programs Properties] window will open. Click [Digimax i5] and click the [Add/ - Samsung 120552 | User Manual - Page 131
Removable Disk ■ To use this camera as a Removable Disk, install (p.117) the USB Driver. 1. Before turning the camera power on, connect the camera to the PC with the USB cable. 2. Click [Removable Disk] under [My computer] or [Windows Explorer]. 3. Image files stored in the Removable Disk (DCIM → - Samsung 120552 | User Manual - Page 132
Removing the removable disk ■ Windows 98SE 1. Check whether the camera and PC are transferring a file. If the camera status lamp blinks, you have to wait until the lamp illuminates. 2. Unplug the USB cable. ■ Windows 2000/ME/XP (The illustrations may be different from the real display in accordance - Samsung 120552 | User Manual - Page 133
the USB cable. [Click !] Setting up the USB Driver for MAC 1. A USB Driver for MAC is not included with the software CD as MAC OS supports the camera driver. 2. Check the MAC OS. You can check the MAC OS version during MAC OS start-up. This camera is compatible with MAC - Samsung 120552 | User Manual - Page 134
Digimax Viewer 2.1 ■ This software is only compatible with Windows. 1. To open Digimax Viewer, click the [Start → Programs → Samsung → Digimax Viewer 2.1 → Digimax Viewer 2.1 ] and Digimax Viewer 2.1 will then open. 2. If the [Auto Launch] option is selected, this program will be executed - Samsung 120552 | User Manual - Page 135
Digimax Reader ■ Digimax Reader is a Text recognition program. You can save an image file that is captured in the Text mode, as a text file with this program. This software is only compatible with Windows. ■ To start the program, click [Start → Programs → Digimax Reader Eng]. The following screen - Samsung 120552 | User Manual - Page 136
Digimax Reader 4. Select the image you want to save as a text file. * Only an image that was taken with SAMSUNG camera can be opened. 5. Click the Area Analysis( image. ) icon to scan the 6. Part of the image you selected will be displayed as shown. 7. Click - Samsung 120552 | User Manual - Page 137
Digimax Reader 9. Select a file type that you want to. Selectable file type : *.TXT, *.HWP, *.DOC, *.RTF INFORMATION ● To get an image that can be recognized as a text : - Characters have to be clear - The subject need to be centered. - Avoid the camera shake to get a good image. ● Refer to the [ - Samsung 120552 | User Manual - Page 138
Button Description Resize Layer Flip Layer Horizontally Undo Copy Delete Layer Button Description Rotate Layer Rotate All Layers Redo Paste Close Picture INFORMATION ● For detailed instructions on how to use PhotoImpression, please refer to the program's Help. 《138》 - Samsung 120552 | User Manual - Page 139
an unexpected error during file transfer → Turn the camera power off and on again. Transfer the file again. [Case 6] How do I know my computer supports a USB Interface? → Check the USB port in your computer or keyboard. → Check the OS version. A USB Interface is available in Windows 98, 98SE, 2000 - Samsung 120552 | User Manual - Page 140
all the conditions mentioned above are met, the computer can support the USB interface. [Case 7] When using the USB hub. → There may be a problem in connecting the camera to the PC through the USB hub to the computer. Refer to the security program instructions about how to stop the program. 《140》 - Samsung 120552 | User Manual - Page 141
the codec for playing back the movie clip will be installed. ※ If a movie clip can't play back on the Mac OS, use a media player that supports XviD codec (Mplayer, VideoLanClient). ● When the DirectX 8.1 or later is not installed → Install the DirectX 8.1 or later 1) Insert the CD provided with the - Samsung 120552 | User Manual - Page 142
is starting. → In this case, disconnect the PC and the camera and Windows will start. If the problem happens continuously, set the Legacy USB Support to disable and re-start the PC. The Legacy USB Support is in the BIOS setup menu. (The BIOS setup menu differs from the PC manufacturers and some - Samsung 120552 | User Manual - Page 143
MEMO 《143》 - Samsung 120552 | User Manual - Page 144
MEMO 《144》 - Samsung 120552 | User Manual - Page 145
MEMO 《145》 - Samsung 120552 | User Manual - Page 146
MEMO 《146》 - Samsung 120552 | User Manual - Page 147
MEMO 《147》 - Samsung 120552 | User Manual - Page 148
1000 HILLSWOOD DRIVE HILLSWOOD BUSINESS PARK CHERTSEY KT16 OPS U.K. TEL : 00800 12263727 (free for calls from UK only) UK Service Hotline : 01932455320 www.samsungcamera.co.uk SAMSUNG OPTO-ELECTRONICS GMBH AM KRONBERGER HANG 6 D-65824 SCHWALBACH/TS., GERMANY TEL : (49) 6196 66 53 03 FAX : (49) 6196
-
 1
1 -
 2
2 -
 3
3 -
 4
4 -
 5
5 -
 6
6 -
 7
7 -
8
-
9
-
10
-
11
-
12
-
13
-
14
-
15
-
16
-
17
-
18
-
19
-
20
-
21
-
22
-
23
-
24
-
25
-
26
-
27
-
28
-
29
-
30
-
31
-
32
-
33
-
34
-
35
-
36
-
37
-
38
-
39
-
40
-
41
-
42
-
43
-
44
-
45
-
46
-
47
-
48
-
49
-
50
-
51
-
52
-
53
-
54
-
55
-
56
-
57
-
58
-
59
-
60
-
61
-
62
-
63
-
64
-
65
-
66
-
67
-
68
-
69
-
70
-
71
-
72
-
73
-
74
-
75
-
76
-
77
-
78
-
79
-
80
-
81
-
82
-
83
-
84
-
85
-
86
-
87
-
88
-
89
-
90
-
91
-
92
-
93
-
94
-
95
-
96
-
97
-
98
-
99
-
100
-
101
-
102
-
103
-
104
-
105
-
106
-
107
-
108
-
109
-
110
-
111
-
112
-
113
-
114
-
115
-
116
-
117
-
118
-
119
-
120
-
121
-
122
-
123
-
124
-
125
-
126
-
127
-
128
-
129
-
130
-
131
-
132
-
133
-
134
-
135
-
136
-
137
-
138
-
139
-
140
-
141
-
142
-
143
-
144
-
145
-
146
-
147
-
148
 |
 |
ENGLISH
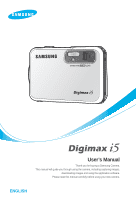
User’s Manual
Thank you for buying a Samsung Camera.
This manual will guide you through using the camera, including capturing images,
downloading images and using the application software.
Please read this manual carefully before using your new camera.