Samsung 403t User Manual
Samsung 403t Manual
 |
View all Samsung 403t manuals
Add to My Manuals
Save this manual to your list of manuals |
Samsung 403t manual content summary:
- Samsung 403t | User Manual - Page 1
SyncMaster 323T / SyncMaster 403T - Samsung 403t | User Manual - Page 2
INDEX - Samsung 403t | User Manual - Page 3
Notational Failure to follow directions noted by this symbol could result in bodily harm or damage to equipment. Prohibited Do not disassemble Do not touch Important to read and understand at all times Disconnect the plug from the outlet Grounding to prevent an electric shock - Samsung 403t | User Manual - Page 4
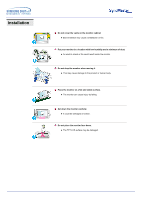
Power When not used for extended periods of time, set your PC to DPMS. If using a screen saver, set it to the active screen mode. Do not use a damaged or loose plug. z This may cause an electric shock or fire. Do not pull the plug out by the wire - Samsung 403t | User Manual - Page 5
when moving it. z This may cause damage to the product or human body. Place the monitor on a flat and stable surface. z The monitor can cause injury by falling. Set down the monitor carefully. z It could be damaged or broken. Do not place the monitor face down. z The TFT-LCD surface may be damaged. - Samsung 403t | User Manual - Page 6
or the surface of the TFT-LCD, wipe with a slightly moistened, soft fabric. Do not spray detergent directly on the monitor. Use the recommended detergent with a or any small metal objects on the monitor. z This may cause damage, electric shock or a fire. z If a foreign substance gets into the - Samsung 403t | User Manual - Page 7
No user serviceable parts inside. z This may cause an electric shock or a fire. z Refer servicing to qualified service personnel. If your monitor the cable. Never insert anything metallic into the monitor openings. z This may cause an electric shock, fire or injury. If you view a fixed screen for - Samsung 403t | User Manual - Page 8
(AAA X 2) Monitor Signal Cable (15 pin D-Sub) BNC to RCA Adaptorjack RS232C CABLE User's Guide CD Sold separately Warranty Card (Not available in all locations) Temporary Stand Wall Mount KIT Speaker Set Stand Kit PIVOT Installation CD Contact a local Samsung Electronics service center to - Samsung 403t | User Manual - Page 9
Your Monitor. The monitor's front configuration may vary slightly depending on the monitor model. 1. Auto button 2. Source button 3. Exit button 4. Navigate button (Up-Down Button) 5. Adjust button (Left-Right Button) / Volume button 6. Menu button 7. Power button 8. Power indicator 9. Remote - Samsung 403t | User Manual - Page 10
Rear SyncMaster 403T For detailed information concerning cable connections, refer to Connecting Cables under Setup. The monitor's rear configuration may vary slightly depending on the monitor model. 1. Power On/Off Switch 2. Power port 3. EXTERNAL CONTROL (RS232C Serial PORT) : MDC(Multiple - Samsung 403t | User Manual - Page 11
Terminal : BNC cable (Input) - RGB 3 (Analog PC) Connection : connecting B, G, R, H, V port - Component Connection : connecting Pb, Y, Pr audio must be connect to this terminal only. Loopout Connection : Up to 5 monitors supported. 14. Speaker Out 15. PC Stereo Connection Terminal (Input) 16. Audio - Samsung 403t | User Manual - Page 12
Rear SyncMaster 323T For detailed information concerning cable connections, refer to Connecting Cables under Setup. The monitor's rear configuration may vary slightly depending on the monitor model. 1. Power On/Off Switch 2. Power port 3. EXTERNAL CONTROL (RS232C Serial PORT) : MDC(Multiple - Samsung 403t | User Manual - Page 13
Terminal : BNC cable (Input) - RGB 3 (Analog PC) Connection : connecting B, G, R, H, V port - Component Connection : connecting Pb, Y, Pr audio must be connect to this terminal only. Loopout Connection : Up to 5 monitors supported. 14. Speaker Out 15. PC Stereo Connection Terminal (Input) 16. Audio - Samsung 403t | User Manual - Page 14
of the monitor's Remote Control Reception sensor. Button Names | Replacing Batteries | Usage 1. Button Names 1. Power button 2. Auto Display button 12. Sleep button 13. Menu button 14. Exit button 15. Swap button 16. Location button 2. Replacing Batteries 1. Slide out the cover pressing part - Samsung 403t | User Manual - Page 15
Mechanical Lay-out 1. Mechanical Lay-out SyncMaster 403T 2. Monitor Head - Samsung 403t | User Manual - Page 16
Mechanical Lay-out 3. Stand 4. Speaker - Samsung 403t | User Manual - Page 17
Mechanical Lay-out 5. Mounting Bracket - Samsung 403t | User Manual - Page 18
Mechanical Lay-out 1. Mechanical Lay-out SyncMaster 323T 2. Monitor Head - Samsung 403t | User Manual - Page 19
Mechanical Lay-out 3. Stand 4. Speaker - Samsung 403t | User Manual - Page 20
Mechanical Lay-out 5. Mounting Bracket - Samsung 403t | User Manual - Page 21
and tighten. (M4 x 15) The Semi Stand is provided only for screen adjustment before the stand kit or wall mount kit (sold separately) is attached. The Semi Stand is not intended for use as a regular stand and Samsung Electronics is not responsible for any problems caused by using it instead of the - Samsung 403t | User Manual - Page 22
separately) and cover the hole using the 'Cover-Hole' when attaching the wall mount kit. 2. Make sure you put the parts in the right direction and in the right place. (M4 x 15) 3. Put the stand into the hole at the bottom of the monitor. 4. Insert screw into the hole indicated and tighten. (M4 x 15 - Samsung 403t | User Manual - Page 23
and tighten. (M4 x 15) The Semi Stand is provided only for screen adjustment before the stand kit or wall mount kit (sold separately) is attached. The Semi Stand is not intended for use as a regular stand and Samsung Electronics is not responsible for any problems caused by using it instead of the - Samsung 403t | User Manual - Page 24
separately) and cover the hole using the 'Cover-Hole' when attaching the wall mount kit. 2. Make sure you put the parts in the right direction and in the right place. (M4 x 15) 3. Put the stand into the hole at the bottom of the monitor. 4. Insert screw into the hole indicated and tighten. (M4 × 15 - Samsung 403t | User Manual - Page 25
- B, G, R, H, V port on the back of your Monitor. DVI cable or BNC cable is optional. 3. Connect the audio cable for your monitor to the audio port on the back of your computer. 4. Turn on both your computer and the monitor. Contact a local Samsung Electronics service center to buy optional items. - Samsung 403t | User Manual - Page 26
Pb Y, Pr jacks on the DVD player. BNC cable is optional. 3. Select BNC that is connected to a DVD player using the Source button on the monitor's front or remote control. 4. Then, start the DVD Player with a DVD disc inserted. For an explanation of Component video, see your DVD player owner's manual - Samsung 403t | User Manual - Page 27
Set Top Box. 2. Connect a BNC cable between the RGB 3 (COMPONENT VIDEO) IN terminal - Pb, Y, Pr port on the Monitor and the Pb, Y, Pr jacks on the Set Top Box. 3. Select BNC that is connected to a DTV Set Top Box using the Source button on the monitor's front or remote control. For an explanation of - Samsung 403t | User Manual - Page 28
Connecting Your Monitor 6. Connecting Speakers 1. Tighten the SET and the speaker using the screws. 2. Connect the speaker connection cable between the speaker connection jack on the rear of the SET and the speaker connection jack on the rear of the speaker. Do not move - Samsung 403t | User Manual - Page 29
Monitor tre måder at tilslutte signalkablet til din monitor på. Vælg en af følgende : + DVI-D) til DVI-porten bag på din monitor. 2-3. Bruge BNC-tilslutningskablet (analogt) sammen med tilslutning af B-, G-, R-, H-, V-port bag på din monitor. DVI- eller BNC-kablet er valgfrit. 3. Tilslut lydkablet til - Samsung 403t | User Manual - Page 30
Connecting Your Monitor 2. Tilslutning til en videobåndoptager 1. AV-inputenheder som DVD-afspilleren. 2. Tilslut et videokabel mellem stikkene Komponent Tilslutning: tilslutning af Pb-, Y-, Pr-port på skærmen og stikkene Pb, Y, Pr på DVD-afspilleren. BNC-kablet er valgfrit. 3. Vælg BNC - Samsung 403t | User Manual - Page 31
Connecting Your Monitor 4. Tilslutning til en camcorder 1. Find AV-udgangsstikkene på camcorderen. De Set Top Box'en. 2. Tilslut et videokabel mellem stikkene Komponent Tilslutning: tilslutning af Pb-, Y-, Pr-port på skærmen og stikkene Pb, Y, Pr på Set Top Box'en. 3. Vælg BNC, der er tilsluttet en - Samsung 403t | User Manual - Page 32
Connecting Your Monitor 6. Connecting Speakers 1. Tighten the SET and the speaker using the screws. 2. Connect the speaker connection cable between the speaker connection jack on the rear of the SET and the speaker connection jack on the rear of the speaker. Do not move - Samsung 403t | User Manual - Page 33
Multiple Display Control (MDC) 1. Introduction 2. Install 3. Beginning : Main Screen | Port Setting | Port Change 4. Power Control 5. Input Source 11. Troubleshooting 12. Settings Value Display In Multiple Display Mode A Multiple Display Control (MDC) is an application allowing various displays to - Samsung 403t | User Manual - Page 34
/XP : Support both English and Others version. 3. Click SETUP.EXE, and the following screen appears and the basic files for setup are copied. The proper operation of this program is guaranteed only when it is used with Samsung SyncMaster 323T / 403T model and is not guaranteed when the user run this - Samsung 403t | User Manual - Page 35
Multiple Display Control (MDC) 5. Select the folder in which you want to install the program and then click Install button. Now installationation is completed. - Samsung 403t | User Manual - Page 36
Shows "Busy" while communicating and "Idle" when the communication is off. The remote control Enable/Disable function operates whether or not the power is On/Off, and this applies to all displays connected to the displays connected to the MDC However, regardless of the status at the time the - Samsung 403t | User Manual - Page 37
to end the program. The Help menu shows how to use the program and general information about the program. 3. Beginning - Port Change 1. The Multiple Display Control uses only with Com1. It does not function with any other ports including Com2. 2. You can change the port to "Com1" in Windows 2000 - Samsung 403t | User Manual - Page 38
5) Off Timer Status 2. Use the Select All button or Check Box to choose a display to control. Power Control allows controlling some of the functions of the selected display. 1) Power On/Off - Turns the power of the selected display On/Off. Turns on each set at one second interval to prevent the - Samsung 403t | User Manual - Page 39
3) Mute On/Off - Turns the mute of the selected display On/Off . When selecting screen appears. Click Select All or use Check Box to select a display to control. Info Grid shows some basic information necessary to Input Source Control. 1) Power Status - Shows the power status of the current display - Samsung 403t | User Manual - Page 40
necessary to Image Size Control. 1) Power - Shows the power status of the current display. 2) Aspect - Shows the current Image Size of the display in use. 3) Input Source - Shows the current Input Source of the display in use. 4) Info Grid displays only the displays whose Input Source is RGB - Samsung 403t | User Manual - Page 41
RGB 1, 2, 3 tab. 5) Click to change Image Size of the selected display. Image Size Control is available only for the displays for which power status is ON. 7. Time Control 1. Click Time of the main icons and the Time Control screen appears. Info Grid shows some basic information necessary to Time - Samsung 403t | User Manual - Page 42
changes the size to PIP 2. • Double 1 : Turns on the PIP of the selected display and changes the size to Double 1. • Double 2 : Turns on the PIP of the selected display and changes the size to Double 2. PIP Size can be controlled with turning on the monitor power. The sets whose input signals are - Samsung 403t | User Manual - Page 43
to Video 1. • Video 2 : Changes the source of the PIP of the selected display to Video 2. PIP Source can be controlled with turning on the monitor power. The Grid doesn't appear on Display that PIP doesn't work. PIP Source can't be controlled on set that PIP doesn't work. The sets whose input - Samsung 403t | User Manual - Page 44
. Settings Control is available only for the displays for which the power status is ON and the default value is 50 when no adjustments are made. 9. Settings Control - Picture RGB 1. Click Settings of the main icons and the Settings Control screen appears. Info Grid shows some basic information - Samsung 403t | User Manual - Page 45
screen appears. Info Grid shows some basic information necessary to Settings Control. When each function is selected, the set value of the selected function is displayed PIP is On. Settings Control is available only for the displays for which the power status is ON and the default value is 50 when no - Samsung 403t | User Manual - Page 46
screen appears. Info Grid shows some basic information necessary to Settings Control. 1) Image Lock 1 - Available only for RGB 1, RGB 3. 2) Coarse - Adjusts Coarse of the selected display . 3) Fine - Adjusts Fine of the selected display. 4) Position - Adjusts Position of the selected display. - Samsung 403t | User Manual - Page 47
is ON. 10. Diagnostics 1. Click Diagnostics of the main icons and the Settings Control screen appears. 1) SET ID - Shows the ID of the currently connected display. 2) Power Status - Shows the power status of the current display. 3) Lamp Time - Shows the LCD Lamp On time of the currently connected - Samsung 403t | User Manual - Page 48
On Timer and Off Timer have been set but different time is showing. - Apply current time to synchronize the display clocks. 5. The remote may not function properly when you turn off the remote Function, disconnect the RS-232C cable, or exit the program in an Irregular manner. Rerun the program and - Samsung 403t | User Manual - Page 49
screen adjustment menu is on: Use this button to open the OSD and activate a highlighted menu item. 7. Power button Use this button to turn the monitor on and off. 8. Power indicator Lights up when you turn the power on. Refer to Specifications > PowerSaver. 9. Remote control sensor Aim the remote - Samsung 403t | User Manual - Page 50
User control buttons | Remote Control Buttons | For more information on the screen adjustment functions, refer to On-Screen Display. 1. Power Display button 12. Sleep button 13. Menu button 14. Exit button 15. Swap button 16. Location button 1. Power button Use this button to turn the monitor - Samsung 403t | User Manual - Page 51
User control buttons 8. PIP Size button Press to make the PIP window PIP 1, PIP 2, Double Screen 1, Double Screen 2. 9. P.Size button Press to change the Screen size. 10. Still button Press the button once to freeze the screen. Press it again to unfreeze. 11. Display button Displays the resolution, - Samsung 403t | User Manual - Page 52
user customizable. 1) Mode 1 : High Temperature. 2) Mode 2 : Middle Temperature. 3) Mode 3 : Low Temperature. 4) User Mode : User customizable. Image PC Screen lock and position parameters are replaced with the factory default values at maximum) • 1 : 1 Displays the image as created by the signal - Samsung 403t | User Manual - Page 53
and darkest areas on the display. Color Use to adjust the lightness/darkness on the display. Tint Use to add the natural tone to the display. Reset Picture parameters are replaced with the factory default values. Image Size Resizing the screen. • Expand 1 • Expand 2 • 1 : 1 • Panorama • Zoom - Samsung 403t | User Manual - Page 54
OSD Functions 3. Audio Control For detailed information on Screen Adjustment in the Audio mode, refer to Audio mode Screen Adjustment Animation Clips. Sound Select is available when the PIP is on. Bass Emphasize low frequency audio. Treble Emphasize high frequency audio. Balance Sound balance ==> - Samsung 403t | User Manual - Page 55
PIP When external A/V devices such as VCR or DVD are connected to the monitor, PIP allows you to watch video from such devices in a small window screen. • Pan : Moves the position of the magnified image on the screen either vertically or horizontally. 2) DNIe (Digital Natural Image engine) Samsung - Samsung 403t | User Manual - Page 56
Screen Adjustment Animation Clips. Timer • Clock : Current Time Setting • On Time : Use to set the monitor to turn on automatically at preset time. • Off Time : Use to set the monitor to turn OSD will remain visible before disappearing. Information Display current display mode. Source / Resolution - Samsung 403t | User Manual - Page 57
while setting Adapter for Display Properties. Contact the computer dealer or manufacturer for information on Safe Mode Booting. Refer to Specifications > Preset Timing Modes for the resolutions or frequencies that are supported by the monitor. The screen sometimes remains black even though it does - Samsung 403t | User Manual - Page 58
if there is trouble with the PC or the video card, this can cause the monitor to become blank, have poor coloring, noise, Video mode not supported, etc. In this case, first check the source of the problem, and then contact a service center or your dealer. 1. Check if the power cord and the cable are - Samsung 403t | User Manual - Page 59
tightened. (Refer to Connecting to a Computer) 2. Problems related to Screen Problems related to the monitor screen and their solutions are listed. Problems Screen is blank and power indicator is off "Check Signal Cable" message "Video mode not supported" message Picture rolls vertically. Image is - Samsung 403t | User Manual - Page 60
Your Monitor) z Check the volume level. z Check the volume level. z If the volume is still too low after turning the control to its maximum, check the volume control on the computer sound card or software program. z Adjust the Treble and Bass to appropriate level. 4. Problems related to Remote - Samsung 403t | User Manual - Page 61
Appearance & Theme Display Screen Saver or in the computer BIOS SETUP. (Refer to Windows/Computer Manual) Windows ME/2000: Set the function at BIOS-SETUP of the computer or the screen saver. (Refer to Windows/Computer Manual). Disconnect the power cord and then clean the monitor with a soft - Samsung 403t | User Manual - Page 62
General Specifications SyncMaster 403T Design and specifications are subject to change without prior notice. General Model Name SyncMaster 403T LCD Panel Size 40.02 inch (Diagonal) Display area 871.68 (H) x 523.008 (V) Pixel Pitch 0.681 (H) x 0.681 (V) Type a-si TFT active matrix - Samsung 403t | User Manual - Page 63
General Specifications SyncMaster 403T Audio Characteristics Audio Input 1 RCA Jack Red(R) White(L), 0.5Vrms (-9dB) Audio Input 2 RCA monitor settings. In most cases, monitor installation will proceed automatically, unless the user wishes to select alternate settings. Dot Acceptable TFT LCD - Samsung 403t | User Manual - Page 64
, Component 100 MHz Power Supply AC 90 ~ 264 V(50/60 Hz) Power Consumption 170W (Maximum) Power Saving Less than 8W Dimensions (WxDxH) Without Stand Weight 787 x 100 x 500 mm Monitor body 18.2 kg Environmental considerations Operating Temperature : 50°F ~ 104°F(10°C ~ 40°C) Humidity : 10 - Samsung 403t | User Manual - Page 65
Specifications Audio monitor settings. In most cases, monitor installation will proceed automatically, unless the user wishes to select alternate settings. Dot Acceptable TFT LCD black pixels could be seen. This is not from bad quality and you can use it without uneasiness. The number of TFT LCD - Samsung 403t | User Manual - Page 66
in your computer. Use a software utility installed on your computer to set up this feature. State Power Indicator Power Consumption Normal Operation Green Less than 230W SyncMaster 403T Power saving mode EPA Green, Blinking Less than 8W Mechanical Power S/W off Black Less than 1W State - Samsung 403t | User Manual - Page 67
SyncMaster 403T If the signal transferred from the computer is the same as the following Preset Timing Modes, the screen will be adjusted automatically. However, if the signal differs, the screen may go blank while the power LED is on. Refer to the video card manual and adjust the screen 40.000 - Samsung 403t | User Manual - Page 68
signal differs, the screen may go blank while the power LED is on. Refer to the video card manual and adjust the screen as follows. Table 1. Preset Timing Modes Display Mode Horizontal Frequency 30.240 49.500 31.500 31.500 36.000 36.000 40.000 49.500 50.000 56.250 65.000 75.000 78750 94.500 - Samsung 403t | User Manual - Page 69
50 http://samsung.es/ FRANCE : SAMSUNG ELECTRONICS FRANCE Service Paris Nord Samsung Electronics AB Box 713 S-194 27 UPPLANDS VÄSBY SVERIGE Besöksadress : Johanneslundsvägen 4 Samsung support Sverige: 020-46 46 46 Samsung support Danmark : 8088-4646 Samsung support Norge: 8001-1800 Samsung support - Samsung 403t | User Manual - Page 70
Toll-free 8-800-502-0000 http://www.samsung.com.ua/ United Kingdom : Samsung Electronics (UK) Ltd. Samsung House, 225 Hook Rise South Surbiton, Surrey U.S.A. : Samsung Computer Products Customer Service 400 Valley Road, Suite 201, Mt. Arlington, NJ 07856 Tel. : (973)601-6000, 1-800-SAMSUNG (1-800-726 - Samsung 403t | User Manual - Page 71
even lines in turn is called the Interlace method. The NonInterlace method is used for the majority of monitors to ensure a clear image. The Interlace method is the same as that used in TVs. Plug & Play This is a function that provides the best quality screen for the user by allowing the computer - Samsung 403t | User Manual - Page 72
., LTD America QA Lab of Samsung 3351 Michelson Drive, Suite #290, Irvine, CA92612 USA Tel) 949-975-7310 Fax) 949-922-8301 Warning User must use shielded signal interface cables to maintain FCC compliance for the product. Provided with this monitor is a detachable power supply cord with IEC320 style - Samsung 403t | User Manual - Page 73
II Compliance This monitor complies with - Power Line Harmonics z EN61000-3-3:1995 - Voltage Fluctuations PCT Notice VCCI This is a Class B product based on the equipment according to the instruction manual. Mercury Statement (LCD Monitor, LCD TV, DLP Projection TV, Projector for USA only) LAMP - Samsung 403t | User Manual - Page 74
the monitor. The Natural Color S/W is the very solution for this problem. It is a color administration system developed by Samsung Electronics on the initial screen to install the Natural Color software. To install the program manually, insert the CD included with the Samsung monitor into the CDROM - Samsung 403t | User Manual - Page 75
seem to be bright sometimes or some of black pixels could be seen. This is not from bad quality and you can use it without uneasiness. { Beispielsweise beträgt die Anzahl der in diesem Produkt enthaltenen LCD-Subpixel 2.949.120. 3. When you clean the monitor and the panel outside, please apply the - Samsung 403t | User Manual - Page 76
hours in use - Turn the power off for 2 hours after 12 hours in use z Use a Screen saver if possible - Screen saver in one color or a moving image is recommended. z Set the Monitor to power off with the PC Display Properties Power Scheme. Suggestions for specific applications Ex) Airports, Transit - Samsung 403t | User Manual - Page 77
The best way to protect your monitor from Image retention is to set your PC or System to operate a Screen Saver program when you are not using it. Image retention may not occur when a LCD panel is operated under normal conditions. Normal conditions are defined as continuously changing video patterns - Samsung 403t | User Manual - Page 78
herein or for incidental or consequential damages in connection with the furnishing, performance, or use of this material. Samsung is the registered trademark of Samsung Electronics Co., Ltd.; Microsoft, Windows and Windows NT are registered trademarks of Microsoft Corporation; VESA, DPMS and DDC
-
 1
1 -
 2
2 -
 3
3 -
 4
4 -
 5
5 -
 6
6 -
 7
7 -
8
-
9
-
10
-
11
-
12
-
13
-
14
-
15
-
16
-
17
-
18
-
19
-
20
-
21
-
22
-
23
-
24
-
25
-
26
-
27
-
28
-
29
-
30
-
31
-
32
-
33
-
34
-
35
-
36
-
37
-
38
-
39
-
40
-
41
-
42
-
43
-
44
-
45
-
46
-
47
-
48
-
49
-
50
-
51
-
52
-
53
-
54
-
55
-
56
-
57
-
58
-
59
-
60
-
61
-
62
-
63
-
64
-
65
-
66
-
67
-
68
-
69
-
70
-
71
-
72
-
73
-
74
-
75
-
76
-
77
-
78
 |
 |

SyncMaster 323T / SyncMaster 403T