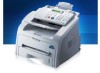
Samsung 650P Quick Guide (easy Manual) (ver.1.0) (English)
Samsung 650P - SF - Multifunction Manual
 |
UPC - 635753613803
View all Samsung 650P manuals
Add to My Manuals
Save this manual to your list of manuals |
Samsung 650P manual content summary:
- Samsung 650P | Quick Guide (easy Manual) (ver.1.0) (English) - Page 1
- Samsung 650P | Quick Guide (easy Manual) (ver.1.0) (English) - Page 2
Electronics is not responsible for any direct or indirect damages, arising from or related to use of this user's guide. • Samsung and Samsung logo are trademarks of Samsung Electronics Co., Ltd. • JPEG License: This software is based in part on the work of the Independent JPEG Group. • All other - Samsung 650P | Quick Guide (easy Manual) (ver.1.0) (English) - Page 3
GUIDE Convention 15 Finding more information 16 Features of your new product 17 INTRODUCTION Machine 24 Using the save modes 25 Using toner saving feature 25 Using power saving feature feeder 26 Selecting print media 27 Guidelines to select the print media 27 Media sizes supported in each - Samsung 650P | Quick Guide (easy Manual) (ver.1.0) (English) - Page 4
34 Sending a priority fax 35 Sending a fax in toll save time 35 Receiving a fax 36 Changing the receive modes 36 Receiving manually in Tel mode 36 Receiving automatically in Answering Machine/Fax mode 36 Receiving faxes manually using an extension telephone 36 Receiving faxes using DRPD mode - Samsung 650P | Quick Guide (easy Manual) (ver.1.0) (English) - Page 5
Cleaning the drum 51 Storing the Toner cartridge 51 Handling instructions 51 Use of non-Samsung and refilled toner cartridge 51 Estimated cartridge life 51 Tips for moving & storing your machine 52 TROUBLESHOOTING Redistributing toner 53 Clearing original document jams 54 Input Misfeed 54 - Samsung 650P | Quick Guide (easy Manual) (ver.1.0) (English) - Page 6
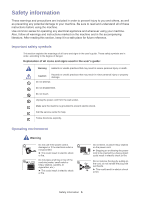
follow all warnings and instructions marked on the machine and in the accompanying literature. After reading this section, keep it in a safe place for future reference. Important safety symbols This section explains the meanings of all icons and signs in the user's guide. These safety symbols are - Samsung 650P | Quick Guide (easy Manual) (ver.1.0) (English) - Page 7
may get hurt. If the plug instructions have been followed, unplug the machine from all interface connections and request assistance from qualified service personnel. ► Otherwise, this could result in electric shock or fire. When printing large quantities, the bottom part of the paper output area may - Samsung 650P | Quick Guide (easy Manual) (ver.1.0) (English) - Page 8
cleaning the inside, do not operate the machine. ► You may get injured. Do not put a cover over the machine or place it in an airtight location, such as a closet. ► If the machine is not well-ventilated, this could result in fire. Make sure you plug the power cord into a grounded electrical outlet - Samsung 650P | Quick Guide (easy Manual) (ver.1.0) (English) - Page 9
of the plug clean from dust or water. ► This could result in electric shock or fire. Do not remove any covers or guards that are fastened with screws. ► The machine should only be repaired by Samsung service technician. Supply usage Caution Do not disassemble the toner cartridge. ► Toner dust can - Samsung 650P | Quick Guide (easy Manual) (ver.1.0) (English) - Page 10
during normal operation, user maintenance or prescribed service condition. WARNING Never operate or service the printer with the protective cover removed that the machine be operated in a well ventilated area. If you need additional information about ozone, request your nearest Samsung dealer. - Samsung 650P | Quick Guide (easy Manual) (ver.1.0) (English) - Page 11
batteries in this product (Applicable in the European Union and other European countries with separate battery return systems.) This marking on the battery, manual or packaging indicates that the batteries in this product should not be disposed with other household waste at the end of their working - Samsung 650P | Quick Guide (easy Manual) (ver.1.0) (English) - Page 12
may not cause harmful interference, and • This device must accept any interference received, including interference that may instructions, may Germany only Fax Branding The machine unless such message clearly contains in a margin at the top or bottom of each transmitted page or on the first page - Samsung 650P | Quick Guide (easy Manual) (ver.1.0) (English) - Page 13
of your intentions. The dispatcher will give you further instructions on how to actually test the emergency number. • This machine may not be used on coin service or party lines. • This machine provides magnetic coupling to hearing aids. You may safely connect this equipment to the telephone network - Samsung 650P | Quick Guide (easy Manual) (ver.1.0) (English) - Page 14
colored black. You must connect the brown wire to the pin which is marked with the letter "L" or colored red. You must have a 13 amp fuse in the plug, of: SF-650 Series : R&TTE Directive (1999/5/EC) The declaration of conformity may be consulted at www.samsung.com/printer, go to Support > Download - Samsung 650P | Quick Guide (easy Manual) (ver.1.0) (English) - Page 15
China only Regulatory information_ 14 - Samsung 650P | Quick Guide (easy Manual) (ver.1.0) (English) - Page 16
If you have a problem using the machine, refer to the troubleshooting chapter (See "Troubleshooting" on page 53). • Terms used in this user's guide are explained in the glossary chapter (See "Glossary" on page74). • All illustrations in this user's guide may differ from your machine depending on its - Samsung 650P | Quick Guide (easy Manual) (ver.1.0) (English) - Page 17
print-out or on screen. MATERIAL NAME Quick Install Guide DESCRIPTION This guide provides information on setting up your machine and this requires that you follow the instructions in the guide to prepare the machine. Samsung website If you have Internet access, you can get help, support, manuals - Samsung 650P | Quick Guide (easy Manual) (ver.1.0) (English) - Page 18
adjusted and enhance at the same time. Set a specific time to transmit a Fax • You can specify a certain time to transmit the fax and also send the fax to several stored destinations. • After the transmission, the machine may print out the fax reports according to the setting. Save time and money - Samsung 650P | Quick Guide (easy Manual) (ver.1.0) (English) - Page 19
the useful button • Turning on the machine Machine overview Front view 1 Document feeder 2 Document width guides 3 Control panel 4 Output tray 5 Front door 6 Tray 1 7 Front door handle 8 Output support 9 Document output tray 10 Handset 11 Toner cartridge 12 Document input tray Introduction_ 18 - Samsung 650P | Quick Guide (easy Manual) (ver.1.0) (English) - Page 20
Rear view 1 Extension telephone socket (EXT) 2 Telephone line socket 3 Power receptacle 4 Rear door 5 Rear door handle Introduction_ 19 - Samsung 650P | Quick Guide (easy Manual) (ver.1.0) (English) - Page 21
you will not be present (See "Delaying a fax transmission" on page 34). Allows you to send a fax to multiple destinations (See "Sending a fax to multiple destinations" on page 34). Converts the fax receiving mode (See "Changing the receive modes" on page 36). Adjusts the resolution of the documents - Samsung 650P | Quick Guide (easy Manual) (ver.1.0) (English) - Page 22
non-genuine Samsung toner cartridges will not be covered under the machine warranty. Check the message on the display. Follow the instructions in the message or refer to troubleshooting part (See "Understanding display messages" on page 59). If the problem persists, call for service. Power LED - Samsung 650P | Quick Guide (easy Manual) (ver.1.0) (English) - Page 23
hardware, as is explained in the Quick Install Guide. Make sure you read the Quick Install Guide first and follow the steps below: 1. Select Otherwise, printing quality may be affected. 2. Unpack the machine and check all the enclosed items. 3. Remove all the tapes. 4. Install the toner cartridge. - Samsung 650P | Quick Guide (easy Manual) (ver.1.0) (English) - Page 24
the time and date, they are used in delay fax and delay print. They are printed on reports. If, however, they are not correct, you need to change it for the correct time being. If the machine's power is cut off, you need to reset the correct time and date once the power has been - Samsung 650P | Quick Guide (easy Manual) (ver.1.0) (English) - Page 25
up your machine, you enter your name or your company's name, and the fax number. When you store fax numbers in memory, you may also enter section. 2. To enter additional letters, repeat step 1. If the next letter is printed on the same button, move the cursor by pressing the left/right arrow button - Samsung 650P | Quick Guide (easy Manual) (ver.1.0) (English) - Page 26
the save modes Using toner saving feature Toner save mode allows your machine to use less toner on each page. Activating this mode extends the life of the toner cartridge beyond what one would experience in the normal mode, but it reduces print quality. 1. Press Menu until Machine Setup appears - Samsung 650P | Quick Guide (easy Manual) (ver.1.0) (English) - Page 27
print media into your machine. This chapter includes: • Preparing originals • Loading originals • Selecting print media • Changing the tray size • Loading paper in the tray • Setting the paper size and type • Using the output support sending a fax. In to separate the pages before loading originals. - Samsung 650P | Quick Guide (easy Manual) (ver.1.0) (English) - Page 28
purchasing large quantities of print media, ensure that it meets the requirements specified in this user's guide. Using print media that does not meet these specifications may cause problems, requiring repairs. Such repairs are not covered by the warranty or service agreements. Media and tray_ - Samsung 650P | Quick Guide (easy Manual) (ver.1.0) (English) - Page 29
The amount of paper put into the tray may differ according to media type used (See "Print media specifications" on page 71). Media sizes supported in each mode MODE Copy mode Fax mode SIZE Letter, A4, Legal, Folio, Executive, JIS B5, A5 Letter, A4, Legal SOURCE tray 1 tray 1 Changing the tray - Samsung 650P | Quick Guide (easy Manual) (ver.1.0) (English) - Page 30
paper with the side you want to print facing down. 4. Set the paper type and size for the tray 1 (See "Setting the paper" on page25). If you experience problems with paper feeding, check whether the paper meets the media specification (See "Print media specifications" on page 71). Media and tray_ 29 - Samsung 650P | Quick Guide (easy Manual) (ver.1.0) (English) - Page 31
printed with heat-resistant ink that will not melt, vaporize, or release hazardous emissions when subjected to the machine's fusing temperature for 0.1 second. Check your machine's specification the output support The surface of the output tray may become hot if you print a large number of pages at - Samsung 650P | Quick Guide (easy Manual) (ver.1.0) (English) - Page 32
instructions "Changing the settings for each copy" on page 31). 4. Enter the number of copies using Changing the settings for each copy Your machine provides default settings for copying so that print. • Normal: Works well with standard typed or printed originals. • Dark: Works well with light print - Samsung 650P | Quick Guide (easy Manual) (ver.1.0) (English) - Page 33
Stop/Clear to return to ready mode. When you make a reduced copy, black lines may appear at the bottom of your copy. Changing the default copy settings The restores the defaults. Setting copy timeout You can set the time the machine waits before it restores the default copy settings, if you do - Samsung 650P | Quick Guide (easy Manual) (ver.1.0) (English) - Page 34
to fax • Sending a fax • Receiving a fax • Adjusting the document settings • Forwarding a fax to other destination • Setting up address book • Printing sent fax report automatically • You cannot use this machine as a fax via the internet phone. For more information ask the internet service provider - Samsung 650P | Quick Guide (easy Manual) (ver.1.0) (English) - Page 35
" on page 59. If you receive an error message, press Stop/Clear to clear the message and try to send the fax again. You can set your machine to print a confirmation report automatically each time sending a fax is completed. For further details, see "Printing sent fax report automatically" on page 41 - Samsung 650P | Quick Guide (easy Manual) (ver.1.0) (English) - Page 36
Press the left/right arrow until Priority Fax appears and press OK. 6. Enter the number of the receiving fax machine and press OK. You can press speed dial numbers or select group dial number using Address book button. For details, see "Setting up address book" on page 39. 7. Enter the job name you - Samsung 650P | Quick Guide (easy Manual) (ver.1.0) (English) - Page 37
further details, see "Receiving in secure receiving mode" on page 37. Receiving manually in Tel mode You can receive a fax call by pressing On Hook Dial and then pressing Start when you hear a fax tone from the remote machine. The machine begins receiving a fax. If your machine has a handset, you - Samsung 650P | Quick Guide (easy Manual) (ver.1.0) (English) - Page 38
telephone or answering machine plugged into the EXT socket. Receiving in secure receiving mode You may need to prevent your received faxes from being accessed by unauthorized people. You can turn on secure receiving mode to restrict printing of received faxes when the machine is unattended. In - Samsung 650P | Quick Guide (easy Manual) (ver.1.0) (English) - Page 39
You can set the machine to forward the received or sent fax to other destination by a fax. If you are out of office but have to receive the fax, this feature may be useful. Forwarding a sent fax to other destination by a fax You can set the machine to forward every fax you sent to other - Samsung 650P | Quick Guide (easy Manual) (ver.1.0) (English) - Page 40
received faxes will be forwarded to the specified fax machine. Setting up address book You can set up Address Book with the fax numbers you use most frequently. Your machine see "Entering characters using the number keypad" on page 24. 7. Enter the fax number you want and press OK. 8. Press Stop/ - Samsung 650P | Quick Guide (easy Manual) (ver.1.0) (English) - Page 41
characters, see "Entering characters using the number keypad" on page 24. 7. Enter the first few letters of the to ready mode. Editing a group dial number 1. Press (Fax) on the control panel. 2. Press Address Book on the control Printing Address Book You can check your Address Book settings by - Samsung 650P | Quick Guide (easy Manual) (ver.1.0) (English) - Page 42
Address Book on the control panel. 3. Press the left/right arrow until Print appears and press OK. The machine begins printing. Printing sent fax report automatically You can set the machine to print a report with detailed information about the previous 50 communication operations, including time - Samsung 650P | Quick Guide (easy Manual) (ver.1.0) (English) - Page 43
saving the data in the memory. You can set the machine to print a report with detailed information about the previous 50 communication operations, including time and dates. The available options are On or Off. When receiving a fax containing pages as long as or longer than the paper loaded in the - Samsung 650P | Quick Guide (easy Manual) (ver.1.0) (English) - Page 44
Code DRPD Mode DESCRIPTION When receiving a fax containing pages as long as or longer than the paper in your machine, you can set the machine to discard a specific length from the end of the received fax. The machine will print the received fax on one or more sheets of paper, minus the data that - Samsung 650P | Quick Guide (easy Manual) (ver.1.0) (English) - Page 45
. You can set the machine to automatically print this report every 50 communications (See "Available fax setup options" on page 42). This report shows information on the faxes you have recently received. This list shows the status of the user-selectable options. You may print this list to confirm - Samsung 650P | Quick Guide (easy Manual) (ver.1.0) (English) - Page 46
the factory default. Resets all of the system settings, such as the machine ID, date and time, display language and save modes, to the factory default. Clears all records of sent faxes. Clears all records of received faxes. Clears all of the fax numbers stored in memory. Machine status and advanced - Samsung 650P | Quick Guide (easy Manual) (ver.1.0) (English) - Page 47
Delay Fax Priority Fax Add Page Cancel Job Delay Rx Poll Send Forward RCV Forward Toll Save Junk Fax Setup Secure Receive Prefix Dial Stamp RCV Name ECM Mode Phone Book Sent Report Fax RCV Report Configuration Scheduled Jobs Send Report JunkFax Report Speaker Ringer Key Sound Alarm Sound Machine - Samsung 650P | Quick Guide (easy Manual) (ver.1.0) (English) - Page 48
Mode Dial Mode Language Toner Save Power Save Clear Toner Clean Drum Notify Toner Clear Memory Clear All Mem. Paper setting Copy Setup Fax Setup Fax Feature Advanced Fax Sound/Volume Machine Setup Sent Report RCV Report Phone Book Adjust Shading TonerLow Alert Machine status and advanced feature_ - Samsung 650P | Quick Guide (easy Manual) (ver.1.0) (English) - Page 49
provides information for maintaining your machine and the toner cartridge. This chapter includes: • Cleaning a machine • Storing the Toner cartridge • Tips for moving & storing your machine Cleaning a machine If printing quality problems occur or if you use your machine in a dusty environment, you - Samsung 650P | Quick Guide (easy Manual) (ver.1.0) (English) - Page 50
or thinner to clean. Printing quality problems can occur and cause damage to the machine. 4. Locate the long strip of glass (LSU) inside the machine and gently swab the glass to see if dirt turns the white cotton black. 5. Reinsert the toner cartridge and close the front door. 6. Plug in the power - Samsung 650P | Quick Guide (easy Manual) (ver.1.0) (English) - Page 51
The right end of the white roller has a plastic bush that is snapped shut with small tab on it. Pull the tab inward slightly then lift the tab until the roller is released. Lift the roller upwards and to the right, releasing the left end of the roller, then rotate the bushing until it reach a slot. - Samsung 650P | Quick Guide (easy Manual) (ver.1.0) (English) - Page 52
OK. The machine prints a cleaning page. Toner particles on the drum surface are affixed to the paper. 5. If the problem remains, repeat step 1 through 4. Storing the Toner cartridge Toner cartridges contain components that are sensitive to light, temperature, and humidity. Samsung suggests users - Samsung 650P | Quick Guide (easy Manual) (ver.1.0) (English) - Page 53
Tips for moving & storing your machine • When moving the machine, do not tilt or turn it upside down. Otherwise, the inside of the machine may be contaminated by toner, which can cause damage to the machine or bad print quality. Maintenance_ 52 - Samsung 650P | Quick Guide (easy Manual) (ver.1.0) (English) - Page 54
paper jams • Clearing paper jams • Understanding display messages • Solving other problems Redistributing toner When the toner cartridge is near the end of its life: • White streaks or light printing occurs. • Prepare new cartridge appears on the display. • The Status LED blinks red. If this - Samsung 650P | Quick Guide (easy Manual) (ver.1.0) (English) - Page 55
message appears on the display screen. To avoid tearing the document, remove the jammed document slowly and gently. Input Misfeed 1. Remove any remaining pages from the document feeder. 2. Pull the jammed document gently out of the document feeder. 3. Load the documents back into the document feeder - Samsung 650P | Quick Guide (easy Manual) (ver.1.0) (English) - Page 56
Exit Misfeed 1. Remove any remaining pages from the document feeder. 2. Open the control panel by gripping it on the 2. Pull down the pressure lever on each side. Keep the rear cover opened during printing. Only use when the printout has more than 20 mm curl. 1 Pressure lever Troubleshooting_ 55 - Samsung 650P | Quick Guide (easy Manual) (ver.1.0) (English) - Page 57
jam occurs, refer to the next guidelines. • Ensure that the adjustable guides are positioned correctly (See "Loading paper in the tray" on page29). toner cartridge (See "Inside the machine" on page 57). 4. Insert tray 1 back into the machine until it snaps into place. Printing automatically resumes. - Samsung 650P | Quick Guide (easy Manual) (ver.1.0) (English) - Page 58
Take care when removing paper from the machine. 1. Open the front door and pull the toner cartridge out, lightly pushing it down. 2. Remove the jammed paper by gently pulling it straight out. 3. Replace the toner cartridge and close the front door. Printing automatically resumes. In exit area Click - Samsung 650P | Quick Guide (easy Manual) (ver.1.0) (English) - Page 59
remove he paper. Return the pressure levers to their original position. 1 Pressure lever The fuser area is hot. Take care when removing paper from the machine. 6. Close the rear door. 7. Open and close front door, printing automatically resumes. Troubleshooting_ 58 - Samsung 650P | Quick Guide (easy Manual) (ver.1.0) (English) - Page 60
number or dial a number manually using the number keypad Reconfirm the remote machine's features Reinstall the toner cartridge two or three times to confirm it is seated properly. If the problem persists, the toner cartridge is not being detected. Contact the service representatives. Try again after - Samsung 650P | Quick Guide (easy Manual) (ver.1.0) (English) - Page 61
stage can result in printing quality issues (See "Replacing the toner cartridge" on page 68). Samsung does not recommend using non-genuine Samsung toner cartridge such as refilled or remanufactured. Samsung cannot guarantee non-genuine Samsung toner cartridge's quality. Service or repair required as - Samsung 650P | Quick Guide (easy Manual) (ver.1.0) (English) - Page 62
machine (See "Print media specifications" on page 71). • There may be debris inside the machine. Open the front door and remove any debris. • If an original does not feed into the machine, the document feeder rubber pad may need to be replaced. Contact a service representative. Printing problems - Samsung 650P | Quick Guide (easy Manual) (ver.1.0) (English) - Page 63
be too moist or rough (See "Print media specifications" on page 71). • A combination of faded or smeared defects may indicate that the toner cartridge needs cleaning (See "Cleaning the inside" on page 48). • The surface of the LSU part inside the machine may be dirty (See "Cleaning the inside" on - Samsung 650P | Quick Guide (easy Manual) (ver.1.0) (English) - Page 64
repeatedly appear on the printed side of the page at even intervals: • The toner cartridge may be damaged. If you still have the same problem, remove the toner cartridge and, install a new one (See "Replacing the toner cartridge" on page 68). • Parts of the machine may have toner on them. If the - Samsung 650P | Quick Guide (easy Manual) (ver.1.0) (English) - Page 65
or Black pages A • The toner cartridge may not be installed properly. Remove the cartridge and reinsert it. • The toner cartridge may be defective. Remove the toner cartridge and install a new one (See "Replacing the toner cartridge" on page 68). • The machine may require repair. Contact a service - Samsung 650P | Quick Guide (easy Manual) (ver.1.0) (English) - Page 66
paper type and quality (See "Print media specifications" on page71). • Remove the toner cartridge and then, install a new one (See "Replacing the toner cartridge" on page 68). • If the problem persists, the machine may require repair. Contact a service representative. Character Voids A Character - Samsung 650P | Quick Guide (easy Manual) (ver.1.0) (English) - Page 67
see if it can receive your fax. The incoming fax has blank spaces or is of poor-quality. • The fax machine sending you the fax may be faulty. • A noisy phone line can cause line errors. • Check your machine by making a copy. • A toner cartridge has reached its estimated cartridge life. Replace the - Samsung 650P | Quick Guide (easy Manual) (ver.1.0) (English) - Page 68
cannot guarantee non-genuine Samsung toner cartridge's quality. Service or repair required as a result of using non-genuine Samsung toner cartridges will not be covered under the machine warranty. Available maintenance parts To avoid print quality and paper feed problems resulting from worn parts - Samsung 650P | Quick Guide (easy Manual) (ver.1.0) (English) - Page 69
life Replace new cart appears on the display. • The machine stops printing. Incoming faxes are saved in memory. At this stage, the toner cartridge needs to be replaced. Check the type of the toner cartridge for your machine (See "Available supplies" on page 67). 1. Open the front door. 2. Pull the - Samsung 650P | Quick Guide (easy Manual) (ver.1.0) (English) - Page 70
the toner cartridge. Use the handle on the cartridge to avoid touching this area. 7. Hold the toner cartridge by the handle and slowly insert the cartridge into the opening in the machine. Tabs on the sides of the cartridge and corresponding grooves within the machine will guide the cartridge into - Samsung 650P | Quick Guide (easy Manual) (ver.1.0) (English) - Page 71
chapter guides you about this machine's specifications such as various features. This chapter include: • Hardware specifications • Environmental specifications • Electrical specifications • Print media specifications The specification values here are based on preliminary data. See www.samsung.com - Samsung 650P | Quick Guide (easy Manual) (ver.1.0) (English) - Page 72
Print media specifications TYPE SIZE DIMENSIONS PRINT MEDIA WEIGHTa/ CAPACITYb TRAY1 Plain paper Letter Legal US Folio g/m2 (32 lb), load a paper into the tray one by one. b. Maximum capacity may differ depending on media weight, thickness, and environmental conditions. Specifications_ 71 - Samsung 650P | Quick Guide (easy Manual) (ver.1.0) (English) - Page 73
., česká organizační složka, Oasis Florenc, Sokolovská394/17, 180 00, Praha 8 8-SAMSUNG (7267864) www.samsung.com/dk 1-800-10-7267 www.samsung.com/latin 800-6225 www.samsung.com/latin 800-7267 www.samsung.com/ee 8-10-800-500-55-500 www.samsung.com/kz_ru 00-800-500-55-500 30-6227 515 www - Samsung 650P | Quick Guide (easy Manual) (ver.1.0) (English) - Page 74
com/no www.samsung.com/latin www.samsung.com/ph www.samsung.com/pl www.samsung.com/pt www.samsung.com/latin www.samsung.com/latin www.samsung.com/ie www.samsung.ru www.samsung.com/sg www.samsung.com/sk www.samsung.com/za www.samsung.com/es www.samsung.com/se www.samsung.com/ch www.samsung.com/tw www - Samsung 650P | Quick Guide (easy Manual) (ver.1.0) (English) - Page 75
printing as well as mentioned in this user's guide share same hardware and use the 2.4 GHz band. 802.11b supports bandwidth up to 11 Mbps; 802.11g up to 54 Mbps. 802.11b/g devices may and receiver of black machine. Coverage It is the printing term used for a toner usage measurement on printing - Samsung 650P | Quick Guide (easy Manual) (ver.1.0) (English) - Page 76
capacity of print-outs, usually within the warranty period. For example, if the duty cycle is 48,000 pages per month assuming 20 working days, a printer limits 2,400 pages a day. ECM Error Correction Mode (ECM) is an optional transmission mode built into Class 1 fax machines or fax modems. It - Samsung 650P | Quick Guide (easy Manual) (ver.1.0) (English) - Page 77
service on your machine. FTP A File Transfer Protocol (FTP) is a commonly used protocol for exchanging files over any network that supports the TCP/IP protocol (such as the Internet or an intranet). Fuser Unit The part of a laser printer that melts the toner onto the print a specific connector type - Samsung 650P | Quick Guide (easy Manual) (ver.1.0) (English) - Page 78
supports access control, authentication, and encryption, making it a much more capable and secure printing services running over TCP/IP. LED A Light-Emitting Diode (LED) is a semiconductor device that indicates the status of a machine be transmitted between the fax machines to transfer the image - Samsung 650P | Quick Guide (easy Manual) (ver.1.0) (English) - Page 79
to generate an image. Printer Driver A program used to send commands and transfer data from the computer to the printer. Print Media The media like paper, envelopes, labels, and transparencies which can be used on a printer, a scanner, a fax or, a copier. PPM Pages Per Minute (PPM) is a method of - Samsung 650P | Quick Guide (easy Manual) (ver.1.0) (English) - Page 80
driver of an image, measured in Dots Per Inch (DPI). The higher the dpi network protocol mainly applied to share files, printers, serial ports, client transmits an email message to the server. SSID Service Set Identifier (SSID) is a name of a of pages sent. This report can be set to print after - Samsung 650P | Quick Guide (easy Manual) (ver.1.0) (English) - Page 81
Toner Cartridge A kind of bottle within a machine like printer which contains toner. Toner is a powder used in laser printers and photocopiers, which forms the text and images on the printed paper. Toner (UNC) is a standard way to access network shares in Window NT and other Microsoft products. The - Samsung 650P | Quick Guide (easy Manual) (ver.1.0) (English) - Page 82
feeding problems 61 R rear view 19 regulatiory information 9 resolution faxing 38 S safety information 5 symbols 5 scanner loading documents 26 service contact numbers 72 specifications general 70 print media 71 start button 20 stop button 20 supplies available supplies 67 estimated toner cartridge - Samsung 650P | Quick Guide (easy Manual) (ver.1.0) (English) - Page 83
T time setting 23 toner cartridge estimated life 51 handling instructions 51 non-Samsung and refilled 51 redistributing toner 53, 68 storing 51 toner save mode 25 tray adjusting the width and length 28 changing the tray size 28 setting the paper size and type 30 turning on the machine 21 Index_ 82 - Samsung 650P | Quick Guide (easy Manual) (ver.1.0) (English) - Page 84
-
 1
1 -
 2
2 -
 3
3 -
 4
4 -
 5
5 -
 6
6 -
 7
7 -
8
-
9
-
10
-
11
-
12
-
13
-
14
-
15
-
16
-
17
-
18
-
19
-
20
-
21
-
22
-
23
-
24
-
25
-
26
-
27
-
28
-
29
-
30
-
31
-
32
-
33
-
34
-
35
-
36
-
37
-
38
-
39
-
40
-
41
-
42
-
43
-
44
-
45
-
46
-
47
-
48
-
49
-
50
-
51
-
52
-
53
-
54
-
55
-
56
-
57
-
58
-
59
-
60
-
61
-
62
-
63
-
64
-
65
-
66
-
67
-
68
-
69
-
70
-
71
-
72
-
73
-
74
-
75
-
76
-
77
-
78
-
79
-
80
-
81
-
82
-
83
-
84
 |
 |
