Samsung BD-C6800 User Manual (user Manual) (ver.1.0) (English) - Page 42
Setting Up the Wireless Network Connection, Manual, ENTER, Delete, YELLOWC, Network Test
 |
UPC - 036725608368
View all Samsung BD-C6800 manuals
Add to My Manuals
Save this manual to your list of manuals |
Page 42 highlights
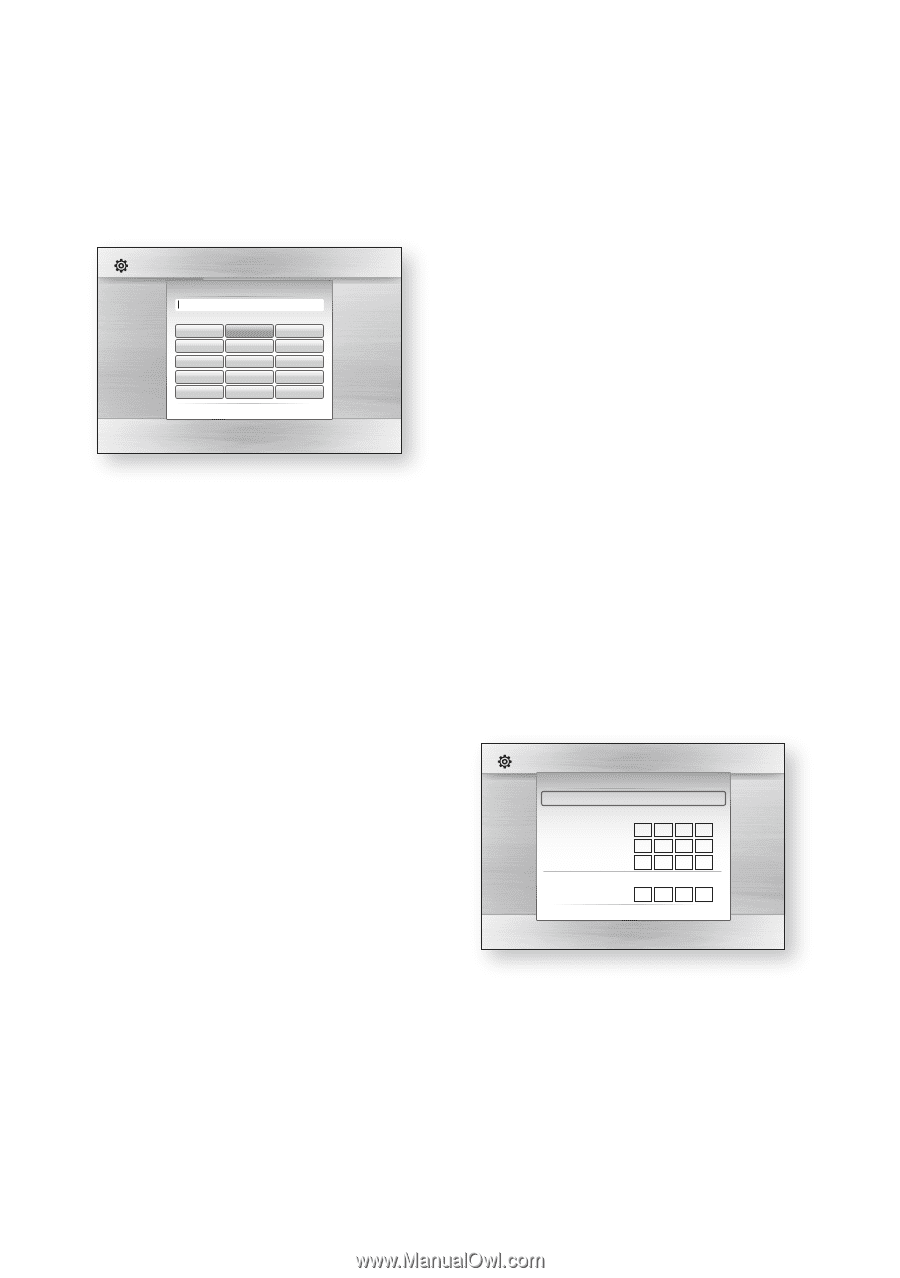
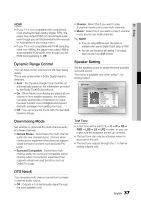
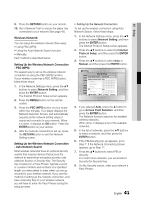
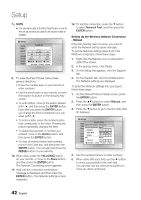
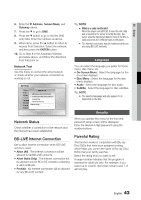
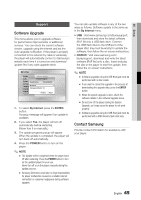
Setup ✎ NOTE ▪ You should be able to find the Pass Phrase on one of the set up screens you used to set up your router or modem. Settings Display Audio System Network Language Security General Support NeStwecourkritSyeKtteinygs Security K ey (0) lid Onaly)b c 1 .,@ 2 abc 3 def 4 ghi 5 jkl 6 mno 7 pqrs 8 tuv 9 wxyz a/A/a/ 0 ] Delete a Clear All b Space c Done (/) Cursor " Select ' Return 9. To enter the Pass Phrase, follow these general directions: • Press the number keys on your remote to enter numbers. • Use the arrow keys on your remote to move from button to button on the Security Key screen. • To enter letters, move to the button labeled a/A/1/, and then press the ENTER button. Each time you press the ENTER button, you change the kind of characters you can enter (a/A/1/). • To enter a letter, press the number button that corresponds to the letter. Pressing the button repeatedly changes the letter. • To delete the last letter or number you entered, move to the Delete button, and then press the ENTER button. • To clear all entered letters and numbers, move to the Clear key, and then press the ENTER button. You can also just press the RED(A) button on your remote. 10. When done, press the YELLOW(C) button on your remote, or move to the Done button, and then press the ENTER button. The Network Connecting screen appears. 11. Wait until the connection confirmation message is displayed, and then press the ENTER button. The Network Settings screen reappears. 12. To test the connection, press the ▼ button to select Network Test, and then press the ENTER button. Setting Up the Wireless Network Connection - Manual If the Auto Setting does not work, you need to enter the Network settng values manually. To get the Network setting values from most Windows computers, follow these steps: 1. Right click the Network icon on the bottom right of the screen. 2. In the pop-up menu, click Status. 3. On the dialog that appears, click the Support tab. 4. On the Support tab, click the Details button. The Network settings are displayed. To Enter the Network settings into your player, follow these steps: 1. On the Internet Protocol Setup screen, press the ENTER button. 2. Press the ▲▼ buttons to select Manual, and then press the ENTER button. 3. Press the ▼ button to go to the first entry field (IP Address). Settings Display Network Setting Audio Access Point Selection : Not Selected \ SystemInternet Protocol Setup : Manual IP Address Network :0 0 0 0 Language Subnet Mask Security Gateway : 255 255 255 0 :0 0 0 0 GeneralDNS DNS Server Support : Manual :0 0 0 0 a PBC (WPS) > Move " Select ' Return 4. Use the number buttons to enter numbers. 5. When done with each field, use the ► button to move successively to the next field. You can also use the other arrow buttons to move up, down, and back. 42 English
-
 1
1 -
2
-
3
-
4
-
5
-
6
-
7
-
8
-
9
-
10
-
11
-
12
-
13
-
14
-
15
-
16
-
17
-
18
-
19
-
20
-
21
-
22
-
23
-
24
-
25
-
26
-
27
-
28
-
29
-
30
-
31
-
32
-
33
-
34
-
35
-
36
-
 37
37 -
 38
38 -
 39
39 -
 40
40 -
 41
41 -
 42
42 -
 43
43 -
 44
44 -
 45
45 -
 46
46 -
 47
47 -
48
-
49
-
50
-
51
-
52
-
53
-
54
-
55
-
56
-
57
-
58
-
59
-
60
-
61
-
62
-
63
-
64
-
65
-
66
-
67
-
68
-
69
-
70
-
71
 |
 |