Samsung CLX-3185FN User Manual (user Manual) (ver.2.00) (English) - Page 104
Network (CLX-3185N/CLX-3185WK/CLX-3185FN/CLX-3185 FW only), Menu overview, TCP/IP IPv6
 |
View all Samsung CLX-3185FN manuals
Add to My Manuals
Save this manual to your list of manuals |
Page 104 highlights
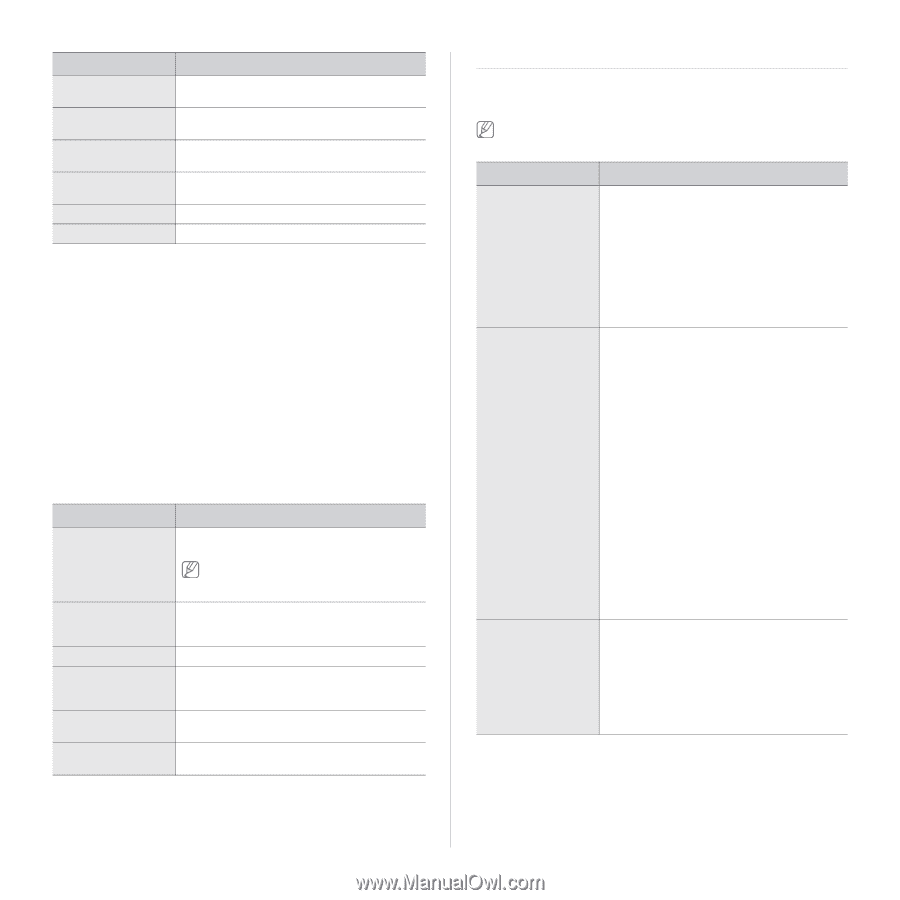
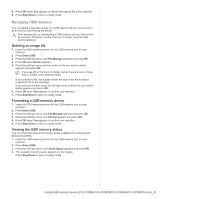
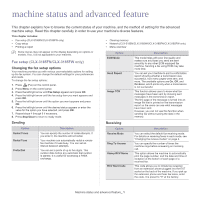
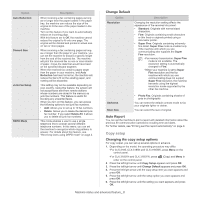
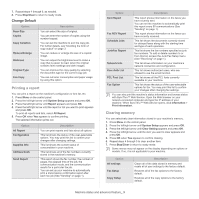
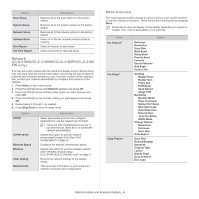
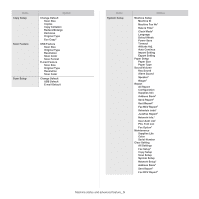
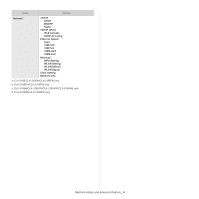
Option Scan Setup System Setup Network Setup Address Book Sent Report Fax RCV Report Description Restores all of the scan options to the factory default. Restores all of the system options to the factory default. Restores all of the network options to the factory default. Clears all of the fax numbers entries stored in memory. Clears all records of sent faxes. Clears all records of received faxes. Network (CLX-3185N/CLX-3185WK/CLX-3185FN/CLX-3185 FW only) You may set up the network with the machine's display screen. Before doing that, you must have the relevant information concerning the type of network protocols and computer system you use. If you are not sure which setting to use, contact your network administrator to configure this machine to the network. 1. Press Menu on the control panel. 2. Press the left/right arrow until Network appears and press OK. 3. Press the left/right arrow until the setup option you want appears and press OK. 4. Press the left/right arrow until the setting you want appears and press OK. 5. Repeat steps 3 through 4, as needed. 6. Press Stop/Clear to return to ready mode. Option TCP/IP TCP/IP (IPv6) Ethernet Speed Wireless Clear Setting Network Info. Description Select appropriate protocol and configure parameters to use the network environment. There are lots of parameters to be set. If you are not sure, leave as is, or consult the network administrator. Selects this option to use the network environment through IPv6 (See "IPv6 Configuration" on page 6). Configure the network transmission speed. Selects this option to use the wireless network (See "Wireless network setup (CLX-3185FW/CLX-3185WK only)" on page 1). Reverts the network settings to the default values. This list shows information on your machine's network connection and configuration. Menu overview The control panel provides access to various menus to set up the machine or use the machine's functions. These menus can be accessed by pressing Menu. Some menus may not appear on the display depending on options or models. If so, it is not applicable to your machine. Items Fax Featureb Fax Setupb Copy Feature Option Darkness Resolution Scan Size Multi Send Delay Send Priority Send Forward Secure Receive Add Page Cancel Job Sending Redial Times Redial Term Prefix Dial ECM Mode Send Report Image TCR Receiving Receive Mode Ring To Answer Stamp RCV Name RCV Start Code Auto Reduction Discard Size Junk Fax Setup DRPD Mode Change Default Resolution Darkness Scan Size Auto Report Scan Size Reduce/Enlarge Darkness Original Type Layout Adjust Bkgd. Gray Enhance Eco Copy Machine status and advanced feature_ 4
-
 1
1 -
2
-
3
-
4
-
5
-
6
-
7
-
8
-
9
-
10
-
11
-
12
-
13
-
14
-
15
-
16
-
17
-
18
-
19
-
20
-
21
-
22
-
23
-
24
-
25
-
26
-
27
-
28
-
29
-
30
-
31
-
32
-
33
-
34
-
35
-
36
-
37
-
38
-
39
-
40
-
41
-
42
-
43
-
44
-
45
-
46
-
47
-
48
-
49
-
50
-
51
-
52
-
53
-
54
-
55
-
56
-
57
-
58
-
59
-
60
-
61
-
62
-
63
-
64
-
65
-
66
-
67
-
68
-
69
-
70
-
71
-
72
-
73
-
74
-
75
-
76
-
77
-
78
-
79
-
80
-
81
-
82
-
83
-
84
-
85
-
86
-
87
-
88
-
89
-
90
-
91
-
92
-
93
-
94
-
95
-
96
-
97
-
98
-
 99
99 -
 100
100 -
 101
101 -
 102
102 -
 103
103 -
 104
104 -
 105
105 -
 106
106 -
 107
107 -
 108
108 -
 109
109 -
110
-
111
-
112
-
113
-
114
-
115
-
116
-
117
-
118
-
119
-
120
-
121
-
122
-
123
-
124
-
125
-
126
-
127
-
128
-
129
-
130
-
131
-
132
-
133
-
134
-
135
-
136
-
137
-
138
-
139
-
140
-
141
-
142
-
143
-
144
-
145
-
146
-
147
-
148
-
149
-
150
-
151
 |
 |