Samsung CLX-3185FN User Manual (user Manual) (ver.2.00) (English) - Page 109
SmarThru, Using the Linux Unified Driver Configurator, Changing the Smart Panel Program Settings - black toner
 |
View all Samsung CLX-3185FN manuals
Add to My Manuals
Save this manual to your list of manuals |
Page 109 highlights
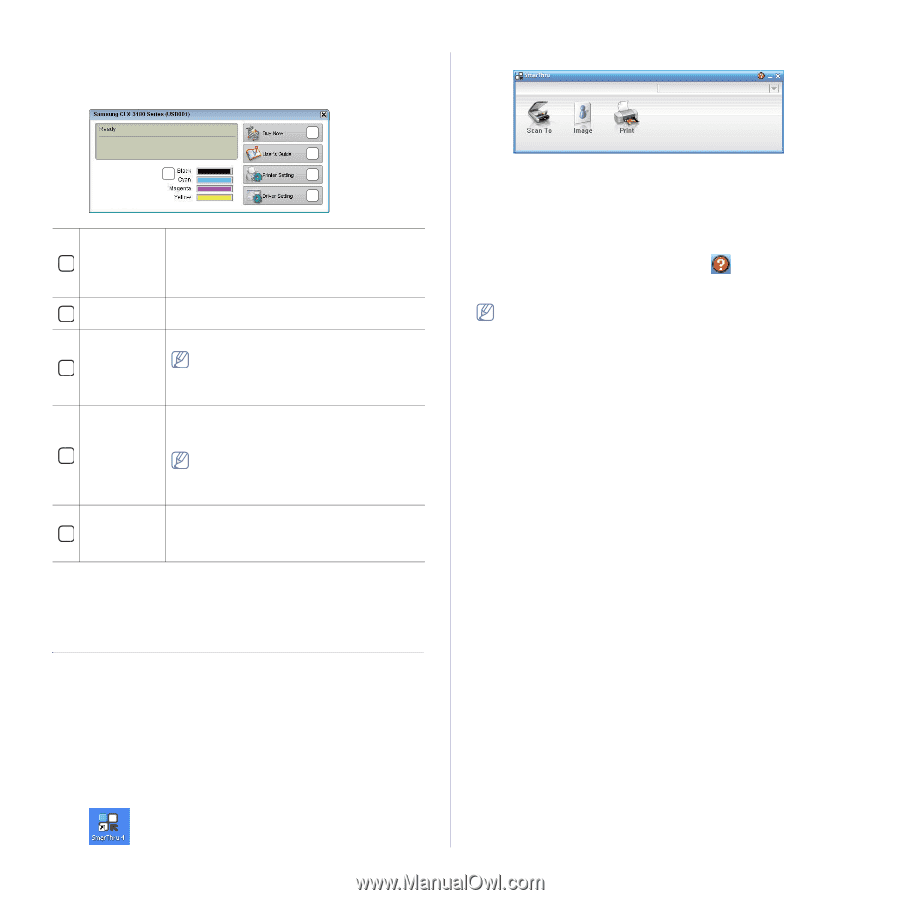
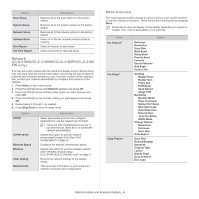
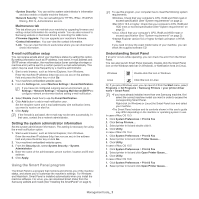
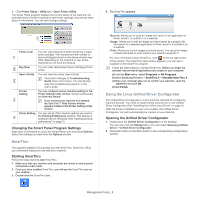
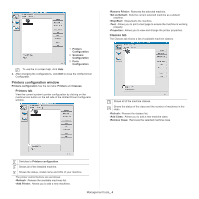
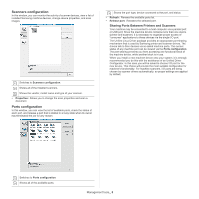
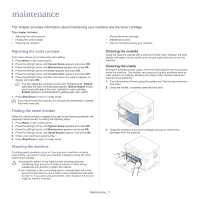
3. Click Printer Setup > Utility tab > Open Printer Utility. The Smart Panel program displays the current status of the machine, the estimated level of toner remaining in each toner cartridge, and various other types of information. You can also change settings. 2 3 1 4 5 Toner Level 1 You can view the level of toner remaining in each toner cartridge. The machine and the number of toner cartridge(s) shown in the above window may differ depending on the machine in use. Some machines do not have this feature. Buy Now 2 You can order replacement toner cartridge(s) from online. User's Guide You can view the online User's Guide. This button changes to Troubleshooting 3 Guide when error occurs. You can directly open the troubleshooting section in the user's guide. Printer Setting 4 You can configure various machine settings in the Printer Settings Utility window. Some machines do not have this feature. If you connect your machine to a network, the SyncThru™ Web Service window appears instead of the Printer Settings Utility window. Driver Setting You can set all of the machine options you need in the Printing Preferences window. This feature is 5 available only for Windows (See "Opening printing preferences" on page 2). Changing the Smart Panel Program Settings Right-click (in Windows or Linux) the Smart Panel icon and select Options. Select the settings you want from the Options window. SmarThru The supplied software CD provides you with SmarThru. SmarThru offers you convenient features to use with your machine. Starting SmarThru Follow the steps below to start SmarThru. 1. Make sure that your machine and computer are turned on and properly connected to each other. 2. Once you have installed SmarThru, you will see the SmarThru icon on your desktop. 3. Double-click the SmarThru icon. 4. The SmarThru appears. •Scan to: Allows you to scan an image and save it to an application or folder, email it, or publish it on a website. •Image: Allows you to edit an image you have saved as a graphic file and send it to a selected application or folder, email it, or publish it on a website. •Print: Allows you to print images you have saved. You can print images in black and white or color mode if your machine supports it. For more information about SmarThru, click at the top right corner of the window. The SmarThru help window appears; you can see it supplied on the SmarThru program. Follow the steps below to uninstall SmarThru. Before you begin the uninstall, ensure that all applications are closed on your computer. a)From the Start menu, select Programs or All Programs. b)Select Samsung Printers > SmarThru 4 > Uninstall SmarThru 4. c)When your computer asks you to confirm your selection, read the statement and click OK. d)Click Finish. Using the Linux Unified Driver Configurator The Unified Driver Configurator is a tool primarily intended for configuring machine devices. You need to install Unified Linux Driver to use Unified Driver Configurator (See "Installing the Unified Linux Driver" on page 4). After the driver is installed on your Linux system, the Unified Driver Configurator icon will automatically be created on your desktop. Opening the Unified Driver Configurator 1. Double-click the Unified Driver Configurator on the desktop. You can also click the Startup Menu icon and select Samsung Unified Driver > Unified Driver Configurator. 2. Click each button on the left to switch to the corresponding configuration window. Management tools_ 3
-
 1
1 -
2
-
3
-
4
-
5
-
6
-
7
-
8
-
9
-
10
-
11
-
12
-
13
-
14
-
15
-
16
-
17
-
18
-
19
-
20
-
21
-
22
-
23
-
24
-
25
-
26
-
27
-
28
-
29
-
30
-
31
-
32
-
33
-
34
-
35
-
36
-
37
-
38
-
39
-
40
-
41
-
42
-
43
-
44
-
45
-
46
-
47
-
48
-
49
-
50
-
51
-
52
-
53
-
54
-
55
-
56
-
57
-
58
-
59
-
60
-
61
-
62
-
63
-
64
-
65
-
66
-
67
-
68
-
69
-
70
-
71
-
72
-
73
-
74
-
75
-
76
-
77
-
78
-
79
-
80
-
81
-
82
-
83
-
84
-
85
-
86
-
87
-
88
-
89
-
90
-
91
-
92
-
93
-
94
-
95
-
96
-
97
-
98
-
99
-
100
-
101
-
102
-
103
-
 104
104 -
 105
105 -
 106
106 -
 107
107 -
 108
108 -
 109
109 -
 110
110 -
 111
111 -
 112
112 -
 113
113 -
 114
114 -
115
-
116
-
117
-
118
-
119
-
120
-
121
-
122
-
123
-
124
-
125
-
126
-
127
-
128
-
129
-
130
-
131
-
132
-
133
-
134
-
135
-
136
-
137
-
138
-
139
-
140
-
141
-
142
-
143
-
144
-
145
-
146
-
147
-
148
-
149
-
150
-
151
 |
 |