Samsung CLX-3185FN User Manual (user Manual) (ver.2.00) (English) - Page 135
Replacing the imaging unit, Supplies and accessories
 |
View all Samsung CLX-3185FN manuals
Add to My Manuals
Save this manual to your list of manuals |
Page 135 highlights
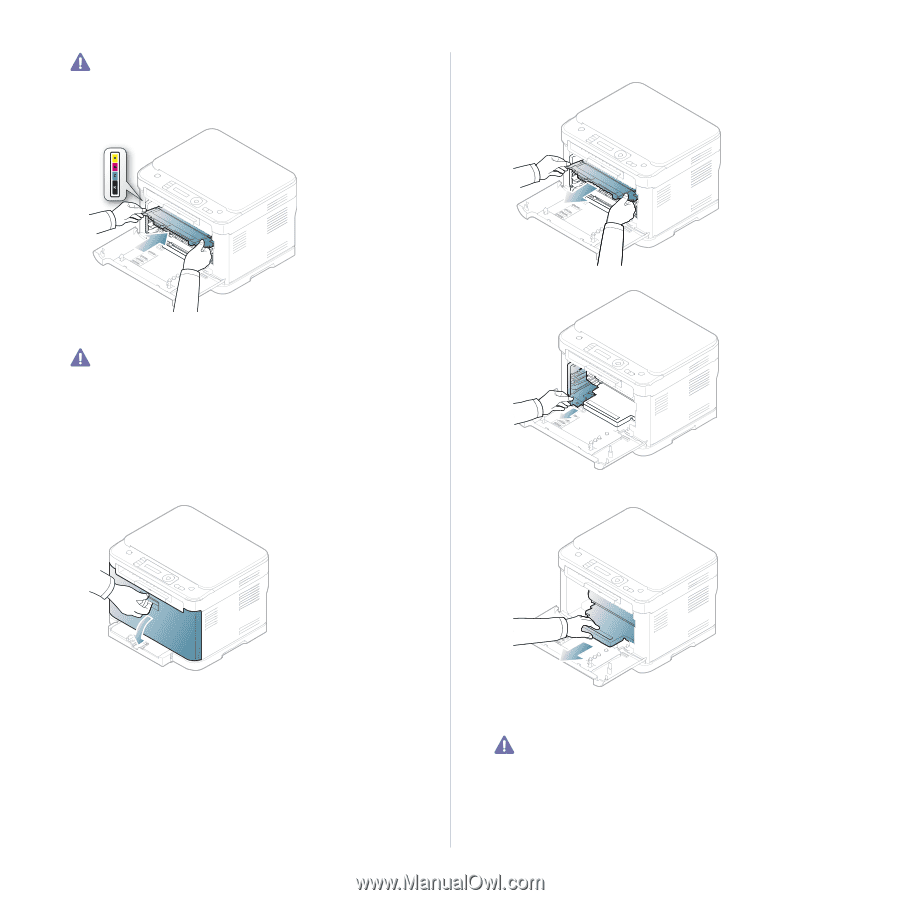
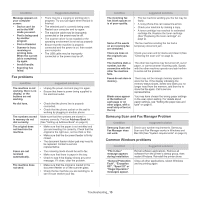
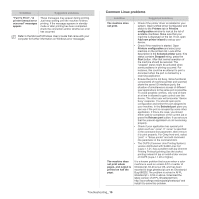
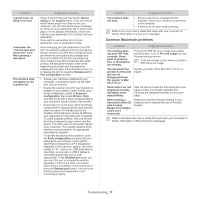
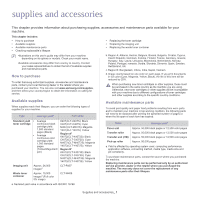
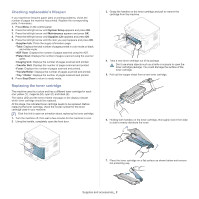
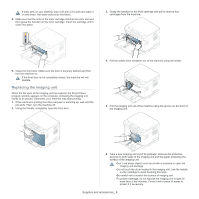
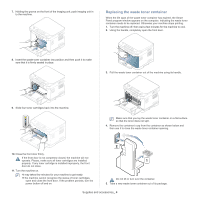
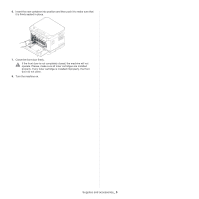
If toner gets on your clothing, wipe it off with a dry cloth and wash it in cold water. Hot water sets toner into fabric. 8. Make sure that the color of the toner cartridge matches the color slot and then grasp the handles on the toner cartridge. Insert the cartridge until it clicks into place. 3. Grasp the handles on the front cartridge and pull to remove four cartridges from the machine. 9. Close the front door. Make sure the door is securely latched and then turn the machine on. If the front door is not completely closed, the machine will not operate. Replacing the imaging unit When the life span of the imaging unit has expired, the Smart Panel program window appears on the computer, indicating the imaging unit needs to be placed. Otherwise, your machine may stop printing. 1. If the machine is printing from the computer or warming up, wait until the job ends. Then, turn the machine off. 2. Using the handle, completely open the front door. 4. Pull the waste toner container out of the machine using its handle. 5. Pull the imaging unit out of the machine using the groove on the front of the imaging unit. 6. Take a new imaging unit out of its package. Remove the protective devices on both sides of the imaging unit and the paper protecting the surface of the imaging unit. •Don't use sharp objects such as a knife or scissors to open the imaging unit package. •Do not touch the drum located in the imaging unit. Use the handle on the cartridge to avoid touching this area. •Be careful not to scratch the surface of imaging unit. •To prevent damage, do not expose the imaging unit to light for more than a few minutes. Cover it with a piece of paper to protect it if necessary. Supplies and accessories_ 3
-
 1
1 -
2
-
3
-
4
-
5
-
6
-
7
-
8
-
9
-
10
-
11
-
12
-
13
-
14
-
15
-
16
-
17
-
18
-
19
-
20
-
21
-
22
-
23
-
24
-
25
-
26
-
27
-
28
-
29
-
30
-
31
-
32
-
33
-
34
-
35
-
36
-
37
-
38
-
39
-
40
-
41
-
42
-
43
-
44
-
45
-
46
-
47
-
48
-
49
-
50
-
51
-
52
-
53
-
54
-
55
-
56
-
57
-
58
-
59
-
60
-
61
-
62
-
63
-
64
-
65
-
66
-
67
-
68
-
69
-
70
-
71
-
72
-
73
-
74
-
75
-
76
-
77
-
78
-
79
-
80
-
81
-
82
-
83
-
84
-
85
-
86
-
87
-
88
-
89
-
90
-
91
-
92
-
93
-
94
-
95
-
96
-
97
-
98
-
99
-
100
-
101
-
102
-
103
-
104
-
105
-
106
-
107
-
108
-
109
-
110
-
111
-
112
-
113
-
114
-
115
-
116
-
117
-
118
-
119
-
120
-
121
-
122
-
123
-
124
-
125
-
126
-
127
-
128
-
129
-
 130
130 -
 131
131 -
 132
132 -
 133
133 -
 134
134 -
 135
135 -
 136
136 -
 137
137 -
 138
138 -
 139
139 -
 140
140 -
141
-
142
-
143
-
144
-
145
-
146
-
147
-
148
-
149
-
150
-
151
 |
 |