Samsung CLX-3185FN User Manual (user Manual) (ver.2.00) (English) - Page 64
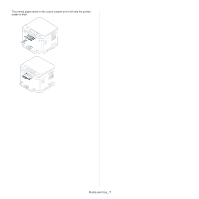
Media and tray, Slide the tray back into the machine.
 |
View all Samsung CLX-3185FN manuals
Add to My Manuals
Save this manual to your list of manuals |
Page 64 highlights
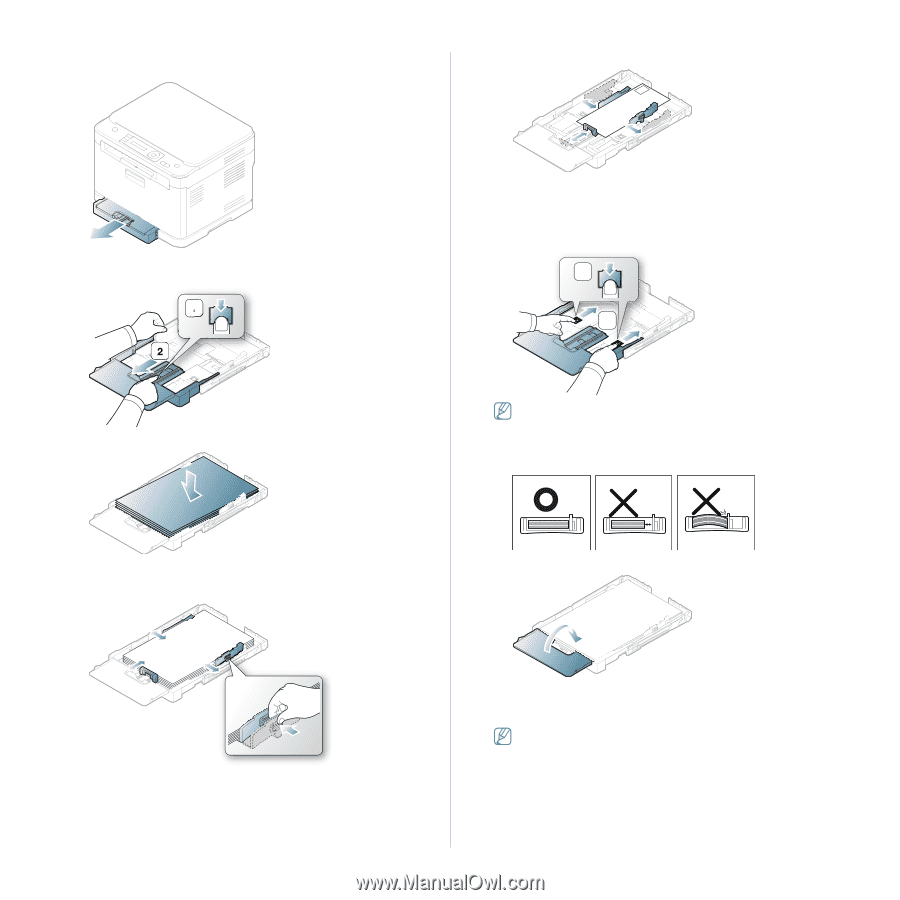
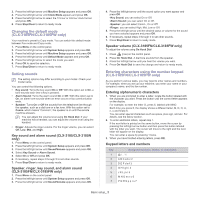
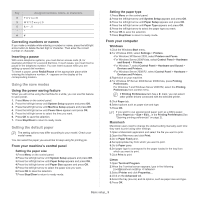
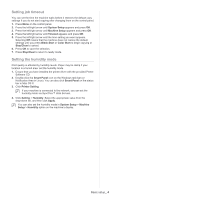
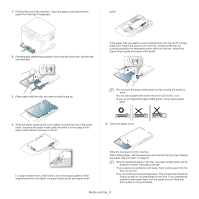
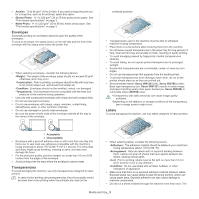
1. Pull the tray out of the machine. Open the paper cover and remove paper from the tray if necessary. guide. 2. Pressing and unlatching the guide lock in the top of the tray, pull the tray out manually. 1 If the paper that you need to print is shorter than 222 mm (8.74 inches), press and unlatch the guide lock in the tray. Unextend the tray by pushing manually the extended portion back into the tray. Adjust the paper length guide and paper width guide. 1 2 3. Place paper with the side you want to print facing up. •Do not push the paper width guide too far causing the media to warp. •Do not use a paper with more than 6 mm (0.24 inch.) curl. •If you do not adjust the paper width guide, it may cause paper jams. 4. Slide the paper length guide until it lightly touches the end of the paper stack. Squeeze the paper width guide and slide it to the edge of the paper stack without causing it to bend. 5. Close the paper cover. For paper smaller than Letter-sized, return the paper guides to their original positions and adjust the paper length guide and paper width Slide the tray back into the machine. After loading paper, set the paper type and size for the tray (See "Setting the paper size and type" on page 6). •Due to insufficient paper in the tray, the paper length guide can be pushed to inside, load paper enough. •If you experience problems with paper feed, load a paper into the tray one by one. •You can load previously printed paper. The printed side should be facing up with an uncurled edge at the front. If you experience problems with paper feed, turn the paper around. Note that print quality is not guaranteed. Media and tray_ 3
-
 1
1 -
2
-
3
-
4
-
5
-
6
-
7
-
8
-
9
-
10
-
11
-
12
-
13
-
14
-
15
-
16
-
17
-
18
-
19
-
20
-
21
-
22
-
23
-
24
-
25
-
26
-
27
-
28
-
29
-
30
-
31
-
32
-
33
-
34
-
35
-
36
-
37
-
38
-
39
-
40
-
41
-
42
-
43
-
44
-
45
-
46
-
47
-
48
-
49
-
50
-
51
-
52
-
53
-
54
-
55
-
56
-
57
-
58
-
 59
59 -
 60
60 -
 61
61 -
 62
62 -
 63
63 -
 64
64 -
 65
65 -
 66
66 -
 67
67 -
 68
68 -
 69
69 -
70
-
71
-
72
-
73
-
74
-
75
-
76
-
77
-
78
-
79
-
80
-
81
-
82
-
83
-
84
-
85
-
86
-
87
-
88
-
89
-
90
-
91
-
92
-
93
-
94
-
95
-
96
-
97
-
98
-
99
-
100
-
101
-
102
-
103
-
104
-
105
-
106
-
107
-
108
-
109
-
110
-
111
-
112
-
113
-
114
-
115
-
116
-
117
-
118
-
119
-
120
-
121
-
122
-
123
-
124
-
125
-
126
-
127
-
128
-
129
-
130
-
131
-
132
-
133
-
134
-
135
-
136
-
137
-
138
-
139
-
140
-
141
-
142
-
143
-
144
-
145
-
146
-
147
-
148
-
149
-
150
-
151
 |
 |