Samsung CLX-3185FN User Manual (user Manual) (ver.2.00) (English) - Page 65
Loading paper in the tray, Printing on special media, In the tray, Manual feeding in the tray
 |
View all Samsung CLX-3185FN manuals
Add to My Manuals
Save this manual to your list of manuals |
Page 65 highlights
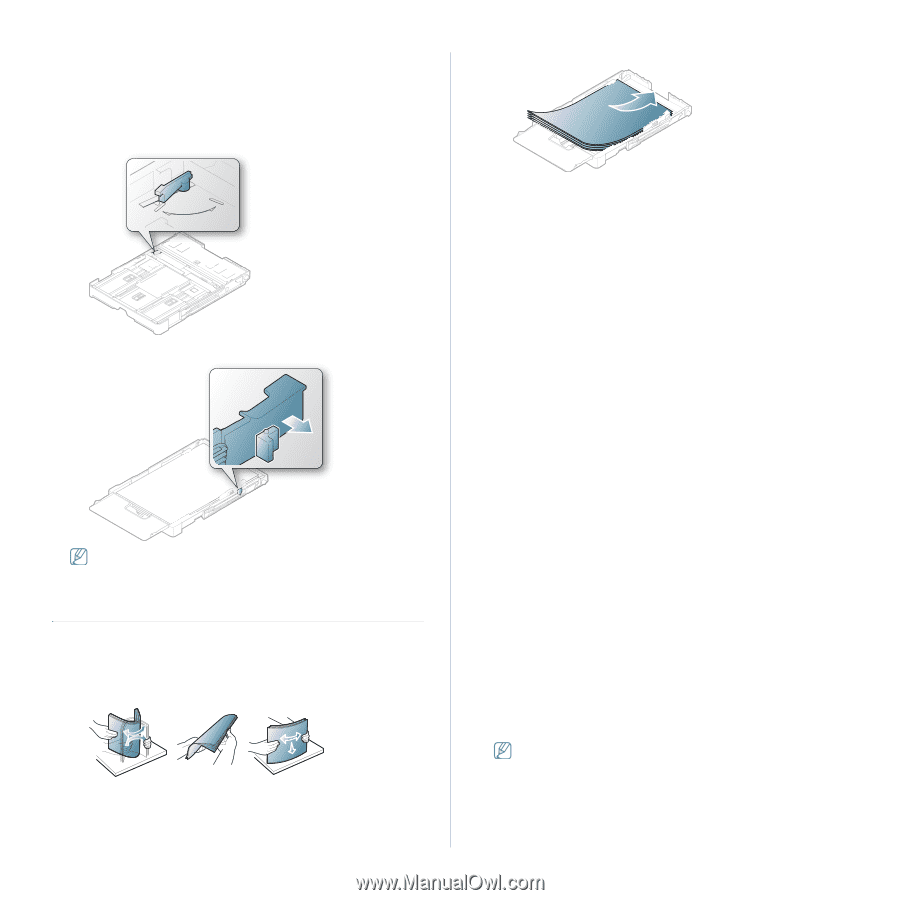
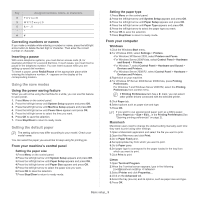
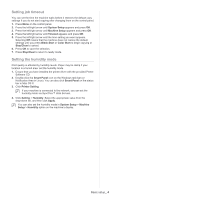
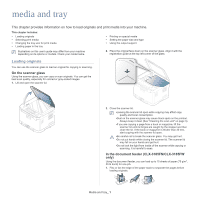
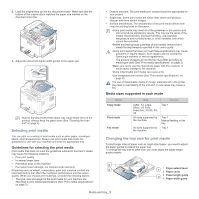
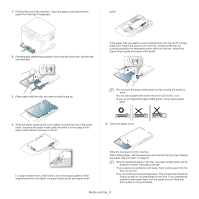
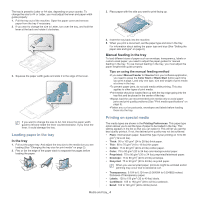
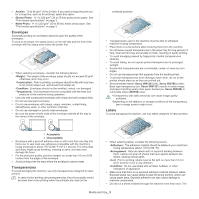
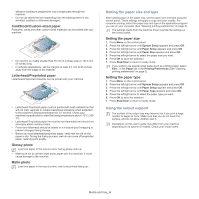
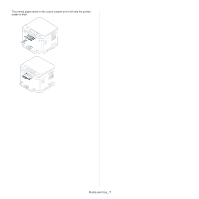
The tray is preset to Letter or A4 size, depending on your country. To change the size to A4 or Letter, you must adjust the lever and paper width guide properly. 1. Pull the tray out of the machine. Open the paper cover and remove paper from the tray if necessary. 2. If you want to change the size to Letter, turn over the tray, and hold the lever at the back and rotate it clockwise. 3. Place paper with the side you want to print facing up. LTR A4 3. Squeeze the paper width guide and slide it to the edge of the lever. LTR A4 4. Insert the tray back into the machine. 5. When you print a document, set the paper type and size in the tray. For information about setting the paper type and size (See "Setting the paper size and type" on page 6). Manual feeding in the tray To load different sizes of paper such as envelope, transparency, labels or custom-sized paper, you need to adjust the paper guides for manual feeding in the tray. To use manual feeding in the tray, you must adjust the paper length/width guide properly. Tips on using the manual feeding method •If you select Manual Feeder for Source from your software application, you need to press the Color Start or Black Start button each time you print a page. Load only one type, size and weight of print media at a time in the tray. •To prevent paper jams, do not add media while printing. This also applies to other types of print media. •Print media should be loaded face up with the top edge going into the tray first and be placed in the center of the tray. •Always load the use recommended print media only to avoid paper jams and print quality problems (See "Print media specifications" on page 3). •Flatten any curl on postcards, envelopes and labels before loading them into the tray. If you want to change the size to A4, first move the paper width guide to left and rotate the lever counterclockwise. If you force the lever, it could damage the tray. Loading paper in the tray In the tray 1. Pull out the paper tray. And adjust the tray size to the media size you are loading (See "Changing the tray size for print media" on page 2). 2. Flex or fan the edge of the paper stack to separate the pages before loading the paper. Printing on special media The media types are shown in the Printing Preferences. This paper type option allows you to set the type of paper to be loaded in the tray. This setting appears in the list so that you can select it. This will let you get the best quality printout. If not, the desired print quality may not be achieved. • Plain: Normal plain paper. Select this type if your printing on 70 to 90 g/m2 (19 to 24 lbs). • Thick: 90 to 105 g/m2 (24 to 28 lbs) thick paper. • Thin: 60 to 70 g/m2 (16 to 19 lbs) thin paper. • Cotton: 75 to 90 g/m2 (20 to 24 lbs) cotton paper. • Color: 75 to 90 g/m2 (20 to 24 lbs) color-backgrounded paper. • Preprinted: 75 to 90 g/m2 (20 to 24 lbs) preprinted/letterhead paper. • Envelope: 75 to 90 g/m2 (20 to 24 lbs) envelope. • Recycled: 75 to 90 g/m2 (20 to 24 lbs) recycled paper. When you use recycled paper, printouts might be wrinkled and/or jamming may occur due to excessive curl. • Transparency: 0.104 to 0.124 mm (0.004094 to 0.004882 inches) thickness of transparency paper. • Labels: 120 to 150 g/m2 (32 to 40 lbs) labels. • CardStock: 105 to 163 g/m2 (28 to 43 lbs) cardstock. • Bond: 105 to 120 g/m2 (28 to 32 lbs) bond. Media and tray_ 4
-
 1
1 -
2
-
3
-
4
-
5
-
6
-
7
-
8
-
9
-
10
-
11
-
12
-
13
-
14
-
15
-
16
-
17
-
18
-
19
-
20
-
21
-
22
-
23
-
24
-
25
-
26
-
27
-
28
-
29
-
30
-
31
-
32
-
33
-
34
-
35
-
36
-
37
-
38
-
39
-
40
-
41
-
42
-
43
-
44
-
45
-
46
-
47
-
48
-
49
-
50
-
51
-
52
-
53
-
54
-
55
-
56
-
57
-
58
-
59
-
 60
60 -
 61
61 -
 62
62 -
 63
63 -
 64
64 -
 65
65 -
 66
66 -
 67
67 -
 68
68 -
 69
69 -
 70
70 -
71
-
72
-
73
-
74
-
75
-
76
-
77
-
78
-
79
-
80
-
81
-
82
-
83
-
84
-
85
-
86
-
87
-
88
-
89
-
90
-
91
-
92
-
93
-
94
-
95
-
96
-
97
-
98
-
99
-
100
-
101
-
102
-
103
-
104
-
105
-
106
-
107
-
108
-
109
-
110
-
111
-
112
-
113
-
114
-
115
-
116
-
117
-
118
-
119
-
120
-
121
-
122
-
123
-
124
-
125
-
126
-
127
-
128
-
129
-
130
-
131
-
132
-
133
-
134
-
135
-
136
-
137
-
138
-
139
-
140
-
141
-
142
-
143
-
144
-
145
-
146
-
147
-
148
-
149
-
150
-
151
 |
 |