Samsung CLX-3185FN User Manual (user Manual) (ver.2.00) (English) - Page 71
Using help, Using special print features, Printing multiple s on one sheet of paper
 |
View all Samsung CLX-3185FN manuals
Add to My Manuals
Save this manual to your list of manuals |
Page 71 highlights
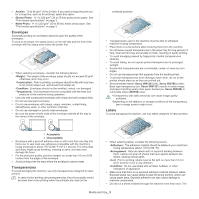
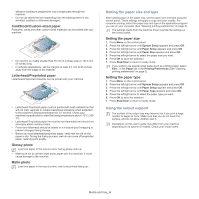
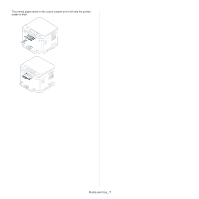
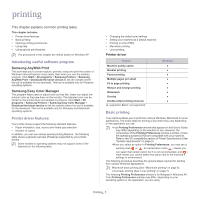
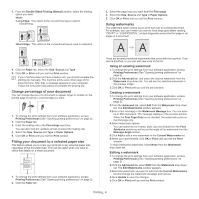
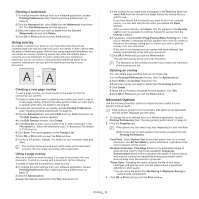
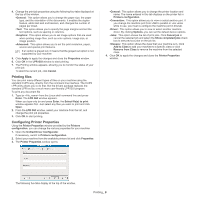
Using help Click the question mark on the upper-right corner of the window and click on the topic you want to know about. Then a pop up window appears with information about that option's feature, which is provided from the driver. If you want to search information via a keyword, click the Samsung tab in the Printing Preferences window and enter a keyword in the input line of the Help option. To get information about supplies, driver update, registration and so on, click appropriate buttons. Using special print features Special print features include the followings. • "Printing multiple pages on one sheet of paper" on page 3. • "Printing posters" on page 3. • "Printing booklets (Manual)" on page 3. • "Printing on both sides of the paper (Manual)" on page 3. • "Change percentage of your document" on page 4. • "Fitting your document to a selected paper size" on page 4. • "Using watermarks" on page 4. • "Using overlay" on page 5. • "Advanced Options" on page 5. Printing multiple pages on one sheet of paper You can select the number of pages to print on a single sheet of paper. To print more than one page per sheet, the pages will be reduced in size and arranged in the order you specify. You can print up to 16 pages on one sheet. 1. To change the print settings from your software application, access Printing Preferences (See "Opening printing preferences" on page 2). 2. Click the Basic tab, select Multiple Pages per Side in the Type drop-down list. 3. Select the number of pages you want to print per sheet (2, 4, 6, 9, or 16) in the Pages per Side drop-down list. 4. Select the page order from the Page Order drop-down list, if necessary. 5. Check Print Page Border to print a border around each page on the sheet. 6. Click the Paper tab, select the Size, Source and Type. 7. Click OK or Print until you exit the Print window. Printing posters This feature allows you to print a single-page document onto 9 sheets of paper, for the purpose of pasting the sheets together to form one poster-size document. 1. To change the print settings from your software application, access Printing Preferences (See "Opening printing preferences" on page 2). 2. Click the Basic tab, select Poster Printing in the Type drop-down list. 3. Select the page layout you want. Available layouts: •Poster 2x2: Document will be enlarged and be divided into 4 pages. •Poster 3x3: Document will be enlarged and be divided into 9 pages. •Poster 4x4: Document will be enlarged and be divided into 16 pages. 4. Select the Poster Overlap value. Specify Poster Overlap in millimeters or inches by selecting the radio button on the upper right of Basic tab to make it easier to paste the sheets together. 5. Click the Paper tab, select the Size, Source and Type. 6. Click OK or Print until you exit the Print window. 7. You can complete the poster by pasting the sheets together. Printing booklets (Manual) This feature prints your document on both sides of a paper and arranges the pages so that the paper can be folded in half after printing to produce a booklet. 8 9 1. To change the print settings from your software application, access the Printing Preferences (See "Opening printing preferences" on page 2). 2. Click the Basic tab, select Booklet Printing from the Type drop-down list. 3. Click the Paper tab, select the Size, Source and Type. The Booklet Printing option is not available for all paper sizes. In order to find out the available paper size for this feature, select the available paper size in the Size option on the Paper tab. If you select an unavailable paper size, this option can be automatically canceled. Select only available paper (paper without or mark). 4. Click OK or Print until you exit the Print window. 5. After printing, fold and staple the pages. Printing on both sides of the paper (Manual) You can print on both sides of a paper (duplex). Before printing, decide how you want your document oriented. You can use this feature with Letter, Legal, A4, US Folio or Oficio sized paper (See "Print media specifications" on page 3). We recommend not to print on both sides of special media such as labels, envelopes or thick paper. It may cause a paper jam or damage the machine. 1. To change the print settings from your software application, access Printing Preferences (See "Opening printing preferences" on page 2). 2. Click the Advance tab. Printing_ 3
-
 1
1 -
2
-
3
-
4
-
5
-
6
-
7
-
8
-
9
-
10
-
11
-
12
-
13
-
14
-
15
-
16
-
17
-
18
-
19
-
20
-
21
-
22
-
23
-
24
-
25
-
26
-
27
-
28
-
29
-
30
-
31
-
32
-
33
-
34
-
35
-
36
-
37
-
38
-
39
-
40
-
41
-
42
-
43
-
44
-
45
-
46
-
47
-
48
-
49
-
50
-
51
-
52
-
53
-
54
-
55
-
56
-
57
-
58
-
59
-
60
-
61
-
62
-
63
-
64
-
65
-
 66
66 -
 67
67 -
 68
68 -
 69
69 -
 70
70 -
 71
71 -
 72
72 -
 73
73 -
 74
74 -
 75
75 -
 76
76 -
77
-
78
-
79
-
80
-
81
-
82
-
83
-
84
-
85
-
86
-
87
-
88
-
89
-
90
-
91
-
92
-
93
-
94
-
95
-
96
-
97
-
98
-
99
-
100
-
101
-
102
-
103
-
104
-
105
-
106
-
107
-
108
-
109
-
110
-
111
-
112
-
113
-
114
-
115
-
116
-
117
-
118
-
119
-
120
-
121
-
122
-
123
-
124
-
125
-
126
-
127
-
128
-
129
-
130
-
131
-
132
-
133
-
134
-
135
-
136
-
137
-
138
-
139
-
140
-
141
-
142
-
143
-
144
-
145
-
146
-
147
-
148
-
149
-
150
-
151
 |
 |