Samsung CLX 6240FX User Manual (ENGLISH) - Page 133
Printing on Both Sides of Paper, Printing a Reduced or Enlarged Document
 |
UPC - 635753721089
View all Samsung CLX 6240FX manuals
Add to My Manuals
Save this manual to your list of manuals |
Page 133 highlights
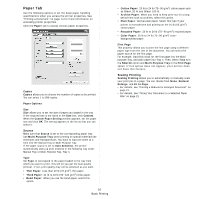
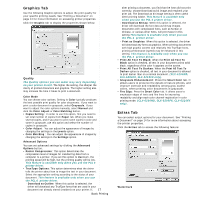
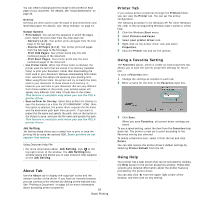
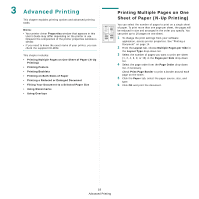
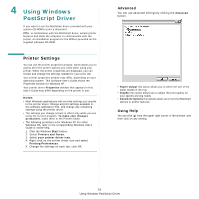
Printing on Both Sides of Paper You can print on both sides of a sheet of paper. Before printing, decide how you want your document oriented. The options are: • Printer Setting, if you select this option, this feature is determined by the setting you've made on the control panel of the printer. If this option does not appear, your printer does not have this feature. • None • Long Edge, which is the conventional layout used in book binding. • Short Edge, which is the type often used with calendars. 2 2 2 3 5 3 5 ▲ Long Edge 3 2 5 3 5 ▲ Short Edge • Reverse Duplex Printing, allows you to select general print order compare to duplex print order. If this option does not appear, your printer does not have this feature. A NOTE: Do not print on both sides of labels, transparencies, envelopes, or thick paper. Paper jamming and damage to the printer may result. 1 To change the print settings from your software application, access printer properties. "Printing a Document" on page 14. 2 From the Layout tab, select the paper orientation. 3 From the Double-sided Printing section, select the binding option you want. 4 Click the Paper tab and select the paper source, size, and type. 5 Click OK and print the document. NOTE: If your printer does not have a duplex unit, you should complete the printing job manually. The printer prints every other page of the document first. After printing the first side of your job, the Printing Tip window appears. Follow the onscreen instructions to complete the printing job. Printing a Reduced or Enlarged Document You can change the size of a page's content to appear larger or smaller on the printed page. 1 To change the print settings from your software application, access printer properties. See "Printing a Document" on page 14. 2 From the Paper tab, select Reduce/Enlarge in the Printing Type drop-down list. 3 Enter the scaling rate in the Percentage input box. You can also click the or button. 4 Select the paper source, size, and type in Paper Options. 5 Click OK and print the document. Fitting Your Document to a Selected Paper Size This printer feature allows you to scale your print job to any selected paper size regardless of the digital document size. This can be useful when you want to check fine details on a small document. 1 To change the print settings from your software application, access printer properties. See "Printing a Document" on page 14. 2 From the Paper tab, select Fit to Page in the Printing Type drop-down list. 3 Select the correct size from the Output size drop-down list. 4 Select the paper source, size, and type in Paper Options. 5 Click OK and print the document. 21 Advanced Printing
-
 1
1 -
2
-
3
-
4
-
5
-
6
-
7
-
8
-
9
-
10
-
11
-
12
-
13
-
14
-
15
-
16
-
17
-
18
-
19
-
20
-
21
-
22
-
23
-
24
-
25
-
26
-
27
-
28
-
29
-
30
-
31
-
32
-
33
-
34
-
35
-
36
-
37
-
38
-
39
-
40
-
41
-
42
-
43
-
44
-
45
-
46
-
47
-
48
-
49
-
50
-
51
-
52
-
53
-
54
-
55
-
56
-
57
-
58
-
59
-
60
-
61
-
62
-
63
-
64
-
65
-
66
-
67
-
68
-
69
-
70
-
71
-
72
-
73
-
74
-
75
-
76
-
77
-
78
-
79
-
80
-
81
-
82
-
83
-
84
-
85
-
86
-
87
-
88
-
89
-
90
-
91
-
92
-
93
-
94
-
95
-
96
-
97
-
98
-
99
-
100
-
101
-
102
-
103
-
104
-
105
-
106
-
107
-
108
-
109
-
110
-
111
-
112
-
113
-
114
-
115
-
116
-
117
-
118
-
119
-
120
-
121
-
122
-
123
-
124
-
125
-
126
-
127
-
 128
128 -
 129
129 -
 130
130 -
 131
131 -
 132
132 -
 133
133 -
 134
134 -
 135
135 -
 136
136 -
 137
137 -
 138
138 -
139
-
140
-
141
-
142
-
143
-
144
-
145
-
146
-
147
-
148
-
149
-
150
-
151
-
152
-
153
-
154
-
155
-
156
-
157
-
158
-
159
-
160
-
161
 |
 |