Samsung CLX 6240FX User Manual (ENGLISH) - Page 30
Using the save modes, Setting print job timeout, Auto continue, Net accounting
 |
UPC - 635753721089
View all Samsung CLX 6240FX manuals
Add to My Manuals
Save this manual to your list of manuals |
Page 30 highlights
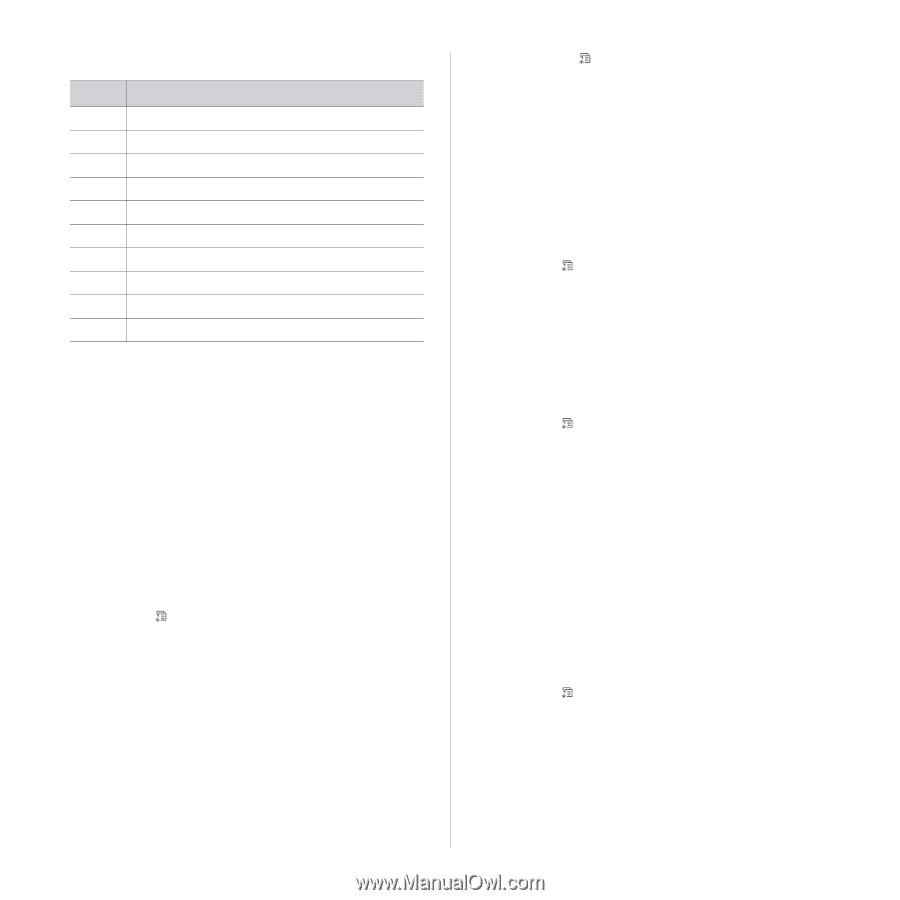
Keypad letters and numbers KEY 1 2 3 4 5 6 7 8 9 0 ASSIGNED NUMBERS, LETTERS, OR CHARACTERS 1 Space A B C a b c 2 D E F d e f 3 GHI ghi4 J K L j k l 5 M N O m n o 6 P Q R S p q r s 7 T U V t u v 8 W X Y Z w x y z 9 0 Correcting numbers or names If you make a mistake while entering a number or name, press the left left/right arrow button to delete the last digit or character. Then enter the correct number or character. Inserting a pause With some telephone systems, you must dial an access code (9, for example) and listen for a second dial tone. In such cases, you must insert a pause in the telephone number. You can insert a pause while you are setting up speed buttons or speed dial numbers. To insert a pause, press Redial/Pause at the appropriate place while entering the telephone number. A - appears on the display at the corresponding location. Using the save modes Power Save mode Power Save mode allows your machine to reduce power consumption when it is not in actual use. You can turn this mode on and select a length of time for which the machine waits after a job is printed before it switches to a reduced power state. 1. Press Menu ( ) until System Setup appears on the bottom line of the display and press OK. 2. Press OK when Machine Setup appears. 3. Press the left/right arrow until Power Save appears and press OK. 4. Press the left/right arrow until the time setting you want appears and press OK. 5. Press Stop/Clear to return to ready mode. Scan Power Save mode Scan Power Save mode allows you to save power by turning off the scan lamp. The scan lamp under the scanner glass automatically turns off when it is not in actual use to reduce power consumption and extend the life of the lamp. The lamp automatically wakes up after some warmup time when you start scanning. You can set the length of time for which the scan lamp waits after a scan job is completed before it switches to the power save mode. 30 _Getting started 1. Press Menu ( ) until System Setup appears on the bottom line of the display and press OK. 2. Press OK when Machine Setup appears. 3. Press the left/right arrow until Scan PWR Save appears and press OK. 4. Press the left/right arrow until the time setting you want appears and press OK. 5. Press Stop/Clear to return to ready mode. Setting print job timeout You can set the amount of time a single print job is active before it must print.The machine handles incoming data as a single job if it comes in within the specified time. When an error occurs while processing data from the computer and the data flow stops, the machine waits the specified time and then cancels printing if data flow does not resume. 1. Press Menu ( ) until System Setup appears on the bottom line of the display and press OK. 2. Press OK when Machine Setup appears. 3. Press the left/right arrow until Job Timeout appears and press OK. 4. Press the left/right arrow until the time setting you want appears and press OK. 5. Press Stop/Clear to return to ready mode. Auto continue This is the option to set the machine to continue printing or not, in case the paper size you have set and the paper within the tray mismatches. 1. Press Menu ( ) until System Setup appears on the bottom line of the display and press OK. 2. Press OK when Machine Setup appears. 3. Press the left/right arrow until Auto Continue appears and press OK. 4. Press the left/right arrow until the binding option you want appears. • On: Automatically prints after set time passes, when the paper size mismatches the tray paper size. • Off: Waits until you press Black Start or Color Start on the control panel, when the paper size mismatches the tray paper size. 5. Press OK to save your selection. 6. Press Stop/Clear to return to ready mode. Net accounting Net Accounting function limits the number of use for fax, printer, copy and scan. First, user need to install Net account Plug-in from SyncThru™ Web Admin Service. Create user account by entering user ID and Password in SyncThru™ Web Admin Service. If you are not registered, request Administrator for a registration. (See page 26) 1. Press Menu ( ) until System Setup appears on the bottom line of the display and press OK. 2. Press OK when Machine Setup appears. 3. Press the left/right arrow until Net Accounting appears and press OK. 4. Press the left/right arrow until the option you want appears and press OK. • Protect: Select the option for which you want to enable or disable Net Accounting. • Chg.Password: The access password code can be changed. 5. Press Stop/Clear to return to ready mode.
-
 1
1 -
2
-
3
-
4
-
5
-
6
-
7
-
8
-
9
-
10
-
11
-
12
-
13
-
14
-
15
-
16
-
17
-
18
-
19
-
20
-
21
-
22
-
23
-
24
-
 25
25 -
 26
26 -
 27
27 -
 28
28 -
 29
29 -
 30
30 -
 31
31 -
 32
32 -
 33
33 -
 34
34 -
 35
35 -
36
-
37
-
38
-
39
-
40
-
41
-
42
-
43
-
44
-
45
-
46
-
47
-
48
-
49
-
50
-
51
-
52
-
53
-
54
-
55
-
56
-
57
-
58
-
59
-
60
-
61
-
62
-
63
-
64
-
65
-
66
-
67
-
68
-
69
-
70
-
71
-
72
-
73
-
74
-
75
-
76
-
77
-
78
-
79
-
80
-
81
-
82
-
83
-
84
-
85
-
86
-
87
-
88
-
89
-
90
-
91
-
92
-
93
-
94
-
95
-
96
-
97
-
98
-
99
-
100
-
101
-
102
-
103
-
104
-
105
-
106
-
107
-
108
-
109
-
110
-
111
-
112
-
113
-
114
-
115
-
116
-
117
-
118
-
119
-
120
-
121
-
122
-
123
-
124
-
125
-
126
-
127
-
128
-
129
-
130
-
131
-
132
-
133
-
134
-
135
-
136
-
137
-
138
-
139
-
140
-
141
-
142
-
143
-
144
-
145
-
146
-
147
-
148
-
149
-
150
-
151
-
152
-
153
-
154
-
155
-
156
-
157
-
158
-
159
-
160
-
161
 |
 |