Samsung CLX 6240FX User Manual (ENGLISH) - Page 71
Troubleshooting, Tips for avoiding paper jams, Clearing document jams, Input Misfeed
 |
UPC - 635753721089
View all Samsung CLX 6240FX manuals
Add to My Manuals
Save this manual to your list of manuals |
Page 71 highlights
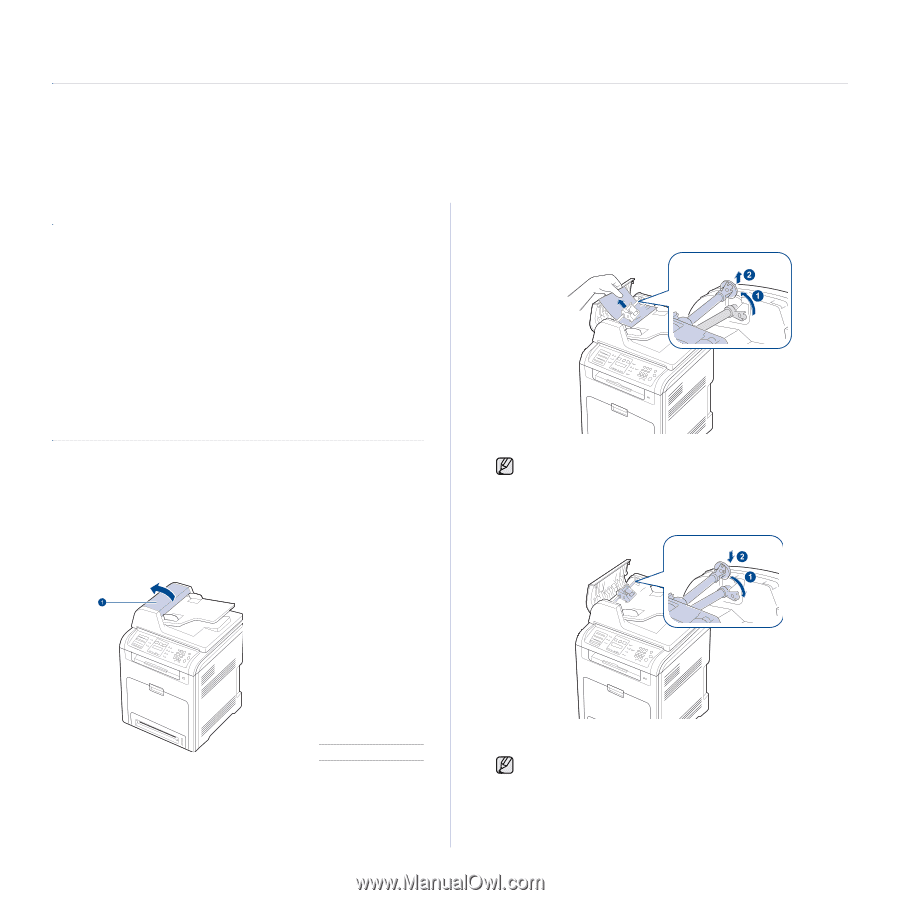
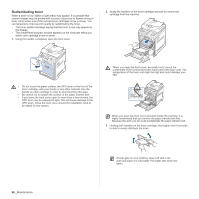
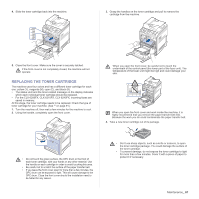
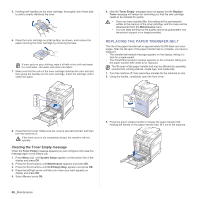
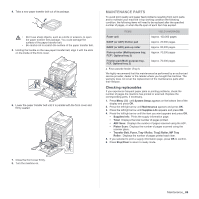
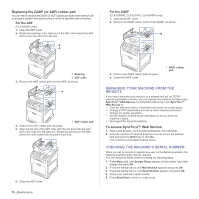
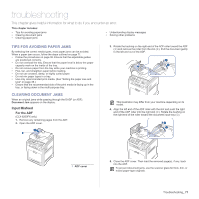
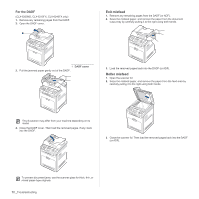
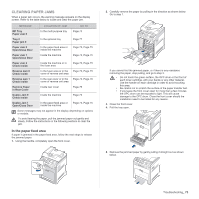
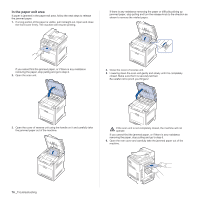
troubleshooting This chapter gives helpful information for what to do if you encounter an error. This chapter includes: • Tips for avoiding paper jams • Clearing document jams • Clearing paper jams • Understanding display messages • Solving other problems TIPS FOR AVOIDING PAPER JAMS By selecting the correct media types, most paper jams can be avoided. When a paper jam occurs, follow the steps outlined on page 71. • Follow the procedures on page 36. Ensure that the adjustable guides are positioned correctly. • Do not overload the tray. Ensure that the paper level is below the paper capacity mark on the inside of the tray. • Do not remove paper from the tray while your machine is printing. • Flex, fan, and straighten paper before loading. • Do not use creased, damp, or highly curled paper. • Do not mix paper types in a tray. • Use only recommended print media. (See "Setting the paper size and type" on page 38.) • Ensure that the recommended side of the print media is facing up in the tray, or facing down in the multi-purpose tray. CLEARING DOCUMENT JAMS When an original jams while passing through the DADF (or ADF), Document Jam appears on the display. Input Misfeed For the ADF (CLX-6200FX only) 1. Remove any remaining pages from the ADF. 2. Open the ADF cover. 3. Rotate the bushing on the right end of the ADF roller toward the ADF (1) and remove the roller from the slot (2). Pull the document gently to the left and out of the ADF. This illustration may differ from your machine depending on its model. 4. Align the left end of the ADF roller with the slot and push the right end of the ADF roller into the right slot (1). Rotate the bushing on the right end of the roller toward the document input tray (2). 1 ADF cover 5. Close the ADF cover. Then load the removed page(s), if any, back into the ADF. To prevent document jams, use the scanner glass for thick, thin, or mixed paper-type originals. Troubleshooting_ 71
-
 1
1 -
2
-
3
-
4
-
5
-
6
-
7
-
8
-
9
-
10
-
11
-
12
-
13
-
14
-
15
-
16
-
17
-
18
-
19
-
20
-
21
-
22
-
23
-
24
-
25
-
26
-
27
-
28
-
29
-
30
-
31
-
32
-
33
-
34
-
35
-
36
-
37
-
38
-
39
-
40
-
41
-
42
-
43
-
44
-
45
-
46
-
47
-
48
-
49
-
50
-
51
-
52
-
53
-
54
-
55
-
56
-
57
-
58
-
59
-
60
-
61
-
62
-
63
-
64
-
65
-
 66
66 -
 67
67 -
 68
68 -
 69
69 -
 70
70 -
 71
71 -
 72
72 -
 73
73 -
 74
74 -
 75
75 -
 76
76 -
77
-
78
-
79
-
80
-
81
-
82
-
83
-
84
-
85
-
86
-
87
-
88
-
89
-
90
-
91
-
92
-
93
-
94
-
95
-
96
-
97
-
98
-
99
-
100
-
101
-
102
-
103
-
104
-
105
-
106
-
107
-
108
-
109
-
110
-
111
-
112
-
113
-
114
-
115
-
116
-
117
-
118
-
119
-
120
-
121
-
122
-
123
-
124
-
125
-
126
-
127
-
128
-
129
-
130
-
131
-
132
-
133
-
134
-
135
-
136
-
137
-
138
-
139
-
140
-
141
-
142
-
143
-
144
-
145
-
146
-
147
-
148
-
149
-
150
-
151
-
152
-
153
-
154
-
155
-
156
-
157
-
158
-
159
-
160
-
161
 |
 |