Samsung CLX 6240FX User Manual (ENGLISH) - Page 74
In the multi-purpose tray, Troubleshooting
 |
UPC - 635753721089
View all Samsung CLX 6240FX manuals
Add to My Manuals
Save this manual to your list of manuals |
Page 74 highlights
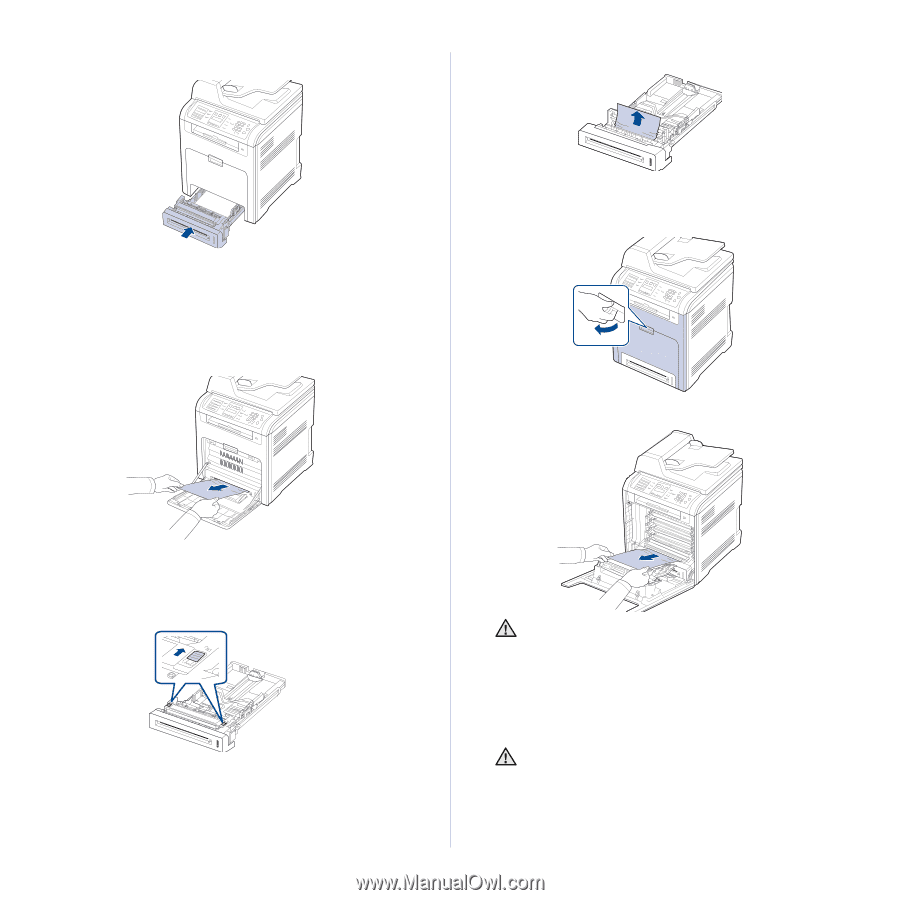
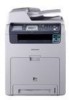
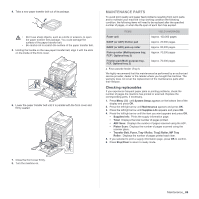
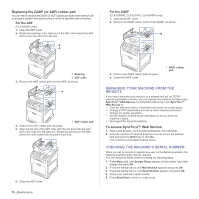
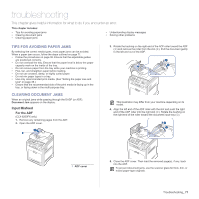
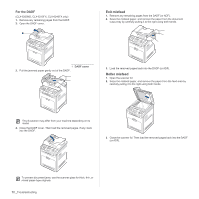
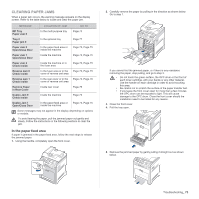
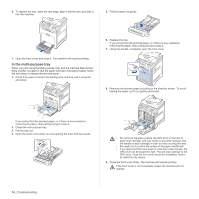
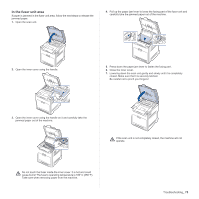
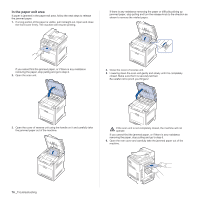
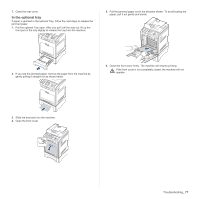
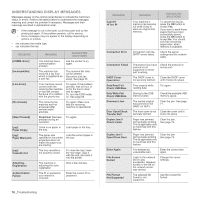
6. To replace the tray, lower the rear edge, align it with the slot, and slide it into the machine. 5. Pull the paper out gently. 7. Open the front cover and close it. The machine will resume printing. In the multi-purpose tray When you print using the Multi-purpose Tray and the machine detects that there is either no paper or that the paper has been improperly loaded, follow the next steps to release the jammed paper. 1. Check if the paper is stuck in the feeding area, and if so, pull it out gently and slowly. 6. Replace the tray. If you cannot find the jammed paper, or if there is any resistance removing the paper, stop pulling and go to step 8. 7. Using the handle, completely open the front cover. 8. Remove the jammed paper by pulling in the direction shown. To avoid tearing the paper, pull it out gently and slowly. If you cannot find the jammed paper, or if there is any resistance removing the paper, stop pulling and go to step 2. 2. Close the multi-purpose tray. 3. Pull the tray out. 4. Open the inner cover while you are pushing the lever with two hands. • Do not touch the green surface, the OPC drum or the front of each toner cartridge, with your hands or any other material. Use the handle on each cartridge in order to avoid touching this area. • Be careful not to scratch the surface of the paper transfer belt. • If you leave the front cover open for more than a few minutes, the OPC drum can be exposed to light. This will cause damage to the OPC drum. Close the front cover should the installation need to be halted for any reason. 9. Close the front cover firmly. The machine will resume printing. If the front cover is not completely closed, the machine will not operate. 74 _Troubleshooting
-
 1
1 -
2
-
3
-
4
-
5
-
6
-
7
-
8
-
9
-
10
-
11
-
12
-
13
-
14
-
15
-
16
-
17
-
18
-
19
-
20
-
21
-
22
-
23
-
24
-
25
-
26
-
27
-
28
-
29
-
30
-
31
-
32
-
33
-
34
-
35
-
36
-
37
-
38
-
39
-
40
-
41
-
42
-
43
-
44
-
45
-
46
-
47
-
48
-
49
-
50
-
51
-
52
-
53
-
54
-
55
-
56
-
57
-
58
-
59
-
60
-
61
-
62
-
63
-
64
-
65
-
66
-
67
-
68
-
 69
69 -
 70
70 -
 71
71 -
 72
72 -
 73
73 -
 74
74 -
 75
75 -
 76
76 -
 77
77 -
 78
78 -
 79
79 -
80
-
81
-
82
-
83
-
84
-
85
-
86
-
87
-
88
-
89
-
90
-
91
-
92
-
93
-
94
-
95
-
96
-
97
-
98
-
99
-
100
-
101
-
102
-
103
-
104
-
105
-
106
-
107
-
108
-
109
-
110
-
111
-
112
-
113
-
114
-
115
-
116
-
117
-
118
-
119
-
120
-
121
-
122
-
123
-
124
-
125
-
126
-
127
-
128
-
129
-
130
-
131
-
132
-
133
-
134
-
135
-
136
-
137
-
138
-
139
-
140
-
141
-
142
-
143
-
144
-
145
-
146
-
147
-
148
-
149
-
150
-
151
-
152
-
153
-
154
-
155
-
156
-
157
-
158
-
159
-
160
-
161
 |
 |