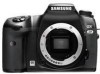
Samsung GX-20 Quick Guide (ENGLISH)
Samsung GX-20 - Digital Camera SLR Manual
 |
UPC - 044701008736
View all Samsung GX-20 manuals
Add to My Manuals
Save this manual to your list of manuals |
Samsung GX-20 manual content summary:
- Samsung GX-20 | Quick Guide (ENGLISH) - Page 1
is in the focus. Auto mode helps users take a picture in very easy steps with correct exposure and auto focusing. Auto mode is designed for those who are using a DSLR (Digital Single Lens reflex) camera for the first time. 5 Now you can take a picture using the shutter button. AF(Auto Focusing) Frame - Samsung GX-20 | Quick Guide (ENGLISH) - Page 2
program mode P (Automatic Program Exposure) mode Auto mode helps users take a picture in very easy steps with correct exposure and auto focusing. Auto mode is designed for those who are using a DSLR (Digital Single Lens reflex) camera for the first time. Auto mode, Aperture: f = 2.8, Shutter speed
-
 1
1 -
 2
2
 |
 |

Using the MENU button
1
Press the
MENU
button.
- The [
CAPTURE MENU
] menu appears on the LCD monitor.
Use the front dial (
) to move forward to the next screen in the
current menu and use the rear dial (
) to jump to the next menu.
2
[
CAPTURE MENU (
)
], [
CUSTOM1
MENU (
)
], [
CUSTOM2 MENU
(
)], [
SETUP MENU (
)
], and
[
PLAYBACK MENU (
)
] menu
appear in order each time the direction
buttons (
)
is pressed.
Using the LCD panel
The following information appears in the LCD panel on top of the camera.
1
Set the Mode dial to
Auto
mode
(
).
- The camera will select the
optimal shooting mode for the
subject.
2
Set the focus mode lever to
SAF
.
- In the SAF mode, the shutter
can be released only when the
image is focused
3
Look through the viewfinder to
view the subject.
- A zoom lens can be used to
change the size of the subject
in the viewfinder.
4
Position the subject inside the
autofocus frame and press the
shutter release button halfway.
- The autofocus system operates.
The focus indicator(
) appears
in the viewfinder with the beep
sound as soon as the subject is
in the focus.
5
Now you can take a picture using the
shutter button.
Playing Back Still Pictures
1
Press the playback button (
).
- The most recently captured image
(image with the largest file number) is
displayed on the LCD monitor.
2
Once images disappear on the LCD monitor, you can playback the images
or rotate them on your LCD monitor.
Focus indicator
Using the Viewfinder
When the power is turned on, the current setting values appears in the
viewfinder as soon as you press the shutter button halfway.
Using the full automatic
program mode
Auto mode
helps users take a picture in very easy steps with correct exposure
and auto focusing. Auto mode is designed for those who are using a DSLR
(Digital Single Lens reflex) camera for the first time.
Using the Menu
Setting the focus
Selecting the Focusing Area (AF Point)
Choose the part of the viewfinder to set focus to. The selected AF point appears
red in the viewfinder. (Superimpose AF Area).
Auto
The camera selects the optimum AF point even if the subject
is not centered.
Select
Sets the AF point to one of the eleven points in the AF area.
Centre
Sets the AF point to the centre of the viewfinder.
Set the desired program mode using the
Focus point selection dial.
For more information about how to select the focusing area, see the user
manual shipped with the product.
For more information about the functions described in this quick start guide,
please see the user manual shipped with the product.
AF fine adjustment
You can adjust the
AF
(Auto Focusing) accuracy by using the
[
AF fine adjustment
] function.
●
AF fine-tuning is available for up to 20 registered lenses. Lens ID is
required for [
AF fine adjustment
].
● You can use the [
AF fine adjustment
] function as in the following images
for example.
Both pictures are taken while focusing on the central area (the ball located
in the centre) in the viewfinder.
You can set the drive mode, white balance value, flash type, and the ISO
sensitivity by simply pressing the
Fn
button on the rear of the camera.
1
Press the
Fn
button when the power is
turned on.
2
You can select the desired menu option by using the direction buttons (
).
Using the Fn button
Flash status
Appears when flash
is available and
blinks when flash is
recommended but
not set.
Shutter speed
Shutter speed when capturing or
adjusting. (Shutter speed can be
adjusted using this front dial (
)
and rear dial (
).)
Aperture
Shutter speed when capturing or
adjusting. (Aperture value can be
adjusted using this front dial (
)
and rear dial (
).)
Focus indicator
Appears when image
is focused.
Number of recordable images
/ EV compensation
Shows the number of recordable
images (including the number of
recordable images using the Drive
mode.) with current quality and
recorded pixel setting. The differences
between the compensated exposure
and proper exposure will be displayed.
In the M mode, the exposure value can
be different. In the Sensitivity priority
mode / Shutter & Aperture Priority
mode, ISO sensitivity will display.
OIS (Optical Image
Stabilization) indicator
Manual Focus
Appears when the
Manual Focus is
selected.
Exposure Bar
Displays the Exposure
Compensation Value.
The differences between
Current Exposure Value
and Proper Exposure
Value in the M mode.
AE Lock indicator
Appears when AE is locked.
EV compensation
Appears when EV compensation is available or in use.
Indicates the RAW
file format is selected.
It appears when the file format is
selected to RAW (RAW+).
ISO Indicator
Flash Exposure Compensation
Shutter speed
Flash Exposure Compensation indicator
Exposure compensation
Battery status
RAW/RAW+
button in
use
White Balance (If Auto WB is selected,
no icon will display)
± : White Balance Compensation
Number of recordable images /
EV compensation value / PC (Pb)
(PC=Personal Computer
(Removable disk), (Pb=PictBridge))
Drive mode
: Single frame
: Continuous Shot
: Self-timer
:
Remote control
mode
Aperture stop
Flash mode
:
Built-in flash is ready (when
blinking, flash should be used;
or incorrect lens is mounted)
: Red-eye reduction flash on
: Auto discharge
SLOW
:
First curtain synchro /
Rear curtain synchro
W
: Wireless Mode
Auto Bracket
Displays the ISO sensitivity
Multi Exposure
Focus point
AF Frame
Spot metering frame
AF Frame
Quick Guide
<Playback the
previous image>
<Playback the
next image>
<Selected image rotates anti-clockwise whenever pressed>
▲
AF range is far
from the target
you focused on.
▲
Adding stops on the
plus (+), the current
depth of
field has
moved to the target
point.
Exposure Bar
<
White balance
mode>
<
ISO Sensitivity
mode>
<
Drive
mode>
<
Flash
mode>
CAPTURE MENU
: Move
: Exit
Picture Wizard
File Format
JPEG Size
JPEG Quality
Colour Space
Set RAW Button
Liveview
Standard
JPEG
14.6M
sRGB
1 time
: Exit
: Move
AF(Auto Focusing) Frame
OK
button
MENU
button
LCD Monitor
Direction buttons
Rear dial
Front dial