Samsung HLR5656W Owner Instructions
Samsung HLR5656W - 56" Rear Projection TV Manual
 |
View all Samsung HLR5656W manuals
Add to My Manuals
Save this manual to your list of manuals |
Samsung HLR5656W manual content summary:
- Samsung HLR5656W | Owner Instructions - Page 1
Owner's Instructions HL-R4656W HL-R5056W HL-R5656W HL-R6156W Register your product at www.samsung.com/global/register - Samsung HLR5656W | Owner Instructions - Page 2
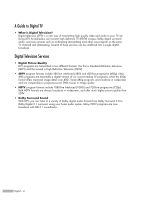
TV (HDTV) images, Dolby digital surround audio, and new services such as multicasting (transmitting more than one program on the same TV channel) and datacasting. Several of these services can be combined into a single digital broadcast. Digital Television Services • Digital Picture Quality - Samsung HLR5656W | Owner Instructions - Page 3
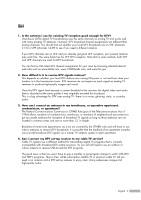
are running full power or not and how close your location Commission's OTARD Rule (part of the Telecommunications Act TV service? Cable TV systems use a different method for transmitting digital TV DTV and HDTV programs. They're free, unlike subscription satellite TV or premium cable TV. All you - Samsung HLR5656W | Owner Instructions - Page 4
Analog Amplifier 24 Operation 26 Turning the TV On and Off 26 Viewing the Menus and On-Screen Displays 26 Selecting a Menu Language 27 Memorizing the Channels 28 Adding and Erasing Channels 30 Changing Channels 31 Customizing Your Remote Control 32 Remote Control Codes 33 Setting the Clock - Samsung HLR5656W | Owner Instructions - Page 5
(On-Screen Text Messages) Analog 84 Viewing Closed Captions (On-Screen Text Messages) Digital 86 Using the Guide ...88 Using Game Mode 90 Appendix 92 Replacing the Lamp 92 Troubleshooting ...94 Cleaning and Maintaining Your TV 95 Using Your TV in Another Country 95 Specifications ...95 - Samsung HLR5656W | Owner Instructions - Page 6
SAMSUNG - Samsung HLR5656W | Owner Instructions - Page 7
Your New Wide TV - Samsung HLR5656W | Owner Instructions - Page 8
Your New Wide TV Viewing Position To optimize your viewing comfort, please follow the guidelines below for viewing distance. If viewing for an extended period of time, sit as far back from the screen as possible. When installing the product, make sure to keep it away from the wall (more than 10 cm - Samsung HLR5656W | Owner Instructions - Page 9
, it has these special features: • Easy-to-operate remote control • Easy-to-use on-screen menu system you can access from right side buttons or remote control • Automatic timer to turn the TV on and off at any time you choose • Adjustable picture and sound settings and the ability to memorize your - Samsung HLR5656W | Owner Instructions - Page 10
on the right side panel control your TV's basic features, including the on-screen menu system. To use the more advanced features, you must use the remote control. Press to switch between viewing TV programs and signals from connected components. Press to see the on-screen menu. Press to raise or - Samsung HLR5656W | Owner Instructions - Page 11
the status of your TV. POWER Press to turn the TV on and off. Indicator Light Key : Light is On : Light is Blinking : Light is Off Remote Control Sensor Aim the remote control towards this spot on the TV. TIMER LAMP STAND BY/TEMP Indication Standby state. The picture will automatically appear - Samsung HLR5656W | Owner Instructions - Page 12
jacks on the rear panel of your TV. For more information, see "Connections". antennas or your cable system. (Refer to pages 16~18) ´ SERVICE This jack is for software upgrades. ˇ S-VIDEO INPUT jacks Connects Anynet Owner's Instruction. This jack is for connecting to other Samsung Anynet-enabled - Samsung HLR5656W | Owner Instructions - Page 13
to the Anynet Owner's Instruction. 9. MENU Displays the main on-screen menu. 10. CH.LIST Displays the channel list. 11. FAV.CH (Favorite Channel) Press to switch between your favorite channels. 12. MODE Selects a target device to be controlled by the Samsung remote control (i.e., TV, STB, VCR, CABLE - Samsung HLR5656W | Owner Instructions - Page 14
you notice a performance degradation while using the remote, the batteries may need to be replaced. Make sure you replace both batteries and do not mix old and new batteries in the remote control. If you won't be using the remote control for a long time, remove the batteries and store them in a cool - Samsung HLR5656W | Owner Instructions - Page 15
Connections - Samsung HLR5656W | Owner Instructions - Page 16
Connections Connecting VHF and UHF Antennas If you do not have a cable system, you will need to connect an antenna to your TV. Antennas with 75-ohm Round Leads If your antenna looks like this: it has 75-ohm round leads. 1 Plug the antenna lead into the ANT 2 - Samsung HLR5656W | Owner Instructions - Page 17
that descrambles some or all channels. Cable without a Cable Box 1 Plug the incoming cable into the ANT 1 IN (CABLE) on the rear panel of your TV. Cable with a Cable Box that Descrambles All Channels 1 Find the cable connected to the ANTENNA OUT terminal on your Cable box. This terminal might be - Samsung HLR5656W | Owner Instructions - Page 18
an RF (A/B) switch, and four coaxial cables (which you can buy from your Samsung dealer or any electronics store). 1 Find and disconnect the cable OUT terminal of the RF (A/B) switch and the ANT 1 IN (CABLE) on the TV. After you've made this connection, set the A/B switch to the "A" position for - Samsung HLR5656W | Owner Instructions - Page 19
/Audio cables between the VIDEO or S-VIDEO/AUDIO input jacks on the TV and VIDEO or S-VIDEO/AUDIO output jacks on the VCR. TV Rear Panel NOTES • For better video, use an S-Video cable. • Please be sure to match the color coded input terminals and cable jacks. Incoming Cable or Antenna or Stereo - Samsung HLR5656W | Owner Instructions - Page 20
, connect L(mono) to the Camcorder audio out using only one audio cable. 3 Connect a video cable between the VIDEO IN (or S-VIDEO IN) jack on the TV and the VIDEO OUT jack on the Camcorder. The audio-video cables shown here are usually included with a Camcorder. (If not, check your local electronics - Samsung HLR5656W | Owner Instructions - Page 21
on the DVD player. 2 Connect a video cable between the VIDEO IN (1 or 2) jack on the TV and the VIDEO OUT jack on the DVD player. DVD Player TV Rear Panel Incoming Cable or Antenna 2 1 NOTE • For an explanation of Component video, see your DVD player's owner's manual. DVD Player English - 21 - Samsung HLR5656W | Owner Instructions - Page 22
the Set-Top Box. NOTES • For an explanation of Component video, see your Set-Top Box owner's manual. • Requires a Cable Converter. • Make sure the DVI source's power is on, or you will be unable to select it in the TV menu's source list. English - 22 Incoming Cable or Antenna 2 1 DTV Set-Top Box - Samsung HLR5656W | Owner Instructions - Page 23
HDMI cable between the HDMI/DVI IN jack on the TV and the HDMI OUT jack on the Set-Top Box. TV Rear Panel NOTE • Make sure the HDMI/DVI source's power is on, or you will be unable to select it in the TV menu's source list. Incoming Cable or Antenna DTV Set-Top - Samsung HLR5656W | Owner Instructions - Page 24
more information, see your audio system owner's manual. 1 If your audio system has an optical digital audio input TV's Sound Menu and adjust the volume level with the volume control of the amplifier. NOTE • If using the HDMI or Component input on the TV, the audio output signal is available only when the TV - Samsung HLR5656W | Owner Instructions - Page 25
Operation - Samsung HLR5656W | Owner Instructions - Page 26
Turning the TV On and Off Press the POWER button on the remote control. You can also use the POWER button on the front panel. Viewing the Menus and On-Screen Displays The on-screen menu system allows you to control the settings of your TV. Access the on-screen menu system by pressing the MENU - Samsung HLR5656W | Owner Instructions - Page 27
to select "Setup", then press the ENTER button. Setup Input Picture Sound Channel Setup Guide Language : English √ Time √ V-Chip √ Caption √ Menu Transparency : Medium √ Blue Screen : Off √ Color Weakness √ Function Help : Off √ Move Enter Return 2 Press the ENTER button to - Samsung HLR5656W | Owner Instructions - Page 28
type of signal source that is connected to the TV (i.e., an antenna or cable system). 1 Press the MENU button. Press the ... or † button to select "Channel", then press the ENTER button. Channel Input Picture Sound Channel Setup Guide Antenna : Air Auto Program Add/Delete Favorite Channels - Samsung HLR5656W | Owner Instructions - Page 29
to an antenna in order to receive digital TV signals. Even if a particular channel is deleted from the memory, you can always tune to that channel directly by using the number buttons on the remote control. Input Picture Sound Channel Setup Guide Auto Program Select the cable system. Analog STD - Samsung HLR5656W | Owner Instructions - Page 30
were not memorized (or delete unwanted channels from memory). 1 Press the MENU button. Press the ... or † button to select "Channel", then press the ENTER button. Channel Input Picture Sound Channel Setup Guide Antenna : Air Auto Program Add/Delete Favorite Channels Name Fine Tune Signal - Samsung HLR5656W | Owner Instructions - Page 31
channel 7-2 (analog), press "7", then "-", then "2", and you will see as right. Air 7-2 Mono Picture Mode Sound Mode MTS Caption V-Chip 12:00 am Standard Standard Stereo On Off Using the Previous Channel Press the PRE-CH button. The TV changes to the last channel you were watching. English - 31 - Samsung HLR5656W | Owner Instructions - Page 32
VCR (Cable box or DVD player) 1 Turn off your VCR (Cable box or DVD player). 2 Press the MODE button to switch the remote control to the VCR (CABLE or DVD) mode. The remote control has five modes: TV, STB, VCR, CABLE, and DVD. 3 On your Samsung remote control, press the SET button. 4 Enter 3 digits - Samsung HLR5656W | Owner Instructions - Page 33
Remote Control Codes VCR Codes Cable Box Codes DVD Codes English - 33 - Samsung HLR5656W | Owner Instructions - Page 34
Manually 1 Press the MENU button. Press the ... or † button to select "Setup", then press the ENTER button. Setup Input Picture Sound Channel Setup Guide Language : English √ Time √ V-Chip √ Caption √ Menu Transparency : Medium √ Blue Screen : Off √ Color Weakness √ Function Help - Samsung HLR5656W | Owner Instructions - Page 35
Picture Sound Channel Setup Guide Language : English √ Time √ V-Chip √ Caption √ Menu Transparency : Medium √ Blue Screen : Off √ Color Weakness √ Function Help between the real time and set time, please set the time manually. 5 Press the ... or † button to select "DST"(Daylight - Samsung HLR5656W | Owner Instructions - Page 36
Activation to "Yes" by pressing ... or † button. Setup Input Picture Sound Channel Setup Guide Language : English √ Time √ V-Chip √ Caption √ Menu Transparency : Medium √ Blue Screen : Off √ Color Weakness √ Function Help : Off √ Move Enter Return Time Input 1/ 1/ 2005/ 12 - Samsung HLR5656W | Owner Instructions - Page 37
" automatically. Press the EXIT button to exit. Setup Input Picture Sound Channel Setup Guide Language : English √ Time √ V-Chip √ Caption √ Menu Transparency : Medium √ Blue Screen : Off √ Color Weakness √ Function Help : Off √ Move Enter Return Time Input 1/ 1/ 2005/ 12 - Samsung HLR5656W | Owner Instructions - Page 38
Use the remote control to switch between viewing signals from connected equipment, such as a VCR, DVD, Set-Top Box or the TV source (broadcast or cable). Setting the Signal Source 1 Press the MENU button. Press the ENTER button to select "Input". Input Input Source List : TV Picture Edit Name - Samsung HLR5656W | Owner Instructions - Page 39
enables you to name the input source you have connected. 1 Press the MENU button. Press the ENTER button to select "Input". Input Input Source List : TV Edit Name Picture Anynet Sound Channel Setup Guide Move Enter √ √ Return 2 Press the ... or † button to select "Edit Name", then - Samsung HLR5656W | Owner Instructions - Page 40
SAMSUNG - Samsung HLR5656W | Owner Instructions - Page 41
Channel Control - Samsung HLR5656W | Owner Instructions - Page 42
TV and CATV). This allows you to quickly and easily find frequently watched channels by pressing the FAV.CH button on the remote control. To Store Your Favorite Channels: 1 Press the MENU button. Press the ... or † button to select "Channel", then press the ENTER button. Channel Input Picture - 42 - Samsung HLR5656W | Owner Instructions - Page 43
to the channel that 2 Press the MENU button. Press the ... or † button to select "Channel", then press the ENTER button. Press the ... or † button to select "Name", then press the ENTER button. Channel Input Picture Sound Channel Setup Guide Antenna : Air Auto Program Add/Delete Favorite - Samsung HLR5656W | Owner Instructions - Page 44
Use fine tuning to manually adjust a particular channel for optimal reception. NOTE • Only analog TV channels can be fine tuned. 1 Press the MENU button. Press the ... or † button to select "Channel", then press the ENTER button. Channel Input Picture Sound Channel Setup Guide Antenna : Cable - Samsung HLR5656W | Owner Instructions - Page 45
, which can vary in reception quality from "snowy" to clear, digital (HDTV) channels have either perfect reception quality or you will not receive them at the MENU button. Press the ... or † button to select "Channel", then press the ENTER button. Channel Input Picture Sound Channel Setup Guide - Samsung HLR5656W | Owner Instructions - Page 46
the MENU button. Press the ... or † button to select "Channel", then press the ENTER button. 2 Press the ... or † button to select "LNA", then press the ENTER button. 3 Press the ... or † button to select "On" or "Off", then press the ENTER button. Channel Input Picture Sound Channel Setup Guide - Samsung HLR5656W | Owner Instructions - Page 47
Picture Control - Samsung HLR5656W | Owner Instructions - Page 48
G 50 Color Tone Reset :DSyntaanmdicard Standard 90 Movie 50 Custom 65 60 R 50 : Warm1 Move Enter Return Alternate method Press the P.MODE button on the remote control repeatedly to select the desired picture mode. Standard English - 48 • Choose "Dynamic" for viewing the TV during - Samsung HLR5656W | Owner Instructions - Page 49
recalls your personalized picture settings. 1 Press the MENU button. Press the ... or † button to select "Picture", then press the ENTER button. Picture Input Mode : Standard √ Picture Size Digital NR : 16:9 : On √ √ Sound DNIe Demo : Off √ My Color Control √ Channel Film Mode - Samsung HLR5656W | Owner Instructions - Page 50
Picture Control 5 Press the ENTER button to return to "Mode". Press the ... or † button to select "Color Tone", then press the ENTER button. 6 Press the ... or † button to select a particular option (Cool2, Cool1, Normal, Warm1, or Warm2), then press the ENTER button. - Samsung HLR5656W | Owner Instructions - Page 51
MENU button. Press the ... or † button to select "Picture", then press the ENTER button. Press the ... or † button to select "Size", then press the ENTER button. Picture Input Mode : Standard √ Picture Size Digital NR : 16:9 : On √ √ Sound DNIe Demo : Off √ My Color Control √ Channel - Samsung HLR5656W | Owner Instructions - Page 52
Picture Control Digital Noise Reduction If the broadcast signal received by your TV is weak, you can activate the Digital Noise Reduction feature to help reduce any static and ghosting that may appear on the screen. 1 Press the MENU button. Press the ... or † button to select "Picture", then press - Samsung HLR5656W | Owner Instructions - Page 53
: Off √ Setup Guide Move Enter Return Picture Input Picture Sound Channel Setup Mode : Standard Size : 16:9 Digital NR : On DNIe Demo : OOfff My Color Control On Film Mode : Off Guide Move Enter Return Alternate method Press the DNIe button under the remote's cover repeatedly - Samsung HLR5656W | Owner Instructions - Page 54
without affecting other colors on the screen. NOTE • Changing the settings in the "Detail Control" menu (see next page) will automatically set the My Color Control mode to "Custom". Using the Easy Control Menu 1 Press the MENU button. Press the ... or † button to select "Picture", then press the - Samsung HLR5656W | Owner Instructions - Page 55
for My Color Control colors. 4 Press the MENU button to display the "Detail Control" menu. Press the ... or † button to select "Reset", then press the ENTER button. The previously adjusted My Color Control colors will be reset to the factory defaults. Detail Control Input Picture Sound Pink - Samsung HLR5656W | Owner Instructions - Page 56
select "Setup", then press the ENTER button. Setup Input Picture Sound Channel Setup Guide Language : English √ Time √ V-Chip √ Caption √ Menu Transparency : Medium √ Blue Screen : Off √ Color Weakness √ Function Help : Off √ Move Enter Return 2 Press the ... or † button to - Samsung HLR5656W | Owner Instructions - Page 57
DNIe Demo : Off √ My Color Control √ Channel Film Mode : Off √ Setup Guide Move Enter Return Picture Input Picture Sound Channel Setup Mode : Standard Size : 16:9 Digital NR : On DNIe Demo : Off My Color Control Film Mode : OOffff On Guide Move Enter Return NOTE • Film - Samsung HLR5656W | Owner Instructions - Page 58
Picture Control Freezing the Picture Press the STILL button to freeze a moving picture. (Normal sound will still be heard.) Press again to cancel. English - 58 - Samsung HLR5656W | Owner Instructions - Page 59
Chip √ Caption √ Menu Transparency : Medium √ Blue Screen : Off √ Color Weakness √ Function Help : Off √ Move Enter Return Setup Input Picture Sound Channel Setup Guide Language : English Time V-Chip Caption Menu Transparency : Medium Blue Screen : OOffff Color Weakness On - Samsung HLR5656W | Owner Instructions - Page 60
SAMSUNG - Samsung HLR5656W | Owner Instructions - Page 61
Sound Control - Samsung HLR5656W | Owner Instructions - Page 62
the MUTE Button At any time, you can temporarily cut off the sound. Press the MUTE button on the remote control. The message "Mute" is displayed and the sound cuts off. Mute To turn mute off, press the MUTE button again or press either the VOL+ or VOL- button. Customizing the Sound The - Samsung HLR5656W | Owner Instructions - Page 63
"Custom", which automatically recalls your personalized sound settings. 1 Press the MENU button. Press the ... or † button to select "Sound", then press the ENTER button. Sound Input Picture Sound Channel Setup Guide Mode : Custom √ Equalizer √ DNSe : Off √ Multi-Track Options √ Auto - Samsung HLR5656W | Owner Instructions - Page 64
raising the sound output when the modulation signal is low. 1 Press the MENU button. Press the ... or † button to select "Sound", then press ENTER button. Press the EXIT button to exit. Sound Input Picture Sound Channel Setup Guide Mode : Custom √ Equalizer √ DNSe : Off √ Multi-Track - Samsung HLR5656W | Owner Instructions - Page 65
upon the program. 1 Press the MENU button. Press the ... or † button to select "Sound", then press the ENTER button. 2 Press the ... or † button to select "Multi-Track Options", then press the ENTER button. Sound Input Picture Sound Channel Setup Guide Mode : Custom √ Equalizer √ DNSe - Samsung HLR5656W | Owner Instructions - Page 66
being broadcast, you can listen to Mono, Stereo or SAP. 1 Press the MENU button. Press the ... or † button to select "Sound", then press the ENTER button. Sound Input Picture Sound Channel Setup Guide Mode : Custom √ Equalizer √ DNSe : Off √ Multi-Track Options √ Auto Volume : Off - Samsung HLR5656W | Owner Instructions - Page 67
rear-panel connector on your TV. The digital sound output is See the owner's manual of your Digital Audio component for further information. 1 Press the MENU button. Press the Press the EXIT button to exit. Sound Input Picture Sound Channel Setup Guide Mode : Custom √ Equalizer √ DNSe : - Samsung HLR5656W | Owner Instructions - Page 68
Control Selecting the Internal Mute When using a device such as a Home Theater or Amplifier with external speakers, you can set Internal Mute to On to cut off sound from the TV's internal speakers. 1 Press the MENU to exit. Sound Input Picture Sound Channel Setup Guide Mode : Custom √ - Samsung HLR5656W | Owner Instructions - Page 69
melody sound can be set to come on when the TV is powered On or Off. 1 Press the MENU button. Press the ... or † button to select "Sound the ENTER button. Press the EXIT button to exit. Sound Input Picture Sound Channel Setup Guide Mode : Custom √ Equalizer √ DNSe : Off √ Multi-Track - Samsung HLR5656W | Owner Instructions - Page 70
engine) DNSe enhances the sound quality, automatically controls output, and prevents sound distortion. 1 Press the MENU button. Press the ... or † button and "Off". Press the EXIT button to exit. Sound Input Picture Sound Channel Setup Guide Mode : Custom √ Equalizer √ DNSe : Off √ Multi- - Samsung HLR5656W | Owner Instructions - Page 71
Special Features - Samsung HLR5656W | Owner Instructions - Page 72
select "Setup", then press the ENTER button. Setup Input Picture Sound Channel Setup Guide Language : English √ Time √ V-Chip √ Caption √ Menu Transparency : Medium √ Blue Screen : Off √ Color Weakness √ Function Help : Off √ Move Enter Return 2 Press the ... or † button to - Samsung HLR5656W | Owner Instructions - Page 73
select "Setup", then press the ENTER button. Setup Input Picture Sound Channel Setup Guide Language : English √ Time √ V-Chip √ Caption √ Menu Transparency : Medium √ Blue Screen : Off √ Color Weakness √ Function Help : Off √ Move Enter Return 2 Press the ... or † button to - Samsung HLR5656W | Owner Instructions - Page 74
select "V-Chip", then press the ENTER button. Setup Input Picture Sound Channel Setup Guide Language : English √ Time √ V-Chip √ Caption √ Menu Transparency : Medium √ Blue Screen : Off √ Color Weakness √ Function Help : Off √ Move Enter Return 2 Press the number buttons to - Samsung HLR5656W | Owner Instructions - Page 75
select "V-Chip", then press the ENTER button. Setup Input Picture Sound Channel Setup Guide Language : English √ Time √ V-Chip √ Caption √ Menu Transparency : Medium √ Blue Screen : Off √ Color Weakness √ Function Help : Off √ Move Enter Return 2 Press the number buttons to - Samsung HLR5656W | Owner Instructions - Page 76
select "V-Chip", then press the ENTER button. Setup Input Picture Sound Channel Setup Guide Language : English √ Time √ V-Chip √ Caption √ Menu Transparency : Medium √ Blue Screen : Off √ Color Weakness √ Function Help : Off √ Move Enter Return 2 Press the number buttons to - Samsung HLR5656W | Owner Instructions - Page 77
by the symbol " ". To unlock a locked channel, press the ENTER button again. Input Picture Sound Channel Setup TV Parental Guidelines ALL FV V S L D TV-Y Allow All TV-Y7 Block All TV-G TV-PG TV-14 TV-MA Press the buttons and the ENTER button to activate the appropriate restrictions for - Samsung HLR5656W | Owner Instructions - Page 78
select "V-Chip", then press the ENTER button. Setup Input Picture Sound Channel Setup Guide Language : English √ Time √ V-Chip √ Caption √ Menu Transparency : Medium √ Blue Screen : Off √ Color Weakness √ Function Help : Off √ Move Enter Return 2 Press the number buttons to - Samsung HLR5656W | Owner Instructions - Page 79
TV-Y All children. The themes and elements in this program are specifically designed for a very young audience, including children from ages two - six. TV Viewers should be 17 or older. X Adults only. NR Not rated. • TV (FCC) ratings : The particular rating that you have selected will be locked - Samsung HLR5656W | Owner Instructions - Page 80
select "V-Chip", then press the ENTER button. Setup Input Picture Sound Channel Setup Guide Language : English √ Time √ V-Chip √ Caption √ Menu Transparency : Medium √ Blue Screen : Off √ Color Weakness √ Function Help : Off √ Move Enter Return 2 Press the number buttons to - Samsung HLR5656W | Owner Instructions - Page 81
ENTER button again. Press the EXIT button. Input Picture Sound Channel Setup Guide Canadian English Block E C C8+ G PG 14+ 18+ Allow All Block All Move Enter Return NOTE • Allow All : Press to unlock all TV ratings. Block All : Press to lock all TV - Samsung HLR5656W | Owner Instructions - Page 82
select "V-Chip", then press the ENTER button. Setup Input Picture Sound Channel Setup Guide Language : English √ Time √ V-Chip √ Caption √ Menu Transparency : Medium √ Blue Screen : Off √ Color Weakness √ Function Help : Off √ Move Enter Return 2 Press the number buttons to - Samsung HLR5656W | Owner Instructions - Page 83
again. Press the EXIT button. Input Picture Sound Channel Setup Guide Canadian French Block E G 8 ans+ 13 ans+ 16 ans+ 18 ans+ Allow All Block All Move Enter Return NOTE • Allow All : Press to unlock all TV ratings. Block All : Press to lock all TV - Samsung HLR5656W | Owner Instructions - Page 84
: Medium √ Blue Screen : Off √ Color Weakness √ Function Help : Off √ Move Enter Return Setup Input Picture Sound Channel Setup Guide Language : English √ Time √ V-Chip √ Caption √ Menu Transparency : Medium √ Blue Screen : Off √ Color Weakness √ Function Help : Off - Samsung HLR5656W | Owner Instructions - Page 85
ENTER button. Press the EXIT button to exit. Caption Input Picture Sound Channel Setup Guide Caption Mode Caption Options Move :DOefanult :CCD1efault CC2 CC3 Caption Service. These are captions in the primary language that must be in sync with the sound, preferably matched to a specific frame. - Samsung HLR5656W | Owner Instructions - Page 86
: Medium √ Blue Screen : Off √ Color Weakness √ Function Help : Off √ Move Enter Return Setup Input Picture Sound Channel Setup Guide Language : English √ Time √ V-Chip √ Caption √ Menu Transparency : Medium √ Blue Screen : Off √ Color Weakness √ Function Help : Off - Samsung HLR5656W | Owner Instructions - Page 87
Options Input Size : Default √ Font Style : Default √ Picture Foreground Color : Default √ Sound Background Color : Default √ Foreground Opacity : Default √ Channel Background Opacity : Default √ Setup Return to Default Guide Move Enter Return NOTE • The availability of captions - Samsung HLR5656W | Owner Instructions - Page 88
all channels or your favorite channels. 1 Press the MENU button. Press the ... or † button to select "Guide", then press the ENTER button. Guide Input Picture Sound Channel List Edit Channel List Favorite Channel List Channel Setup Guide Move Enter √ √ √ Return 2 Press the ... or † button - Samsung HLR5656W | Owner Instructions - Page 89
Adding and Erasing Channels 1 Press the MENU button. Press the ... or † button to select "Guide", then press the ENTER button. Guide Input Picture Sound Channel List Edit Channel List Favorite Channel List Channel Setup Guide Move Enter √ √ √ Return 2 Press the ... or † button to select " - Samsung HLR5656W | Owner Instructions - Page 90
by selecting Game mode. 1 Press the MENU button. Press the ENTER button to select "Input". Input Input Picture Sound Source List Edit Name Anynet : AV1 Channel Setup Guide Move Enter √ √ Return 2 Press the . • If you display an OSD in Game mode, the screen shakes slightly. English - 90 - Samsung HLR5656W | Owner Instructions - Page 91
Appendix - Samsung HLR5656W | Owner Instructions - Page 92
where you purchased the TV or to a Samsung Service center. • Caution 1. Replace with the correct code numbered lamp to avoid damage to the TV. 2. Turn the power off and wait for 30 minutes before replacing the lamp as it will be hot. 3. Do not touch the glass part of the lamp with your bare hands - Samsung HLR5656W | Owner Instructions - Page 93
these steps in reverse order. NOTES • Be sure the replacement Lamp is the same type. • After replacing the lamp, align the lamp cover with the groove and secure the screws. • The TV will not turn on if the lamp cover is not correctly closed (as this will activate the protective circuit). English - Samsung HLR5656W | Owner Instructions - Page 94
troubleshooting tips apply, then call your nearest Samsung authorized service center. Problem Poor picture quality. Poor sound quality. No picture or sound. No color, wrong colors or tints. Picture rolls vertically. The TV operates erratically. Your remote control does not operate your TV. The TV - Samsung HLR5656W | Owner Instructions - Page 95
in the TV channel frequencies. Specifications Model HL-R4656W HL-R5056W HL-R5656W HL-R6156W Voltage AC110-120V~ AC110-120V~ AC110-120V~ AC110-120V~ Frequency of Operation 60Hz 60Hz 60Hz 60Hz Power Consumption 230 watts 230 watts 230 watts 230 watts Dimensions (W x D x H) 43.07 - Samsung HLR5656W | Owner Instructions - Page 96
1-800-SAMSUNG (1-800-726-7864) Samsung Electronics America Service Division 400 Valley Road, Suite 201 Mount Arlington, NJ 07856 www.samsung.com Samsung Electronics Canada Inc. Samsung Customer Care 55 Standish Court Mississauga, Ontario L5R 4B2 www.samsung.ca BP68-00524A-00
-
 1
1 -
 2
2 -
 3
3 -
 4
4 -
 5
5 -
 6
6 -
 7
7 -
8
-
9
-
10
-
11
-
12
-
13
-
14
-
15
-
16
-
17
-
18
-
19
-
20
-
21
-
22
-
23
-
24
-
25
-
26
-
27
-
28
-
29
-
30
-
31
-
32
-
33
-
34
-
35
-
36
-
37
-
38
-
39
-
40
-
41
-
42
-
43
-
44
-
45
-
46
-
47
-
48
-
49
-
50
-
51
-
52
-
53
-
54
-
55
-
56
-
57
-
58
-
59
-
60
-
61
-
62
-
63
-
64
-
65
-
66
-
67
-
68
-
69
-
70
-
71
-
72
-
73
-
74
-
75
-
76
-
77
-
78
-
79
-
80
-
81
-
82
-
83
-
84
-
85
-
86
-
87
-
88
-
89
-
90
-
91
-
92
-
93
-
94
-
95
-
96
 |
 |

Owner’s Instructions
HL-R4656W
HL-R5056W
HL-R5656W
HL-R6156W
Register your product at www.samsung.com/global/register