Samsung HPT4264 User Manual (ENGLISH)
Samsung HPT4264 - 42" Plasma TV Manual
 |
UPC - 036725242647
View all Samsung HPT4264 manuals
Add to My Manuals
Save this manual to your list of manuals |
Samsung HPT4264 manual content summary:
- Samsung HPT4264 | User Manual (ENGLISH) - Page 1
HP-T4264 HP-T5064 PLASMA DISPLAY Owner's Instructions Register your product at www.samsung.com/global/register Record your Model and Serial number here for future reference. ▪ Model Serial No - Samsung HPT4264 | User Manual (ENGLISH) - Page 2
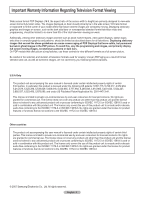
full screen picture. Be careful in the selection and duration of television formats used for viewing. Uneven PDP aging as a result of format selection and use, as well as burned-in images, are not covered by your Samsung limited warranty. U.S.A Only The product unit accompanying this user manual is - Samsung HPT4264 | User Manual (ENGLISH) - Page 3
User Instructions Screen Image retention Do not display a still image (such as on a video game) on the plasma TV The top side of the product may be hot after long periods of use as heat dissipates from the panel through the vent hole in the upper part due to a change of surrounding environment - Samsung HPT4264 | User Manual (ENGLISH) - Page 4
74 ■ Listening through a Receiver 75 ■ Check Points before Requesting Service 75 APPENDIX ■ Troubleshooting 76 ■ Installing the Wall Mount Kit 77 ■ How to assemble the Stand-Base (depending on the model 78 ■ Specifications 78 ■ Dimensions (HP-T4264 79 ■ Dimensions (HP-T5064 80 English - 4 - Samsung HPT4264 | User Manual (ENGLISH) - Page 5
are included with your TV. If any items are missing, contact your dealer. RETURN FAV.CH Remote Control (BN59-00599A) / AAA Batteries (4301-000103) Power Cord (3903-000144) Owner's Instructions / Quick Setup Guide Warranty Card / Registration Card / Safety Guide Manual Cloth-Clean Cover-Bottom - Samsung HPT4264 | User Manual (ENGLISH) - Page 6
Press to change channels. In the on-screen menu, use the CH buttons as you would use the ▲ and ▼ buttons on the remote control. 5 (ENTER) Press to confirm a selection. 6 POWER Press to turn the TV on and off. Power Indicator Blinks and turns off when the power is on and lights up in stand-by mode - Samsung HPT4264 | User Manual (ENGLISH) - Page 7
product color and shape may vary depending on the model. 1 POWER IN Connect the supplied power cord. DVI adapter, the DVI analog audio inputs on your TV allow you to receive left and right audio from can connect a set of headphones if you wish to watch a television program without disturbing other people - Samsung HPT4264 | User Manual (ENGLISH) - Page 8
to display information on the TV screen. h Anynet+ Runs the Anynet+ view functions and sets up Anynet+ devices. i STILL Press to stop the action during a particular scene. Press again to resume normal video. j P.SIZE Press to change the screen size. k PIP Picture-in Picture ON/OFF. l CH / Displays - Samsung HPT4264 | User Manual (ENGLISH) - Page 9
power cut, or is the power cord unplugged? 5. Is there a special fluorescent light or a neon sign nearby? Connections Connecting VHF and UHF Antennas If your antenna has a set adapter (not supplied). Use a screwdriver to TV. Separate VHF and UHF Antennas If you have two separate antennas for your TV - Samsung HPT4264 | User Manual (ENGLISH) - Page 10
cable box descrambles only some channels (such as premium channels), follow the instructions below. You will need a two-way splitter, an RF (A/B) switch (A/B) Switch TV Rear ANT 2 IN (CABLE) After you have made this connection, set the A/B switch to the "A" position for normal viewing. Set the A/B - Samsung HPT4264 | User Manual (ENGLISH) - Page 11
cable(Not supplied) ➢ Each VCR has a different back panel configuration. ➢ When connecting a VCR, match the color of the connection terminal to the cable. S-Video Connection Your Samsung TV can be connected to the S-Video jack of a VCR. (This connection delivers a better picture when compared - Samsung HPT4264 | User Manual (ENGLISH) - Page 12
Cable (Not supplied) between the AV IN 2 [L-AUDIO-R] jacks on the TV and the AUDIO OUT jacks on the Camcorder. ➢ Each Camcorder has a different back panel configuration. ➢ When connecting a Camcorder, match the color of the connection terminal to the cable. Connecting a DVD Player/Set-Top Box - Samsung HPT4264 | User Manual (ENGLISH) - Page 13
jacks on the DVD Player/Set-Top Box. DVD Player / Set-Top Box TV Rear Panel 2 Audio Cable (Not supplied) 1 HDMI/DVI Cable (Not supplied) ➢ Each DVD Player/Set-Top box has a different back panel configuration. ➢ When connecting a DVD Player/Set-Top box, match the color of the connection terminal - Samsung HPT4264 | User Manual (ENGLISH) - Page 14
between the DVI IN (HDMI 1) [R-AUDIO-L] jack on the TV and the Audio Out jack of the sound card on your computer. Using the D-Sub Cable PC TV Rear Panel 2 PC Audio Cable (Not supplied) 1 D-Sub Cable (Not supplied) Using the HDMI/DVI Cable PC TV Rear Panel 2 3.5 mm Stereo plug to 2 RCA Cable - Samsung HPT4264 | User Manual (ENGLISH) - Page 15
Turning the TV On and Off Press the POWER button on the remote control. You can also use the POWER button on the TV. ➢ It may take a while when your TV starts. Plug & Play Feature When the TV is initially powered On, basic settings proceed automatically and subsequently: 1 Press the POWER - Samsung HPT4264 | User Manual (ENGLISH) - Page 16
5 The TV will begin memorizing all of the available channels. After all Press the ▲ or ▼ button to select Manual if you want to set the current time manually, then press the ENTER button. Set current date and time. is displayed. ➢ If you select Auto, Set to daylight savings time. is displayed, then - Samsung HPT4264 | User Manual (ENGLISH) - Page 17
▼ More Move Enter Return i Menu language, Shop Mode, Channels and Time will be set. Start Changing Channels Using the Channel Buttons 1 Press the CH or CH button to change channels. ➢ When you press the CH or CH button, the TV changes channels in sequence. You will see all the channels that the - Samsung HPT4264 | User Manual (ENGLISH) - Page 18
certain picture and sound settings. Press the INFO button once more or wait approximately 10 seconds and it disappears automatically. Air 28 Mono Picture Mode : Dynamic Sound Mode : Custom MTS : Stereo 12 : 00 am Viewing the Menus 1 With the power on, press the MENU button. The main menu appears - Samsung HPT4264 | User Manual (ENGLISH) - Page 19
) and adding and deleting channels (manual). Selecting the Video Signal-source Before your television can begin memorizing the available channels area. At this point the signal source has been selected. 5 The TV begins memorizing all available stations. If you want to stop Auto Programming, press - Samsung HPT4264 | User Manual (ENGLISH) - Page 20
Remote to Operate Your VCR 1 Turn off your VCR. 2 Press the VCR button on your TV's remote control. 3 Press the SET button on your TV's remote control. 4 Using the number buttons on your remote control, enter three digits of the VCR code listed on page 22 of this manual for your brand of VCR. Make - Samsung HPT4264 | User Manual (ENGLISH) - Page 21
the Remote to Operate Your Set Top Box 1 Turn off your STB. 2 Press the STB button on your TV's remote control. 3 Press the SET button on your TV's remote control. 4 Using the number buttons on your remote control, enter three digits of the STB code listed on page 23 of this manual for your brand of - Samsung HPT4264 | User Manual (ENGLISH) - Page 22
Remote Control Codes VCR Brand SAMSUNG ADMIRAL AIWA AKAI AUDIO DYNAMICS BELL&HOWELL BROKSONIC CANDLE CANON CITIZEN COLORTYME CRAIG CURTIS MATHES DAEWOO DB DIMENSIA DYNATECH ELECTROHOME EMERSON FISHER FUNAI GENERAL ELECTRIC - Samsung HPT4264 | User Manual (ENGLISH) - Page 23
037 044 019 021 023 028 004 018 020 044 014 022 040 003 SAMSUNG SET-TOP BOX Product Ground wave STB Satellite STB CABLE STB STB DVD COMBO Satellite RADIOSHACK REALISTIC STS STAR TRAK SKY SKY LIFE SHACK STAR CHOICE SONY TOSHIBA ULTIMATE TV UNIDEN ZENITH Code 044 073 016 021 036 038 039 040 041 042 - Samsung HPT4264 | User Manual (ENGLISH) - Page 24
SAMSUNG DVD Product DVD DVDR BD Record VCR COMBO VCR Record DHR COMBO DVD DVD COMBO DVD Receiver AV Receiver Code 014 015 016 017 018 019 020 021 Brand NORCENT NEXT BASE NEC NANTAUS NESA OPTOMEDIA ELECTRONICS OPTIVIEW ONKYO PHILCO PRINCETON PROSCAN PANASONIC PHILIPS ROTEL RIO RCA RAITE ROWA SAMPO - Samsung HPT4264 | User Manual (ENGLISH) - Page 25
➢ You can choose between the following sets of jacks: AV1, S-Video1, Component1, Component2, PC, HDMI1, or HDMI2 on the TV's rear panel and AV2, S-Video2, or HDMI3 on the TV's side panel. ➢ HDMI1, HDMI2, or HDMI3 input can only be selected when the external device is turned on and connected via HDMI - Samsung HPT4264 | User Manual (ENGLISH) - Page 26
clarity and sharpness of the picture. • Choose Standard for general TV watching mode. • Choose Movie when watching movies. Press the P.MODE button on the remote control to select one of the standard picture settings. T V Picture Mode Contrast Brightness Sharpness Color Tint G 50 : Dynamic ► 100 - Samsung HPT4264 | User Manual (ENGLISH) - Page 27
is available in all modes except PC. T V Picture ▲ More Color Tone : Cool1 Detailed Settings Size : 16:9 Digital NR : Auto Active Color : On DNIe : On Reset : OK Move Enter Return T V Picture ▲ More Color Tone : Cool1 Detailed Settings Off Size : 1L6o:9w Digital NR - Samsung HPT4264 | User Manual (ENGLISH) - Page 28
: Sets the picture to 4:3 normal mode. • Just Scan : Use this function to see the full image without any cutoff when DTV or HDMI 720p/1080i signals are input. Press the P.SIZE button on the remote control to change the picture size. T V Picture ▲ More Color Tone : Cool1 Detailed Settings Size - Samsung HPT4264 | User Manual (ENGLISH) - Page 29
most natural color. You can set the color reproduction space for the input signal to Auto or Wide. White Balance: R-Offset/G-Offset/B-Offset/R-Gain/G-Gain/B-Gain/Reset You can adjust the color temperature for more natural picture colors. R-Offset/G-Offset/B-Offset/R-Gain/G-Gain/B-Gain: Changing the - Samsung HPT4264 | User Manual (ENGLISH) - Page 30
Standard or Movie in Picture Mode, the Active Color automatically changes to Off and it is deactivated. When the Picture Mode is set to Dynamic, the Active Color is activated regardless of the Picture Mode settings. T V Picture ▲ More Color Tone : Cool1 Detailed Settings Size : 16:9 Digital - Samsung HPT4264 | User Manual (ENGLISH) - Page 31
Wall-Mount Adjustment On PIP Function Help : On SW Upgrade Move Enter Return Setting the Blue Screen Mode If no signal is being received In Watching TV Energy Saving : Off ▼ More Move Enter Return Setting the HDMI Black Level Use this function to adjust the Black Level of the picture while - Samsung HPT4264 | User Manual (ENGLISH) - Page 32
to activate or deactivate the PIP. ➢ Analog TV signals can be viewed on the PIP screen while viewing the picture from an external source (DVD, Set-top box, PC etc.) connected to the Component 1, 2, PC and HDMI 1, 2, 3 jacks on the main screen. Move Enter Return Changing the Size of the PIP Window - Samsung HPT4264 | User Manual (ENGLISH) - Page 33
PIP window, then press the ENTER button. ➢ The channel can be active when the sub picture is set to TV. Press the EXIT button to exit. Press the PIP CH and CH and buttons on the remote control to change the PIP channel. T V PIP Size Position Channel PIP : On : : : DTV Air 3 - 0 Move Enter Return - Samsung HPT4264 | User Manual (ENGLISH) - Page 34
stom Internal Mute : Off Sound Select : Main Reset Move Enter Return Customizing the Sound The sound settings can be adjusted to suit If you make any changes to the equalizer settings, the sound mode is automatically switched to the Custom mode. T V Sound Mode : Custom Equalizer - Samsung HPT4264 | User Manual (ENGLISH) - Page 35
Setting the TruSurround XT TruSurround XT is a patented SRS technology that solves the problem of playing 5.1 multichannel content over two speakers. TruSurround delivers a compelling, virtual surround sound experience through any two-speaker playback system, including internal television speakers. - Samsung HPT4264 | User Manual (ENGLISH) - Page 36
▲ or ▼ button to select Multi-Track Sound, then press the ENTER button. Press the ▲ or ▼ button to select a setting you want, then press the ENTER button. Internal Mute : OOffn Sound Select : Main Reset Move Enter Return Selecting the Internal Mute Sound output from the TV speakers is muted. - Samsung HPT4264 | User Manual (ENGLISH) - Page 37
the ENTER button. Press the EXIT button to exit. • Main: Used to listen to the sound of the main picture. • Sub: Used to listen to the sound of the sub picture. ➢ You can select this option when PIP is set to On. English - 37 T V Sound Mode : Custom Equalizer SRS TruSurround XT : Off Multi - Samsung HPT4264 | User Manual (ENGLISH) - Page 38
Channel Control Selecting the Antenna 1 Press the MENU button to display the menu. Press the ▲ or ▼ button to select Channel, then press the ENTER button. 2 Press the ENTER button to select Antenna. Press the ▲ or ▼ button to select Air or Cable, then press the ENTER button. Press the EXIT button to - Samsung HPT4264 | User Manual (ENGLISH) - Page 39
9-1 FDAadevdAAleoiitrrreit11e10 DTV Air 11-1 Air 12 Air 13 Air 14 Air 15 Air 16 List Mode Delete All Enter Page Return Setting Your Favorite Channels You can set channels you watch frequently as favorites. 1 Press the MENU button to display the menu. Press the ▲ or ▼ button to select Channel - Samsung HPT4264 | User Manual (ENGLISH) - Page 40
Air 11 DTV Air 11-1 Air 12 Air 13 Air 14 Air 15 Air 18 List Mode Delete All Enter Page Return Setting the Default Channel List Mode You can set All, Added, or Favorite to be the Default List that appears when you press the CH LIST button. 1 Press the MENU - Samsung HPT4264 | User Manual (ENGLISH) - Page 41
cannot be assigned by users. Fine Tuning Analog Channels Clear Clear Clear Clear Adjust Return Use fine tuning to manually adjust a particular channel for optimal reception. 1 Press the fine tuning setting in the TV's memory, press the ENTER button. To reset the fine tuning setting, press the ▼ - Samsung HPT4264 | User Manual (ENGLISH) - Page 42
from "snowy" to clear, digital (HDTV) channels have either perfect reception quality or Return LNA (Low Noise Amplifier) If the TV is operating in a weak-signal area, set to Air. (See "Selecting the Antenna" on page 38) ➢ If the picture is noisy with the LNA set to On, select Off. ➢ The LNA setting 42 - Samsung HPT4264 | User Manual (ENGLISH) - Page 43
N P HP-T4264 HP-T5064 • The interlace mode is not supported. • The TV operates abnormally if a non-standard video format is selected. • The table above conforms to IBM/VESA regulations and is based on using the Analog Input mark means that this mode can be supported. ➢ • For the HP-T4264, PC - Samsung HPT4264 | User Manual (ENGLISH) - Page 44
to have the TV set automatically adjust the video signals it receives from the PC. The function also automatically fine-tunes the settings and adjusts the the noise has been reduced, re-adjust the picture so that it is aligned on the center of the screen. ➢ Change to the PC mode first. 1 Press the - Samsung HPT4264 | User Manual (ENGLISH) - Page 45
V Position Adjust Enter Return Initializing the Screen Position ➢ Change to the PC mode first. 1 Press the MENU pictures while in PC Mode. After setting the Home Theater PC function to On, you can go into the Detailed Settings menu and make adjustments without affecting settings in the regular TV - Samsung HPT4264 | User Manual (ENGLISH) - Page 46
the clock is necessary in order to use the various timer features of the TV. Also, you can check the time while watching the TV. (Just press the INFO button.) Option 1: Setting the Clock Manually 1 Press the MENU button to display the menu. Press the ▲ or ▼ button to select Setup, then press the - Samsung HPT4264 | User Manual (ENGLISH) - Page 47
button to exit. ➢ Depending on the broadcast station and signal, the auto time may not be set correctly. If this occurs, set the time manually. ➢ Antenna or Cable must be connected in order to set the time automatically. Move Enter Return T V Time Zone Select the time zone in which you live - Samsung HPT4264 | User Manual (ENGLISH) - Page 48
Auto Power Off When you set the timer On, the television will eventually turn off, if no controls are operated for 3 hours after the TV was turned on Menu Transparency : Medium ► ▼ More Move Enter Return T V Time 1/ 1/ 2007/ 12 : 04 am Clock Sleep Timer Timer1 Timer2 Timer3 ► : Off ► : - Samsung HPT4264 | User Manual (ENGLISH) - Page 49
be changed. • Sound Mode in the Sound menu is deactivated. Adjust the sound using the equalizer. • The Reset in the Sound menu is activated. Reset function initializes the Equalizer settings to the factory default setting. ➢ Game Mode is not available in regular TV/Antenna mode. ➢ If the picture is - Samsung HPT4264 | User Manual (ENGLISH) - Page 50
consists of Default, Transparent, Translucent, Solid, and Flashing. You can change the background opacity of the caption. • Return to Default: This option sets each of Size, Font Style, Foreground Color, Background Color, Foreground Opacity, and Background Opacity to its default. Press the CAPTION - Samsung HPT4264 | User Manual (ENGLISH) - Page 51
- Analog The Analog Caption function operates in either analog TV channel mode or external signal mode. (Depending on the • CC1: The Primary Synchronous Caption Service. These are captions in the primary language that must be in sync with the sound, preferably matched to a specific frame. - Samsung HPT4264 | User Manual (ENGLISH) - Page 52
while in Standby mode and it turns off when your TV is turned on. • In Watching TV: The LED lights when watching TV and it turns off when your TV is turned off. • Always: The LED is always lit. ➢ Set the Light Effect to Off to reduce the power consumption. T V Setup ▲ More Blue Screen Melody - Samsung HPT4264 | User Manual (ENGLISH) - Page 53
medium power saving mode. • High: Enters maximum power saving mode TV Energy Saving : OHffigh ▼ More Move Enter Return Preventing Screen Burn-in To reduce the possibility of screen burn, this unit is equipped with screen burn prevention technology. This technology enables you to set picture - Samsung HPT4264 | User Manual (ENGLISH) - Page 54
after-images on the screen by changing the color of pixels to white. Use time. Side Gray When you watch TV with the screen ratio of 4:3, the the EXIT button to exit. ➢ The Function Help default setting is On. English - 54 T V Setup ▲ Function Help : On SW Upgrade Move Enter Return T V - Samsung HPT4264 | User Manual (ENGLISH) - Page 55
TV screen, the Adjustment screen appears. ➢ When you turn the power off, your TV moves to the initial installation position. When you turn the power on, your TV Function Help : On ► SW Upgrade ► Move Enter Return Wall-Mount color buttons. ➢ For installation, refer to the Installation Manual - Samsung HPT4264 | User Manual (ENGLISH) - Page 56
careful to not disconnect the power or remove the USB drive while upgrades are being applied. The TV will shut off and turn on automatically after completing the firmware upgrade. Please check the firmware version after the upgrades are complete. ➢ The firmware and upgrade process may be different - Samsung HPT4264 | User Manual (ENGLISH) - Page 57
0-0-0-0 : Power Off. → MUTE → 8 → 2 → 4 → Power On. T V V-Chip V-Chip Lock : Off ► TV Parental Guidelines ► MPAA Rating ► Downloadable U.S. Rating ► Change PIN ► U.S. Rating Change PIN Move Enter Return How to Set up Restrictions Using "TV Parental Guidelines" First, set up a - Samsung HPT4264 | User Manual (ENGLISH) - Page 58
clear all the screens. (Or proceed to the next section, and set up additional restrictions based on the MPAA codes.) ➢ These categories consist of two separate groups: TV-Y and TV-Y7 (young children through age 7), and TV-G through TV-MA (everybody else). The restrictions for these two groups work - Samsung HPT4264 | User Manual (ENGLISH) - Page 59
How to Set up Restrictions Using "MPAA Ratings" (G, PG, PG-13, R, NC-17, X, NR ) The MPAA rating system uses the Motion Picture Association of America (MPAA) system, and its main application is for movies. When the V-Chip lock is on, the TV will automatically block any programs that are coded with - Samsung HPT4264 | User Manual (ENGLISH) - Page 60
V V-Chip V-Chip Lock : On ► TV Parental Guidelines ► MPAA Rating ► Canadian English ► Canadian French ► Downloadable U.S. Rating ► Change PIN ► Move Enter Return T V Canadian English Allow All Block All Move Enter Return How to Set up Restrictions Using "Canadian French" (for - Samsung HPT4264 | User Manual (ENGLISH) - Page 61
TV ratings. Block all: Press to lock all TV ratings. ➢ Parental restriction levels differ depending on the broadcasting station. ➢ The default menu name and downloadable US rating changes depending on the downloaded information. ➢ Even if you set 0-0-0-0 : Power Off. → MUTE → 8 → 2 → 4 → Power On. - Samsung HPT4264 | User Manual (ENGLISH) - Page 62
when the TV is turned on and switched to WISELINK Mode If this occurs, remove and reinstall the memory device in question. ➢ This product supports USB devices that have only 512byte data block size. ➢ Directly connect the USB device to the USB jack on your TV. Compatibility problems may occur - Samsung HPT4264 | User Manual (ENGLISH) - Page 63
be displayed. ➢ The WISELINK menu differs depending on the USB Memory Device connected to TV. 3 Press the ◄ or ► button to select an icon (Photo, Music or screen again. Press the WISELINK button on the remote control to turn on the WISELINK mode. Using the Remote Control Button in WISELINK Menu - Samsung HPT4264 | User Manual (ENGLISH) - Page 64
only. When trying to view a progressive JPEG file, the Not supported mode message will appear. When trying to view a file exceeding 4000. Photo Music Move Setup Enter Return Photo Folder Jan 22, 2007 1 / 14 Up Folder 1/10 Page Photo 0001 File 2 None turn on the WISELINK mode. English - 64 - Samsung HPT4264 | User Manual (ENGLISH) - Page 65
cannot be written to when copying files If the target memory does not have enough space when copying files Photo 400x340 53 KB May 1, 2007 1 / 14 Photo 0001 1/10 Page Photo 0001 File 2 None File 4 CELLDISK2.0 315MB/495MB File 9 Select File 5 File 6 File 7 File 8 File 10 File 11 File - Samsung HPT4264 | User Manual (ENGLISH) - Page 66
slide show repeatedly, change the setting by referring to Setting, List). 6 Press the ▲ or ▼ button to select the option, then press the ENTER button. Press the WISELINK button on the remote control to turn on the WISELINK mode. Photo Music Move Setup Enter Return Photo 400x340 53 KB May 1, 2007 - Samsung HPT4264 | User Manual (ENGLISH) - Page 67
ENTER button is pressed, the speed changes repeatedly. (Normal → Slow → Fast turn Off the Background Music, even if the Background Music Settings have been set displayed on the left in the TV screen, such as the resolution, Enter Return Photo 400x340 53 KB May 1, 2007 1 / 14 Photo 0001 1/10 Page - Samsung HPT4264 | User Manual (ENGLISH) - Page 68
. Photo CELLDISK2.0 315MB/495MB Free Photo Music Move Setup Enter Return Photo 400x340 53 KB May 1, 2007 1 / 14 Photo 0001 1/10 Page Photo 0001 File 2 None File 4 CELLDISK2.0 315MB/495MB Free WISELINK button on the remote control to turn on the WISELINK mode. Continued... English - 68 - Samsung HPT4264 | User Manual (ENGLISH) - Page 69
Pan Left (END) Pan to the left-most part of a zoomed-in photo. Press the WISELINK button on the remote control to turn on the WISELINK mode. Photo CELLDISK2.0 315MB/495MB Free Photo Music Move Setup Enter Return Photo 400x340 53 KB May 1, 2007 1 / 14 Photo 0001 1/10 Page Photo 0001 File - Samsung HPT4264 | User Manual (ENGLISH) - Page 70
. ➢ To play back the files repeatedly, change the setting by referring to page 71. 5 Press the VOL- button on the remote control. To mute the sound, press the MUTE button on the remote control. to turn on the WISELINK mode. Photo Music Move Setup Enter Return Music 5959 KB Nov 14, 2007 6/14 - Samsung HPT4264 | User Manual (ENGLISH) - Page 71
Using the Setup Menu Setup displays the user settings of the WISELINK menu 1 After switching the mode to WISELINK, or Screen Saver 10 min. Press the WISELINK button on the remote control to turn on the WISELINK mode. English - 71 Photo Music Move Setup Enter Return Slide Show Speed : - Samsung HPT4264 | User Manual (ENGLISH) - Page 72
is sent to the home theater via the TV in 5.1 channel sound because the TV outputs only 2 channel stereo sound. Please see the manual for the home theater. ➢ You can connect an Anynet+ device using the HDMI 1.3 cable. Some HDMI cables may not support Anynet+ functions. ➢ Anynet+ works when the AV - Samsung HPT4264 | User Manual (ENGLISH) - Page 73
setting of the TV remote control is to be set to TV to use the Anynet+ function. ➢ If you set Auto Turn Off to On, connected external devices are also turned off when the TV is turned the TV automatically scans devices when it is turned on using the POWER button, devices connected when the TV is - Samsung HPT4264 | User Manual (ENGLISH) - Page 74
). A audio stream in HDMI is one way only from Device to TV. But there's SPDIF output in TV. So TV sound can be sent to HT. You can set the Anynet+ (HDMI-CEC), auto turn off, and searching connections for using Anynet+. TV Remote Control Buttons Available in Anynet+ Mode Device Type Anynet+ Device - Samsung HPT4264 | User Manual (ENGLISH) - Page 75
Air 28 Recevier: On Connect Recorder Setup ➢ When the receiver is set to On, you can listen to the TV sound through the 2-channel(Stereo) Move Enter Exit Sound. This is not always true. When TV is displaying DTV(air) TV can send out 5.1 channel sound through SPDIF. But when the source is DVD(for - Samsung HPT4264 | User Manual (ENGLISH) - Page 76
troubleshooting tips apply, call your nearest Samsung service center. Problem Poor picture quality. Poor sound quality. No picture or sound. No sound or sound is too low at maximum volume. Picture rolls vertically. The TV operates erratically. The TV won't turn Adjust the Size settings. The visual - Samsung HPT4264 | User Manual (ENGLISH) - Page 77
Wall Mount Kit Specifications ( VESA ) Product Family LCD-TV PDP-TV inch 23 ~ 26 32 ~ 40 46 ~ 52 57 42 ~ 50 63 VESA Spec. (A * B) Standard Screw (C * D) 200 * When purchasing our wall mount kit, a detailed installation manual and all parts necessary for assembly are provided. 3 Do not use - Samsung HPT4264 | User Manual (ENGLISH) - Page 78
to 45 °C) 5% to 95%, non-condensing ➢ This device is a Class B digital apparatus. ➢ Design and specifications are subject to change without prior notice. ➢ For the power supply, refer to the label attached to the product. Stand Swivel (Left / Right) HP-T4264/HP-T5064 Yes -20° ~ 20° English - 78 - Samsung HPT4264 | User Manual (ENGLISH) - Page 79
Dimensions (HP-T4264) TOP VIEW FRONT VIEW JACK PANEL DETAIL 2 1/4"H x 18 3/4"W @ 5 3/4" UP FROM BOTTOM SIDE VIEW REAR VIEW English - 79 - Samsung HPT4264 | User Manual (ENGLISH) - Page 80
Dimensions (HP-T5064) TOP VIEW FRONT VIEW JACK PANEL DETAIL 2 1/4"H x 18 3/4"W @ 5 3/4" UP FROM BOTTOM SIDE VIEW REAR VIEW English - 80 - Samsung HPT4264 | User Manual (ENGLISH) - Page 81
This page is intentionally left blank. - Samsung HPT4264 | User Manual (ENGLISH) - Page 82
This page is intentionally left blank.
-
 1
1 -
 2
2 -
 3
3 -
 4
4 -
 5
5 -
 6
6 -
 7
7 -
8
-
9
-
10
-
11
-
12
-
13
-
14
-
15
-
16
-
17
-
18
-
19
-
20
-
21
-
22
-
23
-
24
-
25
-
26
-
27
-
28
-
29
-
30
-
31
-
32
-
33
-
34
-
35
-
36
-
37
-
38
-
39
-
40
-
41
-
42
-
43
-
44
-
45
-
46
-
47
-
48
-
49
-
50
-
51
-
52
-
53
-
54
-
55
-
56
-
57
-
58
-
59
-
60
-
61
-
62
-
63
-
64
-
65
-
66
-
67
-
68
-
69
-
70
-
71
-
72
-
73
-
74
-
75
-
76
-
77
-
78
-
79
-
80
-
81
-
82
 |
 |

PLASMA DISPLAY
HP-T4264
HP-T5064
Owner’s
Instructions
Register your product at www.samsung.com/global/register
Record your Model and Serial number here for future reference.
▪ Model _______________
▪ Serial No. _______________