Samsung HT-WX70 Quick Guide (easy Manual) (ver.1.0) (English) - Page 6
Remote Control, Insert Remote Batteries, Operation Range of the Remote Control, Con't - dvd
 |
View all Samsung HT-WX70 manuals
Add to My Manuals
Save this manual to your list of manuals |
Page 6 highlights
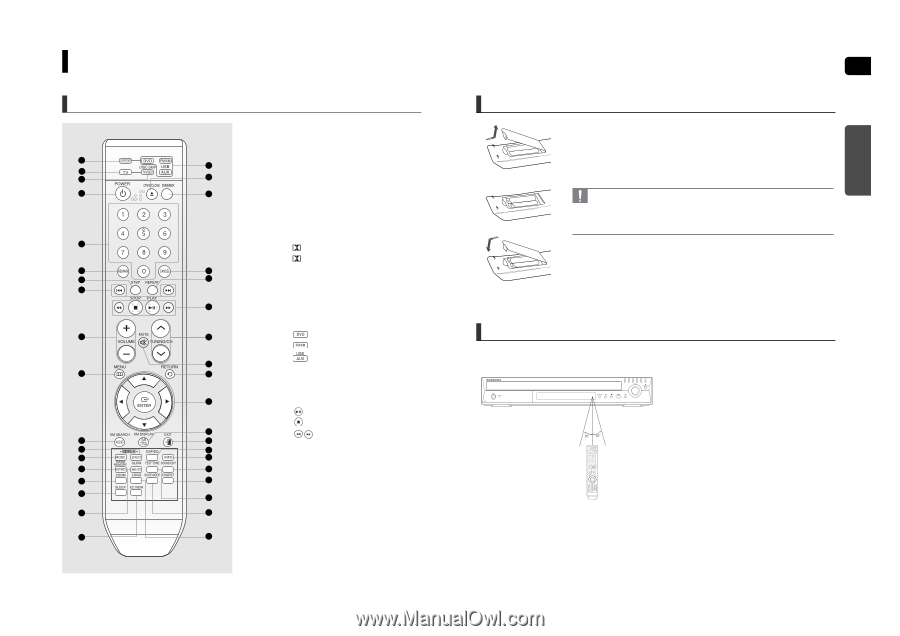
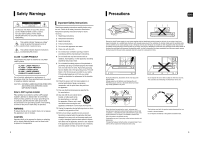
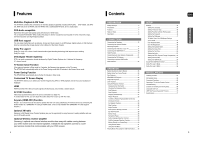
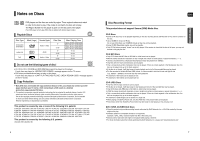
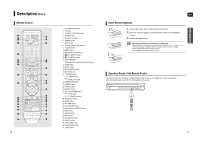
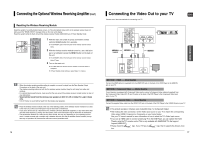
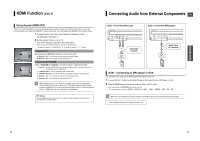
Description (Con't) Remote Control 1 19 2 3 20 4 21 5 6 22 7 23 8 24 9 25 26 10 27 28 29 11 30 12 31 13 32 14 33 15 34 16 35 17 36 18 37 10 1. DVD RECEIVER button 2. TV button 3. TV/VIDEO, DISC SKIP button 4. POWER button 5. Number(0~9) buttons 6. REMAIN button 7. STEP button 8. Tuning Preset/CD Skip buttons 9. VOLUME button 10. MENU button 11. XM SEARCH, AUDIO button 12. PL II EFFECT button 13. PL II MODE button 14. FM/XM MEMORY, SD(Standard Definition)/HD(High Definition) button 15. ZOOM button 16. SLEEP button 17. SLOW, MO/ST button 18. EZ VIEW button 19. DVD button FM/XM button USB, AUX button 20. OPEN/CLOSE button 21. DIMMER button 22. CANCEL button 23. REPEAT button 24. PLAY/PAUSE button STOP button SEARCH buttons 25. TUNING/CH button 26. MUTE button 27. RETURN button 28. Cursor/ENTER button 29. XM DISPLAY, SUBTITLE button 30. EXIT button 31. DSP/EQ button 32. INFO button 33. SOUND EDIT button 34. DIGEST button 35. TEST TONE button 36. SLIDE MODE button 37. LOGO button ENG Insert Remote Batteries 1 Remove the battery cover in the direction of the arrow. 2 Insert two 1.5V AAA batteries, paying attention to the correct polarities (+ and -). 3 Replace the battery cover. Follow these precautions to avoid leaking or cracking cells: • Place batteries in the remote control so they match the polarity : (+) to (+) and (-) to (-). • Use the correct type of batteries. Batteries that look similar may differ in voltage. • Always replace both batteries at the same time. • Do not expose the batteries to heat or a flame. Operation Range of the Remote Control The remote control can be used up to approximately 23 feet (7 meters) in a straight line. It can also be operated at a horizontal angle of up to 30° from the remote control sensor. 11 PREPARATION
-
 1
1 -
 2
2 -
 3
3 -
 4
4 -
 5
5 -
 6
6 -
 7
7 -
 8
8 -
 9
9 -
 10
10 -
 11
11 -
 12
12 -
13
-
14
-
15
-
16
-
17
-
18
-
19
-
20
-
21
-
22
-
23
-
24
-
25
-
26
-
27
-
28
-
29
-
30
-
31
-
32
-
33
-
34
-
35
-
36
-
37
 |
 |