Samsung LH40MGQLBF/ZA User Manual (ENGLISH)
Samsung LH40MGQLBF/ZA Manual
 |
View all Samsung LH40MGQLBF/ZA manuals
Add to My Manuals
Save this manual to your list of manuals |
Samsung LH40MGQLBF/ZA manual content summary:
- Samsung LH40MGQLBF/ZA | User Manual (ENGLISH) - Page 1
SyncMaster 400FP-2,460FP-2,400FPn-2, 460FPn-2 LCD Monitor User Manual - Samsung LH40MGQLBF/ZA | User Manual (ENGLISH) - Page 2
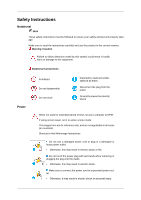
electric shock When not used for extended period of time, set your computer to DPM. If using screen saver, set it to active screen mode , and are not applicable in all cases (or countries). Shortcut to Anti-Afterimage Instructions Do not use a damaged power cord or plug or a damaged or loose power - Samsung LH40MGQLBF/ZA | User Manual (ENGLISH) - Page 3
Safety Instructions Ensure that the power plug is plugged into the power outlet firmly and may result in fire or electric shock. Installation Be sure to contact an authorized Service Center when installing your LCD Display in a location with heavy dust, high or low temperatures, high humidity, and - Samsung LH40MGQLBF/ZA | User Manual (ENGLISH) - Page 4
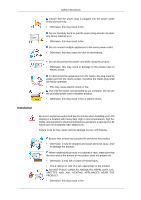
Instructions display. Ensure that an authorized installation company installs the wall mount. • Otherwise, it may fall and cause personal injury. • Make sure to install the specified wall mount of your LCD Display is adjustable, do not place any object or part of your body on the stand when lowering - Samsung LH40MGQLBF/ZA | User Manual (ENGLISH) - Page 5
Instructions a malfunction. The product is a high voltage product. Ensure that users do not disassemble, repair or modify the product themselves. • Otherwise, from the product, disconnect the power plug immediately and contact a Service Center. • Otherwise, this may result in electric shock or fire - Samsung LH40MGQLBF/ZA | User Manual (ENGLISH) - Page 6
Safety Instructions If thunder or lightening is occurring, do not touch the power cord or antenna cable. • Otherwise, this may result in electric shock or fire. Do not try to move the LCD Display by pulling only the wire or the signal cable. • Otherwise, it may fall and result in electric shock, - Samsung LH40MGQLBF/ZA | User Manual (ENGLISH) - Page 7
Instructions If you continually move closer to the product screen, your eyesight may be failing. Take a rest for at least five (5) minutes after using the LCD Display not place the battery in their mouths when removed from the remote control. Place the battery in a location that children or infants - Samsung LH40MGQLBF/ZA | User Manual (ENGLISH) - Page 8
Instructions or fire. If the product has been turned on for a long time, the display panel becomes hot. Do not touch it. • Keep the small accessories in a Be careful when adjusting the angle of the product or the height of the stand. • This may result in personal injury as your hand or fingers may - Samsung LH40MGQLBF/ZA | User Manual (ENGLISH) - Page 9
Contents Note Please make sure the following items are included with your LCD Display. If any items are missing, contact your dealer. Contact a local dealer to buy optional items. Note This stand is not for the Floor Standing Type. Checking the Contents of the Package Remove the lock from the - Samsung LH40MGQLBF/ZA | User Manual (ENGLISH) - Page 10
Manuals LCD Display Quick Setup Guide Warranty Card (Not available in all locations) User's Guide, MagicInfo Software CD, MagicInfo Manual CD Cables Power Cord Others Remote Control Batteries (AAA X 2) HDD Cover (Not available in all loca- (Applicable to the FPn-2 tions) model - Samsung LH40MGQLBF/ZA | User Manual (ENGLISH) - Page 11
Mount KIT LAN Cable (Applicable to the FPn-2 model only) TV tuner box NetWork Box (Applicable to the FP-2 model only) Semi Stand KIT BNC Cable Note • You can purchase and connect a separate network box or TV tuner box. For information on how to use these, refer to their respective user manuals - Samsung LH40MGQLBF/ZA | User Manual (ENGLISH) - Page 12
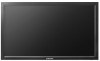
Your LCD Display Front Introduction MENU button [MENU] Opens the on-screen menu from PC mode to Video mode. Changing the source is only allowed for external devices that are connected to the LCD Display at the time. [PC DVI AV HDMI MagicInfo TV BNC Component] Note • The TV menu is available when - Samsung LH40MGQLBF/ZA | User Manual (ENGLISH) - Page 13
periods. Remote Control Sensor Aim the remote control towards this spot on the LCD Display. Note For detailed information concerning cable connections, refer to Connecting Cables under Setup. The LCD Display 's configuration at the back may vary slightly depending on the LCD Display model. POWER - Samsung LH40MGQLBF/ZA | User Manual (ENGLISH) - Page 14
Box[SBBDT*]. Otherwise, this may result in damage to the product. AV IN [VIDEO] (VIDEO Connection Terminal) Connect the [ VIDEO ] terminal of your monitor to the video output terminal of the external device using a VIDEO cable. AV AUDIO IN [L-AUDIO-R](LCD Display Audio Connection Terminal (Input)) - Samsung LH40MGQLBF/ZA | User Manual (ENGLISH) - Page 15
Introduction AV AUDIO OUT [L-AUDIO-R] (LCD Display Audio Connection Terminal (Output)) BNC/COMPONENT OUT[R/PR, G/Y, B/ PB, H, V] /Component Connection Terminal (Input)) RGB OUT (Applicable to the FPn-2 model only) LAN (LAN Connection Terminal) (Applicable to the FPn-2 model only) USB(USB Connection - Samsung LH40MGQLBF/ZA | User Manual (ENGLISH) - Page 16
Refer to the manual provided with the Kensington model. Using the Anti-Theft Kensington Lock 1. Insert the locking device into the Kensington slot on the Monitor Remote Control Note The performance of the remote control may be affected by a TV or other electronic device operating near the LCD Display - Samsung LH40MGQLBF/ZA | User Manual (ENGLISH) - Page 17
Number Buttons DEL + VOL - button MUTE TV/DTV MENU INFO COLOR BUTTONS TTX/MIX STILL AUTO S.MODE MDC LOCK SOURCE ENTER/PRE-CH CH/P D.MENU GUIDE RETURN Up-Down Left-Right buttons EXIT SRS MagicInfo P.MODE DUAL/MTS PIP SWAP Turns the product On. Turns the product Off. Press to change - Samsung LH40MGQLBF/ZA | User Manual (ENGLISH) - Page 18
TV channels provide written information services via teletext. - Teletext Buttons remote control and the LCD Display except for the Power and LOCK buttons. Press the button to change the input signal SOURCE. Changing the SOURCE is only allowed for external devices that are connected to the monitor - Samsung LH40MGQLBF/ZA | User Manual (ENGLISH) - Page 19
28. P.MODE Electronic Program Guide (EPG) display. Returns to the previous on the remote control while watching TV. MTS- You can select MTS (Multichannel Television Stereo) Manual Change Mono Every time you press the button, a PIP screen appears. - This fuction does not work for this LCD Display - Samsung LH40MGQLBF/ZA | User Manual (ENGLISH) - Page 20
Introduction Mechanical Layout(400FP-2.400FPn-2) Mechanical Layout - Samsung LH40MGQLBF/ZA | User Manual (ENGLISH) - Page 21
LCD Display Head NETWORK MODEL SIZE Introduction Installation VESA Bracket • When installing VESA, make sure to comply with the international VESA standards. • Purchasing VESA Bracket and Installation Information : Please contact your nearest SAMSUNG Distributor to place an order. After your order - Samsung LH40MGQLBF/ZA | User Manual (ENGLISH) - Page 22
Dimensions Introduction Notice For securing the bracket on a wall, use only machine screws of 6 mm diameter and 8 to 12 mm length. Wall Bracket Installation • Contact a technician for installing the wall bracket. • SAMSUNG Electronics is not responsible for any damages to the product or harm to - Samsung LH40MGQLBF/ZA | User Manual (ENGLISH) - Page 23
Introduction 1. Insert and tighten the Captive Screw in the direction of the arrow. When done, mount the wall bracket on the wall. There are two hinges(left and right). Use the correct one. A - Captive Screw B - Wall Bracket C - Hinge (Left) D - Hinge (Right) 2. - Samsung LH40MGQLBF/ZA | User Manual (ENGLISH) - Page 24
bracket The shape of the product may vary depending on the model. (The assemblies of the plastic hanger and the screw are the same) 1. Remove the 4 screws on the back of the product. 2. Insert the screw B into the plastic hanger. Notice • Mount the product on the wall bracket and make sure it - Samsung LH40MGQLBF/ZA | User Manual (ENGLISH) - Page 25
firmly fixed to the bracket. Make sure to re-insert and tighten the safety pin (3) to securely hold the product to the bracket. A - LCD Display B - Wall Bracket C - Wall Wall Bracket Angle Adjustment Adjust the bracket angle to -2° before installing it on the wall. 1. Fix the product to the - Samsung LH40MGQLBF/ZA | User Manual (ENGLISH) - Page 26
Introduction Make sure to use the top center, and not the leftor the right side of the product to adjust the angle. Mechanical Layout(460FP-2, 460FPn-2) Mechanical Layout - Samsung LH40MGQLBF/ZA | User Manual (ENGLISH) - Page 27
LCD Display Head NETWORK MODEL SIZE Introduction Installation VESA Bracket • When installing VESA, make sure to comply with the international VESA standards. • Purchasing VESA Bracket and Installation Information : Please contact your nearest SAMSUNG Distributor to place an order. After your order - Samsung LH40MGQLBF/ZA | User Manual (ENGLISH) - Page 28
Dimensions Introduction Notice For securing the bracket on a wall, use only machine screws of 6 mm diameter and 8 to 12 mm length. Wall Bracket Installation • Contact a technician for installing the wall bracket. • SAMSUNG Electronics is not responsible for any damages to the product or harm to - Samsung LH40MGQLBF/ZA | User Manual (ENGLISH) - Page 29
are two hinges(left and right). Use the correct one. 1. Insert and tighten the Captive Screw in the direction of the arrow. When done, mount the wall bracket on the wall. There are two hinges(left and right). Use the correct one. A - Captive Screw B - Wall Bracket C - Hinge (Left) D - Hinge - Samsung LH40MGQLBF/ZA | User Manual (ENGLISH) - Page 30
brackets and hinge holes to the corresponding anchor holes and insert and tighten the 11 screws A. To mount the product on the wall bracket The shape of the product may vary depending on the model. (The assemblies of the plastic hanger and the screw are the same) 1. Remove the 4 screws on the - Samsung LH40MGQLBF/ZA | User Manual (ENGLISH) - Page 31
firmly fixed to the bracket. Make sure to re-insert and tighten the safety pin (3) to securely hold the product to the bracket. A - LCD Display B - Wall Bracket C - Wall Wall Bracket Angle Adjustment Adjust the bracket angle to -2° before installing it on the wall. 1. Fix the product to the - Samsung LH40MGQLBF/ZA | User Manual (ENGLISH) - Page 32
Introduction Make sure to use the top center, and not the leftor the right side of the product to adjust the angle. - Samsung LH40MGQLBF/ZA | User Manual (ENGLISH) - Page 33
such as DVD players, VCRs or camcorders as well as your computer can be connected to the LCD Display. For detailed information on connecting AV input devices, refer to the contents under Adjusting Your LCD Display. Connect the power cord for your LCD Display to the power port on the back of the - Samsung LH40MGQLBF/ZA | User Manual (ENGLISH) - Page 34
on the back of your LCD Display and the 15 pin D-sub Port on the computer. Connect the audio cable for your LCD Display to the audio port on the back of your computer. Note • Turn on both your computer and the LCD Display. • Contact a local SAMSUNG Electronics Service Center to buy optional items - Samsung LH40MGQLBF/ZA | User Manual (ENGLISH) - Page 35
LCD Display has AV connection terminals to connect AV input devices like DVDs, VCRs or Camcorders. You may enjoy AV signals as long as the LCD Display on the LCD Display . 3. Select AV for the Camcorder connection using the Source button on the front of the LCD Display or on the remote control. 4. - Samsung LH40MGQLBF/ZA | User Manual (ENGLISH) - Page 36
using the SOURCE button on the front of the LCD Display or on the remote control. • Then, start the DVD Player with a DVD disc inserted. Note • A component cable is optional. For an explanation of Component video, consult your DVD manual. Connecting a DTV Set Top Box Note • The connections for - Samsung LH40MGQLBF/ZA | User Manual (ENGLISH) - Page 37
Connections Note • For an explanation of Component video, see your Set Top Box owner's manual. Connecting Using a HDMI Cable Note • Input devices such as digital DVD are connected to the HDMI terminal of the LCD Display using the HDMI cable. • You cannot connect a PC to the HDMI terminal. Connecting - Samsung LH40MGQLBF/ZA | User Manual (ENGLISH) - Page 38
, VCRs or camcorders as well as your computer can be connected to the LCD Display. For detailed information on connecting AV input devices, refer to the contents under Adjusting Your LCD Display. Note Connect the LAN cable. (Applicable to the FPn-2 model only) Connecting a USB device Using a Power - Samsung LH40MGQLBF/ZA | User Manual (ENGLISH) - Page 39
Connections Note You can connect USB devices such as a mouse or keyboard. (Applicable to the FPn-2 model only) - Samsung LH40MGQLBF/ZA | User Manual (ENGLISH) - Page 40
file at the Internet web site shown here. Internet web site : http://www.samsung.com/ (Worldwide) Installing the Monitor Driver (Automatic) 1. Insert CD into the CD-ROM drive. 2. Click "Windows". 3. Choose your monitor model in the model list, then click the "OK" button. 4. If you can see following - Samsung LH40MGQLBF/ZA | User Manual (ENGLISH) - Page 41
www.samsung.com/ Installing the Monitor Driver (Manual) Microsoft® Windows Vista™, Operating System 1. Insert your Manual CD into your CD-ROM drive. 2. Click (Start) and "Control Panel". Then, double-click on "Appearance and Personal- ization". 3. Click "Personalization" and then "Display Settings - Samsung LH40MGQLBF/ZA | User Manual (ENGLISH) - Page 42
MS logo, and this installation doesn't damage your system. The certified driver will be posted on Samsung Monitor homepage. 6. Click "Update Driver..." in the "Driver" tab. 7. Check the "Browse my computer for driver software" checkbox and click "Let me pick from a list of device drivers on my - Samsung LH40MGQLBF/ZA | User Manual (ENGLISH) - Page 43
Using the Software 9. Select the model that matches your monitor from the list of monitor models on the screen, and click "Next". 10. Click "Close" "Close" "OK" "OK" on the following screens displayed in sequence. Microsoft® Windows® XP Operating System - Samsung LH40MGQLBF/ZA | User Manual (ENGLISH) - Page 44
. 2. Click "Start" "Control Panel" then click the "Appearance and Themes" icon. 3. Click "Display" icon and choose the "Settings" tab then click "Advanced...". 4. Click the "Properties" button on the "Monitor" tab and select "Driver" tab. 5. Click "Update Driver..." and select "Install from a list - Samsung LH40MGQLBF/ZA | User Manual (ENGLISH) - Page 45
model list and click the "Next" button. 8. If you can see following message window, then click the "Continue Anyway" button. Then click "OK" button. Note This monitor driver is under certifying MS logo, and this installation doesn't damage your system. The certified driver will be posted on Samsung - Samsung LH40MGQLBF/ZA | User Manual (ENGLISH) - Page 46
6. Choose "Display a list of the known drivers for this device so that I can choose a specific driver" then click "Next" and then click "Have disk". 7. Click the "Browse" button then choose A:(D:\Driver). 8. Click the "Open" button, then click "OK" button. 9. Choose your monitor model and click the - Samsung LH40MGQLBF/ZA | User Manual (ENGLISH) - Page 47
Choose "Display a list of all the driver in a specific location..." then click "Next" button. 8. Click the "Have Disk" button. 9. Specify A:\(D:\driver) then click "OK" button. 10. Select "Show all devices" and choose the monitor that corresponds to the one you connected to your computer and click - Samsung LH40MGQLBF/ZA | User Manual (ENGLISH) - Page 48
desktop. Double-click the icon to start the program. MDC execution icon may not appear depending on specification of computer system or monitor. If that happens, press F5 Key. Installation Problems The installation of MDC can be affected by such factors as the video card, motherboard and the network - Samsung LH40MGQLBF/ZA | User Manual (ENGLISH) - Page 49
Using the Software Uninstall The MDC program can be removed only by using the "Add or Remove Programs" option of the Windows® Control Panel. Perform the following steps remove MDC. Select "Setting/Control Panel" on the "Start" menu and then double-click "Add/Delete a program". Select MDC from the - Samsung LH40MGQLBF/ZA | User Manual (ENGLISH) - Page 50
Adjusting the LCD Display Input Available Modes • PC / BNC / DVI • AV • HDMI • MagicInfo • TV • Component Note • The TV List MENU ENTER ENTER ENTER Use to select PC, DVI or other external input sources connected to the LCD Display. Use to select the screen of your choice. 1. PC 2. DVI 3. AV - Samsung LH40MGQLBF/ZA | User Manual (ENGLISH) - Page 51
Adjusting the LCD Display 4. HDMI This is deactivated when a TV tuner box is installed. 5. MagicInfo This is activated when a network box is installed in the HN or H model. 6. TV This is activated when a TV tuner box is installed. 7. BNC BNC mode is not supported if the component cable is connected - Samsung LH40MGQLBF/ZA | User Manual (ENGLISH) - Page 52
Adjusting the LCD Display Picture [PC / BNC / DVI / MagicInfo Mode] Available Modes • PC / BNC / DVI • AV • HDMI • MagicInfo • TV • Component Note • The TV menu is available when a TV tuner - Samsung LH40MGQLBF/ZA | User Manual (ENGLISH) - Page 53
Adjusting the LCD Display For documents or works involving heavy text. 4. Custom Although the values are carefully chosen by our engineers, the pre-configured values may not be comfortable - Samsung LH40MGQLBF/ZA | User Manual (ENGLISH) - Page 54
Adjusting the LCD Display ENTER The color tones can be changed. 1. Off 2. Cool 3. Normal 4. Warm 5. Custom Note If you set the Color Tone to Cool, Normal, Warm, or Custom, - Samsung LH40MGQLBF/ZA | User Manual (ENGLISH) - Page 55
Blue MENU ENTER Adjusting the LCD Display ENTER ENTER ENTER Color Temp MENU ENTER ENTER ENTER Color Temp is a measure of the 'warmth' of the image colors. Note This function is only - Samsung LH40MGQLBF/ZA | User Manual (ENGLISH) - Page 56
Adjusting the LCD Display H-Position MENU ENTER ENTER ENTER ENTER Adjusts the screen location panel, the auto function is performed. (Available in PC mode only) Note The direct button on the remote control is the 'AUTO' button. Signal Balance This is used to make up for the weak RGB signal - Samsung LH40MGQLBF/ZA | User Manual (ENGLISH) - Page 57
Adjusting the LCD Display ENTER Selects either On or Off with the signal control. Signal Control MENU ENTER ENTER 1. R-Gain MENU ENTER ENTER ENTER ENTER ENTER ENTER ENTER 2. G-Gain - Samsung LH40MGQLBF/ZA | User Manual (ENGLISH) - Page 58
Adjusting the LCD Display ENTER 6. B-Offset MENU ENTER ENTER ENTER Size MENU ENTER ENTER ENTER ENTER ENTER ENTER The Size can be switched. 1. 16:9 2. 4:3 Dynamic Contrast MENU ENTER ENTER - Samsung LH40MGQLBF/ZA | User Manual (ENGLISH) - Page 59
when a network box is installed. Mode MENU ENTER ENTER ENTER The LCD Display has four automatic picture settings ("Dynamic", "Standard", "Movie" and " Dynamic 2. Standard 3. Movie 4. Custom Note The direct button on the remote control is the 'P.MODE' button. Custom By using the on-screen menus, - Samsung LH40MGQLBF/ZA | User Manual (ENGLISH) - Page 60
MENU Contrast MENU Adjusting the LCD Display ENTER ENTER ENTER ENTER ENTER ENTER Adjusts the Contrast. Brightness MENU ENTER ENTER ENTER ENTER Adjusts the Brightness ENTER Tint ENTER Adjusts the picture Color. MENU ENTER ENTER ENTER ENTER Adds a natural tone to the display. - Samsung LH40MGQLBF/ZA | User Manual (ENGLISH) - Page 61
Adjusting the LCD Display Note Tint function can be available just in NTSC system. Color Tone MENU ENTER ENTER ENTER The color tones can be changed. The individual Color components are also user adjustable. 1. Off 2. Cool2 3. Cool1 4. Normal 5. Warm1 6. Warm2 Note If you set the Color Tone - Samsung LH40MGQLBF/ZA | User Manual (ENGLISH) - Page 62
LCD Display ENTER The Size can be switched. 1. 16:9 - Sets the picture to 16:9 wide mode. 2. Zoom 1 - Magnifies the size of the picture on the screen. 3. Zoom 2 - Magnifies the size of the picture more than "Zoom 1". 4. 4:3 - Sets the picture to 4:3 normal mode. 5. Just Scan - Displays the input - Samsung LH40MGQLBF/ZA | User Manual (ENGLISH) - Page 63
Film Mode MENU Adjusting the LCD Display ENTER ENTER ENTER Turns Film Mode Off/On. The Film Mode feature offers you a theater-quality viewing experience. (In HDMI mode, this function can be available when the input signal is interlaced scan; it cannot be available with progressive scan signal - Samsung LH40MGQLBF/ZA | User Manual (ENGLISH) - Page 64
a TV tuner box is installed. • The MagicInfo menu is available when a network box is installed. Mode MENU ENTER ENTER ENTER The LCD Display has a built-in high fidelity stereo amplifier. 1. Standard Selects Standard for the standard factory settings. 2. Music Selects Music when watching - Samsung LH40MGQLBF/ZA | User Manual (ENGLISH) - Page 65
Adjusting the LCD Display Bass • If you adjust sound using Custom function, Mode will turn ENTER ENTER ENTER Allows you to Adjusts the sound balance between the left and right speakers. Auto Volume MENU ENTER ENTER ENTER Reduces the difference in volume control between broadcasters. - Samsung LH40MGQLBF/ZA | User Manual (ENGLISH) - Page 66
the LCD Display ENTER SRS TS XT is a patented SRS technology that solves the problem of playing 5.1 multichannel content over two speakers. TruSurround delivers a compelling, virtual surround sound experience through any two-speaker playback system, including internal television speakers. It - Samsung LH40MGQLBF/ZA | User Manual (ENGLISH) - Page 67
running on the computer. Time Selects from one of 4 time settings, Clock Set, Sleep Timer, On Timer, and Off Timer. MENU ENTER ENTER Clock Set MENU ENTER ENTER ENTER ENTER Current Time Setting. Sleep Timer MENU ENTER ENTER ENTER ENTER Turns the LCD Display off automatically at - Samsung LH40MGQLBF/ZA | User Manual (ENGLISH) - Page 68
4. 90 5. 120 6. 150 7. 180 On Timer MENU Adjusting the LCD Display ENTER ENTER ENTER ENTER Turns the LCD Display on automatically at a preset time. Controls the mode and the volume level at the time the LCD Display turns on automatically. Off Timer MENU ENTER ENTER ENTER ENTER Turns the - Samsung LH40MGQLBF/ZA | User Manual (ENGLISH) - Page 69
Adjusting the LCD Display ENTER Change the transparency of the background of the OSD. 1. High 2. Medium 3. Low 4. Opaque Safety Lock Energy Saving to On. However, when Energy Saving is On, you cannot use the remote Power On function of the MDC and the WOL (Wake On LAN) function of MagicInfo. - Samsung LH40MGQLBF/ZA | User Manual (ENGLISH) - Page 70
HDMI Black Level MENU Adjusting the LCD Display ENTER ENTER ENTER When a DVD or set-top box is connected to your TV via HDMI, it may cause a degradation in operate in MagicInfo mode. Video Wall MENU ENTER ENTER ENTER ENTER Turns Off/On the Video Wall function of the selected display Off/On. - Samsung LH40MGQLBF/ZA | User Manual (ENGLISH) - Page 71
1. Off 2. On Format MENU Adjusting the LCD Display ENTER ENTER ENTER ENTER The Format can be selected to see a divided screen. 1. Full Provides a full screen without any margins. 2. Natural Displays a natural image with the original aspect ratio intact. Horizontal MENU ENTER ENTER ENTER - Samsung LH40MGQLBF/ZA | User Manual (ENGLISH) - Page 72
Adjusting the LCD Display ENTER Sets how many parts the screen should be divided vertically. Five The Safety Screen function is used to prevent afterimages that may appear when a still picture is displayed on the screen over a long time. • The Safety Screen function scrolls the screen for the - Samsung LH40MGQLBF/ZA | User Manual (ENGLISH) - Page 73
Adjusting the LCD Display To prevent after-images on the screen you can use this function, so that every minute pixels on the LCD are moved in horizontal or vertical direction. 1. Off 2. On Horizontal Dot MENU ENTER ENTER ENTER ENTER ENTER Sets how many pixels the screen moves horizontally. - Samsung LH40MGQLBF/ZA | User Manual (ENGLISH) - Page 74
Time MENU ENTER Adjusting the LCD Display ENTER ENTER ENTER ENTER Set the time interval for performing the horizontal or vertical movement, respectively. Timer Timer MENU ENTER ENTER ENTER ENTER ENTER You - Samsung LH40MGQLBF/ZA | User Manual (ENGLISH) - Page 75
1. Scroll 2. Bar 3. Eraser Period MENU Adjusting the LCD Display ENTER ENTER ENTER Period ENTER ENTER Time Use this function to set the execution period for each ENTER ENTER ENTER This function prevents after-images on the screen by moving all the pixels on the LCD according to a pattern. - Samsung LH40MGQLBF/ZA | User Manual (ENGLISH) - Page 76
the LCD Display Bar Use this function when there are remaining after-images or symbols on the screen, especially when you displayed a ENTER ENTER ENTER When the picture is not displayed properly on the screen when setting the graphics card resolution of the computer to 1024 x 768 @ 60Hz, 1280 x - Samsung LH40MGQLBF/ZA | User Manual (ENGLISH) - Page 77
Adjusting the LCD Display Note Available in PC mode only 1. Off 2. 1024 X 768 3. 1280 X 768 4. 1360 x 768 5. 1366 X 768 Note Selecting the menu is only allowed when the graphics - Samsung LH40MGQLBF/ZA | User Manual (ENGLISH) - Page 78
Adjusting the LCD Display 1. Off 2. Light 3. Dark Reset Reverts the product settings to factory defaults. The Reset function is only available when PC / DVI is being used. MENU ENTER - Samsung LH40MGQLBF/ZA | User Manual (ENGLISH) - Page 79
1. Landscape 2. Portrait Lamp Control MENU ENTER Adjusting the LCD Display ENTER ENTER Adjusts the inverter lamp in order to reduce energy consumption. Note This function does Assigns an individual ID to the SET. MENU ENTER ENTER • ID Setup Assigns distinctive IDs to the SET. • ID Input - Samsung LH40MGQLBF/ZA | User Manual (ENGLISH) - Page 80
menu when mounted Network box. Note • For MagicInfo, a remote control is available for MagicInfo. However, it is recommended using a separate USB keyboard. • For MagicInfo in Device mode, moving external devices while booting may cause errors. Set up external devices only if the LCD Display turns on - Samsung LH40MGQLBF/ZA | User Manual (ENGLISH) - Page 81
highly recommended not to turn off the AC power during an operation. • For pivoted LCD Displays, ticker transparency is not supported. • For pivoted LCD Displays, a screen resolution of up to 720*480(SD) is supported for movies. • For drive D:, EWF is not applied. • When the contents of Setup have - Samsung LH40MGQLBF/ZA | User Manual (ENGLISH) - Page 82
Adjusting the LCD Display Note If the MagicInfo icon is not displayed on the notification area, double click the MagicInfo icon on the window desktop. The icon will appear. - Samsung LH40MGQLBF/ZA | User Manual (ENGLISH) - Page 83
Troubleshooting Self-Test Feature Check Note Check the following items yourself before calling for assistance. Contact a Service Center for problems that you cannot solve by yourself. Self-Test Feature Check 1. Turn off both your computer and the LCD Display. 2. Unplug the video cable from the back - Samsung LH40MGQLBF/ZA | User Manual (ENGLISH) - Page 84
from the computer. Therefore, if there is a problem with the computer or the video card, this can cause the LCD Display to become blank, have poor coloring, become noisy, and video mode not supported, etc. In this case, first check the source of the problem, and then contact a Service Center or - Samsung LH40MGQLBF/ZA | User Manual (ENGLISH) - Page 85
Troubleshooting A: Check if the signal cable between the computer and the LCD Display is securely connected. (Refer to Connecting a Computer) Problems related to the Screen Note Problems related to the LCD Display screen and their solutions are listed. Q: The screen is blank and the power indicator - Samsung LH40MGQLBF/ZA | User Manual (ENGLISH) - Page 86
on the screen when you pressing the MENU button, check the cable connection between the LCD Display and the computer to ensure that the connector is properly connected. Problems related to Audio Note Problems related to audio signals and their solutions are listed below. Q: No sound. A: Ensure that - Samsung LH40MGQLBF/ZA | User Manual (ENGLISH) - Page 87
frequency? A: The frequency can be changed by reconfiguring the video card. Note That video card support can vary, depending on the version of the driver used. (Refer to the computer or the video card manual for details.) Q: How can I Adjusts the resolution? A: Windows XP: Set the resolution in the - Samsung LH40MGQLBF/ZA | User Manual (ENGLISH) - Page 88
Screen Saver. Set the function in the BIOS-SETUP of the computer. (Refer to the Windows / Computer Manual). Q: How can I clean the outer case/LCD Panel? A: Disconnect the power cord and then clean the LCD Display with a soft cloth, using either a cleaning solution or plain water. Do not leave - Samsung LH40MGQLBF/ZA | User Manual (ENGLISH) - Page 89
Specifications General General Model Name SyncMaster 400FP-2, 400FPn-2 SyncMaster 460FP-2, 460FPn-2 LCD Panel Size Display area Pixel Pitch SyncMaster 400FP-2, 400FPn-2 SyncMaster 460FP-2, 460FPn-2 SyncMaster 400FP-2, 400FPn-2 SyncMaster 460FP-2, 460FPn-2 SyncMaster 400FP-2, 400FPn-2 SyncMaster - Samsung LH40MGQLBF/ZA | User Manual (ENGLISH) - Page 90
Specifications Input Signal, Terminated RGB SyncMaster 1102.0 x 658.0 x 125.5 mm / 43.4 x 25.9 x 4.9 inch (Without 460FP-2, 460FPn-2 Stand) 1102.0 x 719.0 x 311.0 mm / 43.4 x 28.3 x 12.2 inch (With Stand) / 27.0 kg / 59.5 lbs (With protection glass-option) 32.0 kg / 70.5 lbs VESA Mounting - Samsung LH40MGQLBF/ZA | User Manual (ENGLISH) - Page 91
Specifications Plug and Play Capability This LCD Display can be installed on any Plug & Play compatible system. The interaction of the LCD Display and the computer systems will provide the best operating conditions and LCD Display settings. In most cases, the LCD Display installation will proceed - Samsung LH40MGQLBF/ZA | User Manual (ENGLISH) - Page 92
Specifications Preset Timing Modes If the signal transferred from the computer is the same as the following Preset Timing Modes, the screen will be adjusted automatically. However, if the signal differs, the screen may go blank while the power LED is on. Refer to the video card manual and adjusts - Samsung LH40MGQLBF/ZA | User Manual (ENGLISH) - Page 93
Specifications called the Vertical Frequency or Refresh Rate. Unit: Hz - Samsung LH40MGQLBF/ZA | User Manual (ENGLISH) - Page 94
For Better Display Adjust the computer resolution and screen injection rate (refresh rate) on the computer as described use it without any problems. • For example, the number of TFT-LCD sub pixels contained in this product are 3,133,440(6,220,800). When cleaning the monitor and the panel outside, - Samsung LH40MGQLBF/ZA | User Manual (ENGLISH) - Page 95
power off for 4 hours after 20 hours in use • Turn the power off for 2 hours after 12 hours in use • Set the Monitor to power off with the PC Display Properties Power Scheme. • Use a Screen saver if possible - Screen saver in one color or a moving image is recommended. Change the Color Information - Samsung LH40MGQLBF/ZA | User Manual (ENGLISH) - Page 96
hours in use. • The best way to protect your monitor from Image retention is to turn Power off, or set your PC, or System to operate a Screen Saver program when you are not using it. Also Warranty service will be limited based on instruction guide. Apply the Screen Scroll function on Product • Apply - Samsung LH40MGQLBF/ZA | User Manual (ENGLISH) - Page 97
User Guide at "OSD Function", some model's will not available ) Apply the Screen Pixel function on Product • Apply the Screen Pixel function - Symptom: Dot with Black Color move up and down. - Select method • Instruction Guide method • Instruction Guide : OSD User Guide at "OSD Function", some model - Samsung LH40MGQLBF/ZA | User Manual (ENGLISH) - Page 98
Information - Select method • Instruction Guide : OSD Menu -> Set Up -> Safety Screen -> Eraser • Time Interval : 1 ~ 10 hours ( Recommend : 1 ) • Time Period : 10 ~ 50 second ( Recommend : 50 ) Note ( Please check CD's User Guide at "OSD Function", some model's will not available ) - Samsung LH40MGQLBF/ZA | User Manual (ENGLISH) - Page 99
or comments relating to Samsung products, please contact the SAMSUNG customer care center. U.S.A CANADA MEXICO North America 1-800-SAMSUNG(726-7864) http://www.samsung.com/us 1-800-SAMSUNG(726-7864) http://www.samsung.com/ca 01-800-SAMSUNG (726-7864) http://www.samsung.com/mx ARGENTINE BRAZIL - Samsung LH40MGQLBF/ZA | User Manual (ENGLISH) - Page 100
022 - 607 - 93 - 33 808 20 - SAMSUNG http://www.samsung.com/pt (7267864) 0800-SAMSUNG(726-7864) http://www.samsung.com/sk 902 - 1 - SAMSUNG (902 172 http://www.samsung.com/es 678) 075 - SAMSUNG (726 78 64) http://www.samsung.com/se 0848-SAMSUNG(7267864, http://www.samsung.com/ch CHF 0.08/min) 0845 - Samsung LH40MGQLBF/ZA | User Manual (ENGLISH) - Page 101
vn SOUTH AFRICA TURKEY U.A.E Middle East & Africa 0860-SAMSUNG(726-7864) http://www.samsung.com/za 444 77 11 http://www.samsung.com/tr 800-SAMSUNG(726-7864) http://www.samsung.com/ae 8000-4726 Terms Dot Pitch Vertical Frequency The image on a monitor is composed of red, green and blue dots - Samsung LH40MGQLBF/ZA | User Manual (ENGLISH) - Page 102
quality screen for the user by allowing the computer and the monitor to exchange information automatically. This monitor follows the international standard for 5.1 channel speaker sound but through a 2-channel speaker. It has a good effect when stereo signals are input. Correct Disposal Correct - Samsung LH40MGQLBF/ZA | User Manual (ENGLISH) - Page 103
return systems.) This marking on the battery, manual or packaging indicates that the batteries in this product user replaceable. For information on its replacement, please contact your service provider. Authority Information in this document is subject to change without notice. © 2009 Samsung owners. - Samsung LH40MGQLBF/ZA | User Manual (ENGLISH) - Page 104
Appendix
-
 1
1 -
 2
2 -
 3
3 -
 4
4 -
 5
5 -
 6
6 -
 7
7 -
8
-
9
-
10
-
11
-
12
-
13
-
14
-
15
-
16
-
17
-
18
-
19
-
20
-
21
-
22
-
23
-
24
-
25
-
26
-
27
-
28
-
29
-
30
-
31
-
32
-
33
-
34
-
35
-
36
-
37
-
38
-
39
-
40
-
41
-
42
-
43
-
44
-
45
-
46
-
47
-
48
-
49
-
50
-
51
-
52
-
53
-
54
-
55
-
56
-
57
-
58
-
59
-
60
-
61
-
62
-
63
-
64
-
65
-
66
-
67
-
68
-
69
-
70
-
71
-
72
-
73
-
74
-
75
-
76
-
77
-
78
-
79
-
80
-
81
-
82
-
83
-
84
-
85
-
86
-
87
-
88
-
89
-
90
-
91
-
92
-
93
-
94
-
95
-
96
-
97
-
98
-
99
-
100
-
101
-
102
-
103
-
104
 |
 |

SyncMaster 400FP-2,460FP-2,400FPn-2, 460FPn-2
LCD Monitor
User Manual