Samsung LN-R329D Quick Guide (easy Manual) (ver.1.0) (English)
Samsung LN-R329D Manual
 |
View all Samsung LN-R329D manuals
Add to My Manuals
Save this manual to your list of manuals |
Samsung LN-R329D manual content summary:
- Samsung LN-R329D | Quick Guide (easy Manual) (ver.1.0) (English) - Page 1
LN-R269D LN-R329D LN-R409D LN-R469D BN68-00910A-03 This device is a Class B digital apparatus. Register your product at www.samsung.com/global/register - Samsung LN-R329D | Quick Guide (easy Manual) (ver.1.0) (English) - Page 2
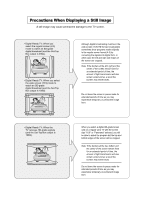
the borders may leave traces. Do not leave the screen in pause mode for extended periods of time as you may experience temporary or permanent image burn. • Digital Ready TV: When the TV receives HD-grade signals (and the Set-Top Box output is 1080i). When you watch a digital HD-grade broadcast - Samsung LN-R329D | Quick Guide (easy Manual) (ver.1.0) (English) - Page 3
signals (receives 480p regular signals). • Digital Ready TV (wide-screen): digital TV: When the TV receives SD-grade (regular) broadcasting signals (with a Set-Top Box). • When you watch an analog (regular) broadcast on a wide-screen TV (with the 4:3 screen mode selected). • When you watch a DVD, CD - Samsung LN-R329D | Quick Guide (easy Manual) (ver.1.0) (English) - Page 4
Set-Top Box via HDMI 16 Connecting a Digital Audio System 17 Connecting an Amplifier/DVD Home Theater 17 Connecting a PC 17 Connecting CableCARD (LN-R409D, LN-R469D 18 Chapter 3: Operation Turning the TV (Automatic Method 26 Adding and Erasing Channels (Manual Method 28 Setting Up Your Remote - Samsung LN-R329D | Quick Guide (easy Manual) (ver.1.0) (English) - Page 5
65 Fine Tuning Analog Channels 66 Checking the Digital-Signal Strength 67 LNA (Low Noise Amplifier 68 Chapter 7: PC Display Using Your TV as a Computer (PC) Display 69 Setting Up Your PC Software (Based on Windows XP 69 How to Auto Adjust 70 Adjusting the Screen Quality 71 Changing the Screen - Samsung LN-R329D | Quick Guide (easy Manual) (ver.1.0) (English) - Page 6
(LN-R269D 117 Installing the Wall Mount Kit (LN-R329D, LN-R409D 118 Wall Installation Instructions (LN-R469D 119 How to assemble the Stand-Base (LN-R469D 123 Using the Anti-Theft Kensington Lock 124 Using Your TV in Another Country 124 CableCARD and Digital Cable Ready TVs 125 Specifications - Samsung LN-R329D | Quick Guide (easy Manual) (ver.1.0) (English) - Page 7
- The Anynet system enables you to easily control Samsung audio-video (AV) devices from this TV. - For more information about Anynet, refer to the Anynet AV Owner's Instructions. List of Parts Please make sure the following items are included with your LCD TV. If any items are missing, contact your - Samsung LN-R329D | Quick Guide (easy Manual) (ver.1.0) (English) - Page 8
LN-R269D - TV, AV, S-VIDEO, Component 1, Component 2, PC, HDMI • LN-R329D / LN-R409D / LN-R469D - TV, AV 1, AV 2, S-VIDEO 1, S-VIDEO 2, Component 1, Component 2, PC, HDMI up in stand-by mode. REMOTE CONTROL SENSOR Aim the remote control towards this spot on the TV. LIGHT DETECTING SENSOR Adjusts - Samsung LN-R329D | Quick Guide (easy Manual) (ver.1.0) (English) - Page 9
to connect an A/V component that will be connected continuously, such as a VCR or a DVD player. For more information on connecting equipment, see pages 8-18. The TV surface can be different depending on the model. LN-R269D LN-R329D LN-R409D / LN-R469D English-3 - Samsung LN-R329D | Quick Guide (easy Manual) (ver.1.0) (English) - Page 10
jacks on your PC. HEADPHONE (LN-R269D) Connect a set of external headphones for private listening. AUDIO OUT Connect to the audio input jacks on your Amplifier/Home theater. Anynet Refer to "Anynet AV Owner's Instructions". SERVICE Connector for service only. COMPONENT IN Connect component video - Samsung LN-R329D | Quick Guide (easy Manual) (ver.1.0) (English) - Page 11
Set-Top Box. POWER Turns the TV on and off. (See page 19) ANTENNA Press to select "AIR" or "CABLE". (See pages 8~11) GUIDE Press to display the on-screen Electronic Program Guide menu. (See page 20) MODE Selects a target device to be controlled by the Samsung remote control (TV, VCR, CATV, DVD, STB - Samsung LN-R329D | Quick Guide (easy Manual) (ver.1.0) (English) - Page 12
the Anynet button to bring up the Anynet menu. Refer to "Anynet AV Owner's Instructions". STILL Press to stop the action during a particular scene. Press again to 40) SRS Selects TruSurround XT mode. (See page 54) SET Adjusts 5 separate devices - TV, VCR, Cable, DVD, or Set-Top Box. (See pages 29 - Samsung LN-R329D | Quick Guide (easy Manual) (ver.1.0) (English) - Page 13
control can be used up to about 23 feet from the TV. (Assuming typical TV usage, the batteries last for about one year.) If the remote control doesn't work Check the following: 1. Is the TV power on? 2. Are the plus and minus ends of the batteries reversed? - Samsung LN-R329D | Quick Guide (easy Manual) (ver.1.0) (English) - Page 14
Chapter 2 CONNECTIONS Connecting VHF and UHF Antennas If your antenna has a set of leads that look like this, see "Antennas with 300-ohm Flat Twin Leads" below. If your to tighten the screws. 2 Plug the adaptor into the ANT 1 IN (CABLE) terminal on the back of the TV. ANT 1 IN (CABLE) English-8 - Samsung LN-R329D | Quick Guide (easy Manual) (ver.1.0) (English) - Page 15
the combiner into the ANT 2 IN (AIR) terminal on the bottom of the rear panel. UHF VHF ANT 2 IN (AIR) Connecting Cable TV To connect to a cable TV system, follow the instructions below. Cable without a Cable Box 1 Plug the incoming cable into the ANT 1 IN (CABLE) terminal on the back of the - Samsung LN-R329D | Quick Guide (easy Manual) (ver.1.0) (English) - Page 16
ANT 1 IN (CABLE) terminal on the back of the TV. ANT 1 IN (CABLE) Connecting to a Cable Box channels (such as premium channels), follow the instructions below. You will need a two-way These items are available at most electronics stores.) 1 Find and disconnect the cable that is connected to the - Samsung LN-R329D | Quick Guide (easy Manual) (ver.1.0) (English) - Page 17
and the ANT 1 IN (CABLE) terminal on the rear of the TV. Incoming cable Splitter Cable Box RF (A/B) Switch ANT 1IN (CABLE) TV Rear After you have made this connection, set the A/B switch to the "A" position for normal viewing. Set the A/B switch to the "B" position to view scrambled channels - Samsung LN-R329D | Quick Guide (easy Manual) (ver.1.0) (English) - Page 18
assume that you have already connected your TV to an antenna or a cable TV system (according to the instructions on pages 8-11). Skip step 1 if you have not yet connected to an antenna or a cable system. 1 Unplug the cable or antenna from the back of the TV. ANT IN 2 Connect the cable or antenna - Samsung LN-R329D | Quick Guide (easy Manual) (ver.1.0) (English) - Page 19
not supplied) to hook up to the right and left audio input jacks of the TV. If your VCR is stereo, you must connect two cables. 5 Connect a [VIDEO] jack on the TV. VCR Rear Panel TV Rear Panel Audio Cable (Option) Video Cable (Option) RF Cable (Option) Follow the instructions in "Viewing a VCR - Samsung LN-R329D | Quick Guide (easy Manual) (ver.1.0) (English) - Page 20
VCR Your Samsung TV can be connected to an S-Video signal from an S-VHS VCR. (This connection delivers a better picture as compared to a standard VHS VCR.) 1 To begin, follow steps 1-3 in the previous section to connect the antenna or cable to your VCR and your TV. VCR Rear Panel TV Rear Panel - Samsung LN-R329D | Quick Guide (easy Manual) (ver.1.0) (English) - Page 21
COMPONENT [Y, PB, PR] jacks on the DVD player. DVD Player Rear Panel TV Rear Panel Audio Cable (Option) Component Cable (Option) Note: For an explanation of Component video, see your DVD player owner's manual. Be sure to match the component video and audio connections. For example, if connecting - Samsung LN-R329D | Quick Guide (easy Manual) (ver.1.0) (English) - Page 22
Output connector on the external device. 1 Connect a DVI to HDMI cable or DVI-HDMI Adapter between the HDMI/DVI connector on the TV and the DVI connector on the DVD player/Set-Top Box. DVD Player / Set-Top Box TV Rear Panel DVI to HDMI Cable (Option) 2 Connect an audio cable between the DVI IN - Samsung LN-R329D | Quick Guide (easy Manual) (ver.1.0) (English) - Page 23
when it is connected to an external device supporting 5.1CH. For an explanation of Component video, see your Digital Audio System owner's manual. Connecting an Amplifier/DVD Home Theater 1 Connect an audio cable between the AUDIO OUT [R-AUDIO-L] on the TV and AUDIO IN [R-AUDIO-L] on the Amplifier - Samsung LN-R329D | Quick Guide (easy Manual) (ver.1.0) (English) - Page 24
CONNECTIONS Connecting CableCARD (LN-R409D, LN-R469D) You must obtain a CableCARD from a local cable service provider. TV Rear Panel CableCARD RF displayed in about 2~3 minutes. If an error message is displayed, please contact your service provider. 3 When the channel information configuration - Samsung LN-R329D | Quick Guide (easy Manual) (ver.1.0) (English) - Page 25
not memorized. See pages 21-28 to memorize channels. Using the PRE-CH Button to select the Previous Channel 1 Press the PRE-CH button. The TV will switch to the last channel viewed. To quickly switch between two channels that are far apart, tune to one channel, then use the number - Samsung LN-R329D | Quick Guide (easy Manual) (ver.1.0) (English) - Page 26
settings. 1 Press the INFO button on the remote control. The TV will display the channel, the type of sound, and the status of certain picture and sound settings Its left side has six icons: Input, Picture, Sound, Channel, Setup, Guide. 2 Use the UP/DOWN buttons to select one of the six icons. - Samsung LN-R329D | Quick Guide (easy Manual) (ver.1.0) (English) - Page 27
Play Feature When the TV is initially powered on, two basic customer settings proceed automatically and subsequently: Some OSD can be different depending on the model. 1 Press the POWER button on the remote control. The message "Menu language, Channels and Time will be set." is displayed. Press the - Samsung LN-R329D | Quick Guide (easy Manual) (ver.1.0) (English) - Page 28
LN-R269D / LN-R329D) Press the UP/DOWN buttons to select "Cable" or "Air+Cable" then press the ENTER button. Press the UP/DOWN buttons to select "STD", "HRC" or "IRC", press the ENTER button. 4-2 (LN-R409D / LN and IRC identify various types of cable TV systems. Contact your local cable company to - Samsung LN-R329D | Quick Guide (easy Manual) (ver.1.0) (English) - Page 29
O P E R AT I O N 5 The TV will begin memorizing all of the available channels. After all the available channels are stored, the Auto program menu reappears. Press the ENTER button when channel memorization is complete. "Set to daylight savings time." menu is automatically displayed. Note • To stop - Samsung LN-R329D | Quick Guide (easy Manual) (ver.1.0) (English) - Page 30
If you have received a digital signal, the time will be set automatically. If not, see page 76 to set the clock. 8 The message "Completed. Time will be updated the ENTER button. For further details on setting up options, refer to the previous page. Note • Plug and Play can only be - Samsung LN-R329D | Quick Guide (easy Manual) (ver.1.0) (English) - Page 31
memorizing the channels (automatic) and adding and deleting channels (manual). Selecting the Video Signal-source Before your television can begin channels, you must specify the type of signal source that is connected to the TV (i.e. an antenna or a cable system). 1 Press the MENU button to display - Samsung LN-R329D | Quick Guide (easy Manual) (ver.1.0) (English) - Page 32
) Some OSD can be different depending on the model. 1 Press the MENU button. Press the UP/DOWN buttons to select "Channel", then press the ENTER button. 2 Press the UP/DOWN buttons to select "Auto Program", then press the ENTER button. 3-1 (LN-R269D / LN-R329D) Press the UP/DOWN buttons to select - Samsung LN-R329D | Quick Guide (easy Manual) (ver.1.0) (English) - Page 33
O P E R AT I O N 4 After all the available channels are stored, the "Auto Program" menu reappears. Press the EXIT button to exit. English-27 - Samsung LN-R329D | Quick Guide (easy Manual) (ver.1.0) (English) - Page 34
O P E R AT I O N Adding and Erasing Channels (Manual Method) 1 Press the MENU button. Press the UP/DOWN buttons to select "Channel", then press the ENTER button. 2 Press the UP/DOWN buttons to select " - Samsung LN-R329D | Quick Guide (easy Manual) (ver.1.0) (English) - Page 35
off your VCR. 2 Press the MODE button and make sure that the VCR appears on the LCD screen. 3 Press the SET button on your TV's remote control. 4 Using the number buttons on your remote control, enter three digits of the VCR code listed on page 32 of this manual for your brand of VCR. Make - Samsung LN-R329D | Quick Guide (easy Manual) (ver.1.0) (English) - Page 36
the MODE button and make sure that the CATV appears on the LCD screen. 3 Press the SET button on your TV's remote control. 4 Using the number buttons on your remote control, enter three digits of the cable box code listed on page 32 of this manual - Samsung LN-R329D | Quick Guide (easy Manual) (ver.1.0) (English) - Page 37
off your DVD. 2 Press the MODE button and make sure that the DVD appears on the LCD screen. 3 Press the SET button on your TV's remote control. 4Using the number buttons on your remote control, enter three digits of the DVD code listed on page 32 of this manual for your brand of DVD. Make - Samsung LN-R329D | Quick Guide (easy Manual) (ver.1.0) (English) - Page 38
Funai GE Hitachi JC Penny Kenwood Magnavox Marantz NEC Panasonic Philco Philips Pioneer RCA Samsung Sanyo Sears Sharp Sony Sylvania Toshiba Code 025 002 017 007 008 021 025 029 051 052 Cable Box Brand Hitachi Panasonic Philips Pioneer RCA Samsung Zenith Code 025 030 003 022 027 037 044 019 021 - Samsung LN-R329D | Quick Guide (easy Manual) (ver.1.0) (English) - Page 39
press the ENTER button. Press the EXIT button to exit. (LN-R269D) • When you connect equipment to the LCD, you can choose between the following sets of jacks: TV, AV, S-Video, Component 1, Component 2, PC, or HDMI on the TV's rear panel. • HDMI input can only be selected when the external device is - Samsung LN-R329D | Quick Guide (easy Manual) (ver.1.0) (English) - Page 40
Alternate method: Press the SOURCE button on the remote control to view an external signal source. Note You can choose only those external devices that are connected to the TV. English-34 - Samsung LN-R329D | Quick Guide (easy Manual) (ver.1.0) (English) - Page 41
model. 1 Press the MENU button to display the on-screen menu. Press the ENTER button to select "Input". Press the UP/DOWN buttons to select "Edit Name", then pressthe ENTER button. 2-1 (LN-R269D) Press the UP/DOWN buttons to select "AV", "S-Video", "Component1", "Component2", "PC", or "HDMI" input - Samsung LN-R329D | Quick Guide (easy Manual) (ver.1.0) (English) - Page 42
3-1 (LN-R269D) Press the UP/DOWN buttons to select "VCR", "DVD", "D-VHS", "Cable STB", "HD STB", "Satellite STB", "PVR STB", "AV Receiver", "DVD Receiver", "GAME", "Camcorder" , "DVD Combo", "PC", "VOD STB", or "TV" input source, then press the ENTER button. Press the EXIT button to exit. 3-2 (LN- - Samsung LN-R329D | Quick Guide (easy Manual) (ver.1.0) (English) - Page 43
Chapter 4 PICTURE CONTROL Using Automatic Picture Settings Your TV has four automatic picture settings ("Dynamic", "Standard", "Movie", "Dynamic", "Standard", "Movie", or "Custom" picture setting. Press the ENTER button. In case of the PC mode, Tint, Sharpness and Color are not available. • - Samsung LN-R329D | Quick Guide (easy Manual) (ver.1.0) (English) - Page 44
The Tint can be adjusted in any mode other than PC mode. • "Tint" doesn't operate in HDMI or any Component modes. • The Tint cannot be adjusted while watching Digital TV. • Each adjusted setting will be stored separately according to its input mode. • When you make changes to Contrast, Brightness - Samsung LN-R329D | Quick Guide (easy Manual) (ver.1.0) (English) - Page 45
"Normal", "Warm1", or "Warm2". Press the ENTER button. Press the EXIT button to exit. Resetting the Picture Settings to the Factory Defaults Press the ENTER button again to select "Mode". Press the UP/DOWN buttons to select "Reset", then press the ENTER button. Choose from the following Color Tone - Samsung LN-R329D | Quick Guide (easy Manual) (ver.1.0) (English) - Page 46
PICTURE CONTROL DNIe (Digital Natural Image engine) Samsung's new technology brings you more detailed images with contrast, white enhancement and 3D noise reduction. You can see how DNIe improves the picture by setting DNIe demo mode to On. 1 Press the MENU button to display the menu. Press the - Samsung LN-R329D | Quick Guide (easy Manual) (ver.1.0) (English) - Page 47
LEFT/RIGHT buttons to select the screen format you want. Press the ENTER button. Press the EXIT button to exit. • 16:9 : Sets the picture to 16:9 wide mode. • Panorama : Use this mode for the wide aspect ratio of a panoramic picture. • Zoom1 : Magnifies the size of the picture on the screen. • Zoom2 - Samsung LN-R329D | Quick Guide (easy Manual) (ver.1.0) (English) - Page 48
is vertically enlarged. 4:3 Sets the picture to 4:3 normal mode. Note • In TV, VIDEO, S-VIDEO,and all COMPONENT (480i, 480p) modes, all screen modes can be selected. (16:9 • Panorama • Zoom1 • Zoom2 • 4:3). • In TV(DTV), DVI, PC, HDMI, COMPONENT (720p, 1080i) modes, only 16:9 & 4:3 modes can be - Samsung LN-R329D | Quick Guide (easy Manual) (ver.1.0) (English) - Page 49
PICTURE CONTROL Freezing the Picture 1 Press the STILL button to freeze a moving picture. • Normal sound will still be heard. Press again to cancel. English-43 - Samsung LN-R329D | Quick Guide (easy Manual) (ver.1.0) (English) - Page 50
has one built-in tuner, which does not allow PIP to function in the same mode. For example, you cannot watch one TV channel in the main screen, and a different one in the PIP screen. Please see 'PIP Settings'below for details. You can use the PIP feature to simultaneously watch two video - Samsung LN-R329D | Quick Guide (easy Manual) (ver.1.0) (English) - Page 51
can be different depending on the model. 3-1 (LN-R269D) Press the UP/DOWN buttons to select "Source", then press the ENTER button. Select the source of the sub picture (PIP) by pressing the UP/DOWN buttons and press the ENTER button. • MAIN : TV(ATV) PIP : HDMI • The sub picture can serve - Samsung LN-R329D | Quick Guide (easy Manual) (ver.1.0) (English) - Page 52
to select the desired channel in the PIP window. • MAIN : AV(1, 2), S-Video(1, 2), COM(1, 2) PIP : TV(DTV) • MAIN : PC, HDMI PIP : TV(ATV) • The channel can be active when the sub picture is set to TV. Press the ENTER buttons. Alternate method : Press the PIP Channel buttons under the remote - Samsung LN-R329D | Quick Guide (easy Manual) (ver.1.0) (English) - Page 53
"Position", then press the ENTER button. Press the UP/DOWN buttons to select the desired PIP window position. Press the ENTER buttons. • The Double ( ) mode cannot be selected in position. Changing the Size of the PIP Window 7 Press the UP/DOWN buttons to select "Size", then press the ENTER button - Samsung LN-R329D | Quick Guide (easy Manual) (ver.1.0) (English) - Page 54
colors to their preference by adjusting Pink, Blue and Green using the predefined settings (Red, Green, Blue, Yellow, Pink, White, Standard, and Custom) picture (before adjustment) is shown on the left side, while the selected mode is shown on the right side. * The sources are displayed in the - Samsung LN-R329D | Quick Guide (easy Manual) (ver.1.0) (English) - Page 55
following order: Red-Green-Blue-Yellow-Pink-White-Reset English-49 You can adjust Red, Green, Blue, Yellow, Pink and White without using the predefined settings in custom mode. This function doesn't work when the Source is in PC - Samsung LN-R329D | Quick Guide (easy Manual) (ver.1.0) (English) - Page 56
. 2 Press the UP/DOWN buttons to select "Dynamic Contrast", then press the ENTER button. This function doesn't work when the Source is in PC mode, or PIP is set to on. 3 Press the UP/DOWN buttons to select "On", then press the ENTER button. Press the EXIT button to exit. English-50 - Samsung LN-R329D | Quick Guide (easy Manual) (ver.1.0) (English) - Page 57
2 Press the UP/DOWN buttons to select "Brightness Sensor", then press the ENTER button. This function doesn't work when the Source is in PC mode. 3 Press the LEFT/RIGHT buttons to select "On", then press the ENTER button. Press the EXIT button to exit. Screen brightness is adjusted automatically - Samsung LN-R329D | Quick Guide (easy Manual) (ver.1.0) (English) - Page 58
can be adjusted to suit your personal preference. (Alternatively, you can use one of the "automatic" settings. See the next page.) 1 Press the MENU button to display the menu. Press the UP/DOWN buttons to select "Sound", then press the ENTER button. 2 - Samsung LN-R329D | Quick Guide (easy Manual) (ver.1.0) (English) - Page 59
UP/DOWN buttons to select "Sound", then press the ENTER button. 2 Press the ENTER to select "Mode". button Press the UP/DOWN buttons to select "Standard", "Music", "Movie", "Speech", or "Custom" sound setting, then press the ENTER button. Press the EXIT button to exit. • Choose Standard for the - Samsung LN-R329D | Quick Guide (easy Manual) (ver.1.0) (English) - Page 60
SOUND CONTROL Setting the TruSurround XT TruSurround XT is a patented SRS technology that solves the problem of playing 5.1 multichannel content over two speakers. Trusurround delivers a compelling, virtual surround sound experience through any two-speaker playback system, including internal - Samsung LN-R329D | Quick Guide (easy Manual) (ver.1.0) (English) - Page 61
SOUND CONTROL Choosing a Multi-Channel Sound (MTS) track - Digital The digital-TV transmission system is capable of simultaneous transmission of many audio tracks (for example, simultaneous translations of the program into foreign languages). The availability of these - Samsung LN-R329D | Quick Guide (easy Manual) (ver.1.0) (English) - Page 62
the ENTER button. 3 Press the UP/DOWN buttons to select "Multi-Track Sound", then press the ENTER button. Press the UP/DOWN buttons to select a setting you want, then press the ENTER button. Press the EXIT button to exit. • Choose Mono for channels that are broadcasting in mono, or if you - Samsung LN-R329D | Quick Guide (easy Manual) (ver.1.0) (English) - Page 63
", then press the ENTER button. 2 Press the UP/DOWN buttons to select "Auto Volume", then press the ENTER button. 3 Press the UP/DOWN buttons to set Auto Volume "On" then press the ENTER button. Press the EXIT button to exit. English-57 - Samsung LN-R329D | Quick Guide (easy Manual) (ver.1.0) (English) - Page 64
SOUND CONTROL Selecting the Internal Mute Sound output from the TV speakers is muted. 1 Press the MENU button to display the menu. Press the UP/DOWN buttons to select "Sound", then press the ENTER button. 2 Press - Samsung LN-R329D | Quick Guide (easy Manual) (ver.1.0) (English) - Page 65
Digital sound can be output from the rear panel connector on your TV. The digital sound output is a connector labeled "Optical". After Modulation): this is for use with 2 channel AVamplifiers that do not support Dolby digital. DOLBY DIGITAL Manufactured under license from Dolby Laboratories. "Dolby - Samsung LN-R329D | Quick Guide (easy Manual) (ver.1.0) (English) - Page 66
On/Off Melody A melody sound can be set to come on when the TV is powered On or Off. 1 Press the MENU button to display the menu. Press the UP/DOWN buttons to select "Sound", then press the ENTER - Samsung LN-R329D | Quick Guide (easy Manual) (ver.1.0) (English) - Page 67
Chapter 6 CHANNEL CONTROL Selecting the Antenna 1 Press the MENU button to display the menu. Press the UP/DOWN buttons to select "Channel", then press the ENTER button. 2 Press the ENTER button to select "Antenna". Press the UP/DOWN buttons to select "Air" or "Cable", then press the ENTER button. - Samsung LN-R329D | Quick Guide (easy Manual) (ver.1.0) (English) - Page 68
CHANNEL CONTROL To Set-up Your Favorite Channels 1 Press the MENU button to display the EXIT button to exit. 3 To select the favorite channels you have set up, press the FAV.CH button on the remote. Only memorized channels can be set as favorite channels. Select All : Press to select all channels. - Samsung LN-R329D | Quick Guide (easy Manual) (ver.1.0) (English) - Page 69
CHANNEL CONTROL Labeling Channels 1 Press the MENU button to display the menu. Press the UP/DOWN buttons to select "Channel", then press the ENTER button. Press the UP/DOWN buttons to select "Name", then press the ENTER button. 2 Press the UP/DOWN buttons to select the channel to be assigned to - Samsung LN-R329D | Quick Guide (easy Manual) (ver.1.0) (English) - Page 70
CHANNEL CONTROL Viewing the Channel Lists You can display a list of all channels or your favorite channels. 1 Press the MENU button to display the menu. Press the UP/DOWN buttons to select "Channel", then press the ENTER button. 2 Press the UP/DOWN buttons to select "Channel List", then press the - Samsung LN-R329D | Quick Guide (easy Manual) (ver.1.0) (English) - Page 71
CHANNEL CONTROL Editing the Channel Lists You can edit channels to be added or deleted. 1 Press the MENU button to display the menu. Press the UP/DOWN buttons to select "Channel", then press the ENTER button. 2 Press the UP/DOWN buttons to select "Channel List", then press the ENTER button. Press - Samsung LN-R329D | Quick Guide (easy Manual) (ver.1.0) (English) - Page 72
Fine Tuning Analog Channels Use fine tuning to manually adjust a particular channel for optimal reception. 1 adjust the fine tuning. 4 To store the fine tuning setting in the TV's memory, press the ENTER button. To reset the fine tuning setting, press the DOWN button to select "Reset", then press - Samsung LN-R329D | Quick Guide (easy Manual) (ver.1.0) (English) - Page 73
channels, which can vary in reception quality from "snowy" to clear, digital (HDTV) channels have either perfect reception quality or you will not receive them at all. Continue to adjust the antenna until you find the best position with the strongest signal. Press the EXIT button to exit. English- - Samsung LN-R329D | Quick Guide (easy Manual) (ver.1.0) (English) - Page 74
CHANNEL CONTROL LNA (Low Noise Amplifier) If the TV is operating in a weak-signal area, sometimes the LNA function can EXIT button to exit. • LNA functions only when antenna is set to AIR and the settings will be stored separately in each channel. (See "Selecting the antenna." on page 61.) • For - Samsung LN-R329D | Quick Guide (easy Manual) (ver.1.0) (English) - Page 75
and your particular video card. However, even if your actual screens look different, the same basic set-up information will apply in almost all cases. (If not, contact your computer manufacturer or Samsung Dealer.) 1 First, click on "Control Panel" on the Windows start menu. 2 When the control panel - Samsung LN-R329D | Quick Guide (easy Manual) (ver.1.0) (English) - Page 76
the TV set automatically adjust the video signals the monitor receives. The function also automatically fine-tunes the settings and adjusts the frequency values and positions. Note: This function does not work in DVI-Digital mode. Some OSD can be different depending on the model. 1-1 (LN-R269D/ LN - Samsung LN-R329D | Quick Guide (easy Manual) (ver.1.0) (English) - Page 77
on the model. 1-1 (LN-R269D/ LN-R329D) Press the MENU button to display the menu. Press the UP/DOWN buttons to select "Setup", then press the ENTER button. Press the UP/DOWN buttons to select "PC", then press the ENTER button. Change to the PC mode first. 1-2 (LN-R409D / LN - Samsung LN-R329D | Quick Guide (easy Manual) (ver.1.0) (English) - Page 78
3 Press the UP/DOWN buttons to select "Coarse" or "Fine", then press the ENTER button. Press the LEFT/RIGHT buttons to adjust the screen quality. Vertical stripes may appear or the picture may be blurry. Press the ENTER button. Press the EXIT button to exit. - Samsung LN-R329D | Quick Guide (easy Manual) (ver.1.0) (English) - Page 79
depending on the model. 1-1 (LN-R269D/ LN-R329D) Press the MENU button to display the menu. Press the UP/DOWN buttons to select "Setup", then press the ENTER button. Press the UP/DOWN buttons to select "PC", then press the ENTER button. Change to the PC mode first. 1-2 (LN-R409D / LN-R469D) Press - Samsung LN-R329D | Quick Guide (easy Manual) (ver.1.0) (English) - Page 80
3 Press the UP/DOWN buttons to adjust the V-Position. Press the LEFT/RIGHT buttons to adjust the H-Position. Press the ENTER button. Press the EXIT button to exit. English-74 - Samsung LN-R329D | Quick Guide (easy Manual) (ver.1.0) (English) - Page 81
Settings Some OSD can be different depending on the model. 1-1 (LN-R269D/ LN-R329D) Press the MENU button to display the menu. Press the UP/DOWN buttons to select "Setup", then press the ENTER button. Press the UP/DOWN buttons to select "PC", then press the ENTER button. Change to the PC mode - Samsung LN-R329D | Quick Guide (easy Manual) (ver.1.0) (English) - Page 82
various timer features of the TV. Also, you can check the time while watching the TV. (Just press the INFO button.) Option 1: Setting the Clock Manually 1 Press the MENU button ENTER button to select "Clock Mode". Press the UP/DOWN buttons to select "Manual", then press the ENTER button. English-76 - Samsung LN-R329D | Quick Guide (easy Manual) (ver.1.0) (English) - Page 83
then press the ENTER button. 5 Press the LEFT/RIGHT buttons to move to "Month", "Day", "Year", "Hour", "Minute", or "am/pm". Set the date and time you want by pressing the UP/DOWN buttons, then press the ENTER button. Press the EXIT button to exit. • The current - Samsung LN-R329D | Quick Guide (easy Manual) (ver.1.0) (English) - Page 84
TIME SETTING Option 2: Setting the Clock Automatically 1 Press the MENU button to display the menu. Press the UP/DOWN . 2 Press the ENTER button to select "Clock". 3 Press the ENTER button to select "Clock Mode". Press the UP/DOWN buttons to select "Auto", then press the ENTER button. English-78 - Samsung LN-R329D | Quick Guide (easy Manual) (ver.1.0) (English) - Page 85
TIME SETTING 4 Press the UP/DOWN buttons to select "Time Zone", then press the ENTER button. 5 Press the EXIT button to exit. Depending on the broadcast station and signal, the auto time may not be set correctly. If this occurs, set the time manually. Antenna or cable must be connected in order to - Samsung LN-R329D | Quick Guide (easy Manual) (ver.1.0) (English) - Page 86
TIME SETTING Setting the Sleep Timer The sleep timer automatically shuts off the TV after a preset time (from 30 to 180 minutes). 1 Press the MENU button to display the menu. Press the UP/DOWN buttons to select "Setup", then - Samsung LN-R329D | Quick Guide (easy Manual) (ver.1.0) (English) - Page 87
to adjust "Hour", then press the RIGHT button to move to the next step. Set other items using the same method as above. 4 Press the UP/DOWN buttons to to adjust "Hour", then press the RIGHT button to move to the next step. Set other items using the same method as above. Press the EXIT button to exit. - Samsung LN-R329D | Quick Guide (easy Manual) (ver.1.0) (English) - Page 88
Chapter 9 FUNCTION DESCRIPTION Selecting a Menu Language 1 Press the MENU button to display the menu. Press the UP/DOWN buttons to select "Setup", then press the ENTER button. Press the UP/DOWN buttons to select "Language", then press the ENTER button. 2 Press the UP/DOWN buttons to select the - Samsung LN-R329D | Quick Guide (easy Manual) (ver.1.0) (English) - Page 89
and adjusts the picture for optimum quality. Off: Switches off the Film mode. 1 Press the MENU button to display the menu. Press the UP/ ", then press the ENTER button. 2 Press the UP/DOWN buttons to select "Film Mode", then press the ENTER button. 3 Press the UP/DOWN buttons to select "On", - Samsung LN-R329D | Quick Guide (easy Manual) (ver.1.0) (English) - Page 90
FUNCTION DESCRIPTION Digital Noise Reduction If the broadcast signal received by your TV is weak, you can activate the Digital Noise Reduction feature to help reduce any static and ghosting that may appear on the screen. 1 Press the - Samsung LN-R329D | Quick Guide (easy Manual) (ver.1.0) (English) - Page 91
to the user's particular color weakness. Some OSD can be different depending on the model. 1 Press the MENU button to display the menu. Press the UP/DOWN buttons to select "Setup", then press the ENTER button. 2-1 (LN-R269D / LN-R329D) Press the UP/DOWN buttons to select "Color Weakness", then press - Samsung LN-R329D | Quick Guide (easy Manual) (ver.1.0) (English) - Page 92
FUNCTION DESCRIPTION 3 Press the ENTER button. Press the UP/DOWN buttons to select "On", then press the ENTER button. You will also see the items "Red", "Green" and "Blue". 4 Press the UP/DOWN buttons to select the item you wish to change, then press the ENTER button. Press the LEFT/RIGHT buttons to - Samsung LN-R329D | Quick Guide (easy Manual) (ver.1.0) (English) - Page 93
FUNCTION DESCRIPTION Viewing Closed Captions (On-Screen Text Messages) - Analog The Analog Caption function operates in either analog RF channel mode or external signal mode. 1 Press the MENU button to display the menu. Press the UP/DOWN buttons to select "Setup", then press the ENTER button. 2 - Samsung LN-R329D | Quick Guide (easy Manual) (ver.1.0) (English) - Page 94
Service. These are captions in the primary language that must be in sync with the sound, preferably matched to a specific frame Services. These data channels should be used only if Text1 and Text2 are not sufficient. Note • The Caption feature doesn't work in COMPONENT(480p, 720p, 1080i), HDMI modes - Samsung LN-R329D | Quick Guide (easy Manual) (ver.1.0) (English) - Page 95
FUNCTION DESCRIPTION Viewing Closed Captions (On-Screen Text Messages) - Digital The Digital Captions function operates on digital channels. 1 Press the MENU button to display the menu. Press the UP/DOWN buttons to select "Setup", then press the ENTER button. 2 Press the UP/DOWN buttons to select " - Samsung LN-R329D | Quick Guide (easy Manual) (ver.1.0) (English) - Page 96
4 Press the UP/DOWN buttons to select "Caption Mode", then press the ENTER button. Press the UP/DOWN are available only when "Service1~Service6" can be selected in "Caption Mode". • SERVICE1~6 in digital caption mode may not be available depending on the broadcast. • The availability of cap - Samsung LN-R329D | Quick Guide (easy Manual) (ver.1.0) (English) - Page 97
", "Transparent", "Translucent", "Solid", and "Flashing". You can change the background opacity of the caption. • Return to Default This option sets each of "Size", "Font Style", "Foreground Color", "Bakcground color", "Foreground Opacity", and "Background Opacity" to its default. Alternate method - Samsung LN-R329D | Quick Guide (easy Manual) (ver.1.0) (English) - Page 98
FUNCTION DESCRIPTION Menu Transparency Level Adjusts the transparency of the menu screen. 1 Press the MENU button to display the menu. Press the UP/DOWN buttons to select "Setup", then press the ENTER button. 2 Press the UP/DOWN buttons to select "Menu Transparency", then press the ENTER - Samsung LN-R329D | Quick Guide (easy Manual) (ver.1.0) (English) - Page 99
FUNCTION DESCRIPTION Setting the Function Help Displays help on the menu functions. Some OSD can be different depending on the model. 1 Press the MENU button to display the menu. Press the UP/DOWN buttons to select "Setup", then press the ENTER button. 2-1 (LN-R269D / LN-R329D) Press the UP/DOWN - Samsung LN-R329D | Quick Guide (easy Manual) (ver.1.0) (English) - Page 100
3-1 (LN-R269D / LN-R329D) Press the UP/DOWN buttons to select "On", then press the ENTER button. Press the EXIT button to exit 3-2 (LN-R409D / LN-R469D) Press the UP/DOWN buttons to select "On", then press the ENTER button. Press the EXIT button to exit English-94 - Samsung LN-R329D | Quick Guide (easy Manual) (ver.1.0) (English) - Page 101
"V-Chip", then press the ENTER button. The message "Enter PIN" will appear. Enter your 4 digit PIN number. • The default PIN number of a new TV set is "0-0-0-0". 3 The "V-Chip" screen will appear. Press the UP/DOWN buttons to select "Change PIN", then press the ENTER button. The Change PIN - Samsung LN-R329D | Quick Guide (easy Manual) (ver.1.0) (English) - Page 102
FUNCTION DESCRIPTION How to Enable/Disable the V-Chip 1 Press the MENU button to display the menu. Press the UP/DOWN buttons to select "Setup", then press the ENTER button. 2 Press the UP/DOWN buttons to select "V-Chip", then press the ENTER button. The message "Enter PIN" will appear. Enter your 4 - Samsung LN-R329D | Quick Guide (easy Manual) (ver.1.0) (English) - Page 103
up a personal identification number (PIN), and enable the V-Chip. (See previous section.) Parental restrictions can be set up using either of two methods: The TV guidelines or the MPAA rating. 1 Press the MENU button to display the menu. Press the UP/DOWN buttons to select "Setup", then press the - Samsung LN-R329D | Quick Guide (easy Manual) (ver.1.0) (English) - Page 104
young adult" group will be blocked (TV-Y, TV-Y7, TV-G, TV-PG, TV-14, and TV-MA). The sub-rat ings (D, L, S, V) work together similarly. (See next section.) 6 How to set the FV, D, L, S and V sub-ratings. First, select one of these TV-Ratings: TV-Y, TV-Y7, TV-G, TV-PG, TV-14, or TV-MA (See Step 4, on - Samsung LN-R329D | Quick Guide (easy Manual) (ver.1.0) (English) - Page 105
FUNCTION DESCRIPTION How to Set up Restrictions Using the MPAA Ratings: G, PG, PG-13, R, NC-17, X, NR The MPAA rating system uses the Motion Picture Association of America (MPAA) system, and its main application is for movies. When the V-Chip lock is on, the TV will automatically block any programs - Samsung LN-R329D | Quick Guide (easy Manual) (ver.1.0) (English) - Page 106
be accompanied by an adult). No children under age 17. X (Adults only). Not rated. Allow all: Press to unlock all TV ratings. Block all: Press to lock all TV ratings. While a particular category is selected, press the ENTER button to activate it. A selected symbol " " will be displayed. Press the - Samsung LN-R329D | Quick Guide (easy Manual) (ver.1.0) (English) - Page 107
How to Set up Restrictions Using the 'Canadian English' 1 Press the MENU button to indicated. Press the EXIT button.to exit. Allow All: Press to unlock all TV ratings. Block All: Press to lock all TV ratings. Canadian English • E : Exempt programming includes...news, sports, documentaries and - Samsung LN-R329D | Quick Guide (easy Manual) (ver.1.0) (English) - Page 108
How to Set up Restrictions Using the 'Canadian French' 1 Press the MENU button to indicated. Press the EXIT button.to exit. Allow All: Press to unlock all TV ratings. Block All: Press to lock all TV ratings. Canadian French • E : Exempt programming includes...news, sports, documentaries and - Samsung LN-R329D | Quick Guide (easy Manual) (ver.1.0) (English) - Page 109
PIN number. To resume normal viewing, tune to a different channel using CH or CH button. Under certain conditions (depending on the rating of the local TV programs) the V-Chip might lock out all the channels. In this case, use the V-Chip function for an "emergency escape": 1 Press the MENU button - Samsung LN-R329D | Quick Guide (easy Manual) (ver.1.0) (English) - Page 110
Program Guide Your TV has an "Electronic Program Guide" Red button on the remote control. The set default guide is Mini Guide. D Scrolls backwards quickly (2 hours). Press time is displayed. G Exits from the Program Guide and returns to normal viewing mode. Press the Blue button on the remote - Samsung LN-R329D | Quick Guide (easy Manual) (ver.1.0) (English) - Page 111
the UP/DOWN buttons to select "Default Guide", then press the ENTER button. 3 Press the UP/DOWN buttons to select "Mini Guide" or "Full Guide", then press the ENTER button. • Mini Guide : Displays the guide for one channel. • Full Guide : Displays the guide for all channels. Press the EXIT button - Samsung LN-R329D | Quick Guide (easy Manual) (ver.1.0) (English) - Page 112
the EXIT button to exit. Note • You can also view information about a single channel by pressing the GUIDE button on the remote control. (The EPG should be pre-set in Mini Guide mode.) • Press the INFO button on the remote control to view the program information for the current channel. English - Samsung LN-R329D | Quick Guide (easy Manual) (ver.1.0) (English) - Page 113
program is digital. 1 Press the MENU button to display the menu. Press the UP/DOWN buttons to select "Guide", then press the ENTER button. 2 Press the UP/DOWN buttons to select "Full Guide", then press the ENTER button. 3 Press the Green button to activate "-2 Hours" and the Yellow button to - Samsung LN-R329D | Quick Guide (easy Manual) (ver.1.0) (English) - Page 114
INFO button. • Exit from the Program Guide and return to normal viewing mode : Press the Blue button or the EXIT GUIDE button on the remote control to view the program information for all channels. However, this function is available only when the default program guide setting is set to "Full Guide - Samsung LN-R329D | Quick Guide (easy Manual) (ver.1.0) (English) - Page 115
watching another program. 1 Press the MENU button to display the menu. Press the UP/DOWN buttons to select "Guide", then press the ENTER button. 2 Press the ENTER buttons to select "Mini Guide". Press the UP/DOWN buttons to select programs you would like to see, then press the enter button. The - Samsung LN-R329D | Quick Guide (easy Manual) (ver.1.0) (English) - Page 116
FUNCTION DESCRIPTION To View the Remind List 1 Press the MENU button to display the menu. Press the UP/DOWN buttons to select "Guide", then press the ENTER button. 2 Press the UP/DOWN buttons to select "Remind List", then press the ENTER button. To Remove the Scheduled Programs 1 Press - Samsung LN-R329D | Quick Guide (easy Manual) (ver.1.0) (English) - Page 117
) (LN-R409D, LN-R469D) This menu works with a CableCARD provided by a local cable service provider. Prior to accessing this menu, a CableCARD should be connected to the rear panel of the TV. For detailed connection instructions refer to the "Connecting CableCARD" section of this manual. Displaying - Samsung LN-R329D | Quick Guide (easy Manual) (ver.1.0) (English) - Page 118
FUNCTION DESCRIPTION Using the CableCARD Setup Function (LN-R409D, LN-R469D) Sets up the relevant options for CableCARD. CableCARD Reset Resets CableCARD when the channels provided by CableCARD are not available. 1 Press the MENU button to display - Samsung LN-R329D | Quick Guide (easy Manual) (ver.1.0) (English) - Page 119
FUNCTION DESCRIPTION Channel List Reorganization Deletes and reorganizes the channel list provided by the Cable Company and authorized by the CableCARD. 1 Press the MENU button to display the menu. Press the UP/DOWN buttons to select "Setup", then press the ENTER button. 2 Press the UP/DOWN buttons - Samsung LN-R329D | Quick Guide (easy Manual) (ver.1.0) (English) - Page 120
Chapter 10 APPENDIX If the TV seems to have a problem, first try this list of possible problems and solutions. If none of these troubleshooting tips apply, call your nearest Samsung service center. Identifying Problems Problem Poor picture Poor sound quality. No picture or sound. No sound or - Samsung LN-R329D | Quick Guide (easy Manual) (ver.1.0) (English) - Page 121
Problem change the display settings. when you have a computer connected to the PC input. NOTE: Your TV supports multiscan display functions settings so that the monitor automatically may appear. goes into energy saving mode or activates the screen saver to display moving images. The TFT LCD - Samsung LN-R329D | Quick Guide (easy Manual) (ver.1.0) (English) - Page 122
Installing the Stand (LN-R269D, LN-R329D) 1. Place the TV faced down on a soft cloth or cushion on a table. 2. Attach the stand to the TV set as shown in the picture. 3. Use the four screws to tightly fix the stand. Disconnecting the Stand 1. Place the TV faced down on - Samsung LN-R329D | Quick Guide (easy Manual) (ver.1.0) (English) - Page 123
APPENDIX Installing the Wall Mount Kit (LN-R269D) Note: This installation is to be used when attaching the wall mount to a wall. When attaching to other building materials, please contact your nearest dealer. Components (Sold separately) Wall-Bracket Set-Bracket M4 X L12 Screw: 8EA M4 X L20 Wood - Samsung LN-R329D | Quick Guide (easy Manual) (ver.1.0) (English) - Page 124
the wall, LCD TV can fall off. 2 Turn the power off and unplug the power cord from the outlet. Place the TV faced down on a soft cloth or cushion on a table. Loosen two screws on the rear side of the TV set (only model LN-R409D applied). Attach the set-bracket onto the rear side of the TV set and - Samsung LN-R329D | Quick Guide (easy Manual) (ver.1.0) (English) - Page 125
APPENDIX Wall Installation Instructions (LN-R469D) Refer to the correct installation guide according to your wall bracket. Installation Notes 1 Contact a technician for installing the wall bracket. 2 Samsung Electronics is not responsible for any damage to the product or injury to yourself or others - Samsung LN-R329D | Quick Guide (easy Manual) (ver.1.0) (English) - Page 126
APPENDIX How to assemble the Wall Mount Bracket 1 Insert and tighten the Captive Screw in the direction of the arrow. When done, mount the wall bracket on the wall. Captive Screw Hinge (Left) There are two hinges (left and right). Use the correct one. Wall Bracket Hinge (Right) 2 Before drilling - Samsung LN-R329D | Quick Guide (easy Manual) (ver.1.0) (English) - Page 127
the TV panel to the wall attachment panel bracket The shape of the product may vary depending on the model. (The assemblies of the plastic hanger and the screw are the same) 1 Remove the 4 screws on the back of the product. 2 Insert the screw into the plastic hanger. (See the figure below) • Mount - Samsung LN-R329D | Quick Guide (easy Manual) (ver.1.0) (English) - Page 128
APPENDIX How to Adjust Mounting Angle Note Note : Adjust the bracket angle to -2° before installing it on the wall. 1. Fix the product to the wall bracket. 2. Hold the product at the top in the center and pull it forward (direction of the arrow) to adjust the angle. (See the figure - Samsung LN-R329D | Quick Guide (easy Manual) (ver.1.0) (English) - Page 129
APPENDIX How to assemble the Stand-Base (LN-R469D) 1 Using the 4 screws for securing the stand pegs and the monitor, firmly attach the monitor to the stand pegs. (The exterior of the set may be different than the picture.) Warning Firmly secure the stand to the TV before moving it, as the stand may - Samsung LN-R329D | Quick Guide (easy Manual) (ver.1.0) (English) - Page 130
the illustration depending on the manufacturer. Please refer to the manual provided with the Kensington lock for proper use. Cable Figure 2 Figure 1 1. Insert the locking device into the Kensington slot on the LCD TV (Figure 1), and turn it in the locking direction (Figure 2). 2. Connect - Samsung LN-R329D | Quick Guide (easy Manual) (ver.1.0) (English) - Page 131
to page 28 for how to insert the CableCARD. A digital Set-Top Box which used to be provided by the cable service provider is no longer needed with Digital Cable Ready TVs and CableCARDs. When the CableCARD is inserted into the slot, the TV screen will show a message that CableCARD is inserted and - Samsung LN-R329D | Quick Guide (easy Manual) (ver.1.0) (English) - Page 132
Specifications Model Panel Size Display Size(HXV) Type Pixel Pitch Viewing Angle Resolution Frequency Horizontal Vertical Display Color PC Resolution Maximum mode Optimum mode Input Signal Sync Signal Video Signal TV Input 2 Headphone Output Frequency Response LN-R269D 26 inch 22.67 (H) X 12.74 - Samsung LN-R329D | Quick Guide (easy Manual) (ver.1.0) (English) - Page 133
Model Panel Size Display Size(HXV) Type Pixel Pitch Viewing Angle Resolution LN mode 1360 x 768 @ 60 Hz 1360 x 768 @ 60 Hz Input Signal Sync Signal Video Signal H/V Separate, TTL, P. or N. 0.7 Vp-p @ 75ohm TV 52 X 4.52 X 26.77 inches (1004 Referring to Display Modes, page 128. LN-R469D 46 inch - Samsung LN-R329D | Quick Guide (easy Manual) (ver.1.0) (English) - Page 134
signal from the system doesn't equal the standard signal mode, adjust the mode by referring to your videocard user guide; otherwise there may be no video. For the display modes listed below, the screen image has been optimized during manufacture. Mode IBM VESA Resolution 640 X 350 720 X 400 640
-
 1
1 -
 2
2 -
 3
3 -
 4
4 -
 5
5 -
 6
6 -
 7
7 -
8
-
9
-
10
-
11
-
12
-
13
-
14
-
15
-
16
-
17
-
18
-
19
-
20
-
21
-
22
-
23
-
24
-
25
-
26
-
27
-
28
-
29
-
30
-
31
-
32
-
33
-
34
-
35
-
36
-
37
-
38
-
39
-
40
-
41
-
42
-
43
-
44
-
45
-
46
-
47
-
48
-
49
-
50
-
51
-
52
-
53
-
54
-
55
-
56
-
57
-
58
-
59
-
60
-
61
-
62
-
63
-
64
-
65
-
66
-
67
-
68
-
69
-
70
-
71
-
72
-
73
-
74
-
75
-
76
-
77
-
78
-
79
-
80
-
81
-
82
-
83
-
84
-
85
-
86
-
87
-
88
-
89
-
90
-
91
-
92
-
93
-
94
-
95
-
96
-
97
-
98
-
99
-
100
-
101
-
102
-
103
-
104
-
105
-
106
-
107
-
108
-
109
-
110
-
111
-
112
-
113
-
114
-
115
-
116
-
117
-
118
-
119
-
120
-
121
-
122
-
123
-
124
-
125
-
126
-
127
-
128
-
129
-
130
-
131
-
132
-
133
-
134
 |
 |
BN68-00910A-03
LN-R269D
LN-R329D
LN-R409D
LN-R469D
This device is a Class B digital apparatus.
Register your product at
www.samsung.com/global/register