Samsung ML-2165W User Manual (user Manual) (ver.1.0) (English) - Page 111
Access point via USB cable, Setup using Windows - printer manual
 |
View all Samsung ML-2165W manuals
Add to My Manuals
Save this manual to your list of manuals |
Page 111 highlights
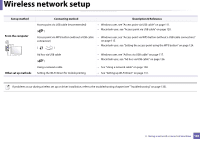
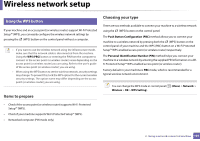
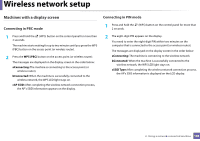
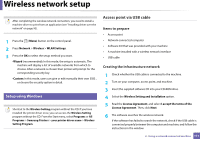
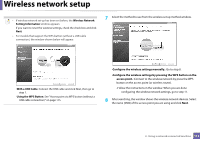
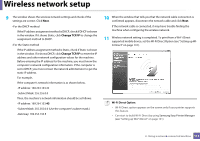
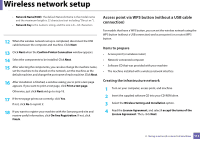
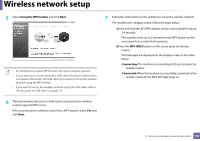
Wireless network setup After completing the wireless network connection, you need to install a machine driver to print from an application (see "Installing driver over the network" on page 93). 1 Press the (Menu) button on the control panel. 2 Press Network > Wireless > WLAN Settings. 3 Press the OK to select the setup method you want. •Wizard (recommended): In this mode, the setup is automatic. The machine will display a list of available networks from which to choose. After a network is chosen then printer will prompt for the corresponding security key. •Custom: In this mode, users can give or edit manually their own SSID , or choose the security option in detail. 16 Setup using Windows Shortcut to the Wireless Setting program without the CD: If you have installed the printer driver once, you can access the Wireless Setting program without the CD. From the Start menu, select Programs or All Programs > Samsung Printers > your printer driver name > Wireless Setting Program. Access point via USB cable Items to prepare • Access point • Network-connected computer • Software CD that was provided with your machine • A machine installed with a wireless network interface • USB cable Creating the infrastructure network 1 Check whether the USB cable is connected to the machine. 2 Turn on your computer, access point, and machine. 3 Insert the supplied software CD into your CD-ROM drive. 4 Select the Wireless Setting and Installation option. 5 Read the License Agreement, and select I accept the terms of the License Agreement. Then, click Next. 6 The software searches the wireless network. If the software has failed to search the network, check if the USB cable is connected properly between the computer and machine, and follow the instructions in the window. 2. Using a network-connected machine 111
-
 1
1 -
2
-
3
-
4
-
5
-
6
-
7
-
8
-
9
-
10
-
11
-
12
-
13
-
14
-
15
-
16
-
17
-
18
-
19
-
20
-
21
-
22
-
23
-
24
-
25
-
26
-
27
-
28
-
29
-
30
-
31
-
32
-
33
-
34
-
35
-
36
-
37
-
38
-
39
-
40
-
41
-
42
-
43
-
44
-
45
-
46
-
47
-
48
-
49
-
50
-
51
-
52
-
53
-
54
-
55
-
56
-
57
-
58
-
59
-
60
-
61
-
62
-
63
-
64
-
65
-
66
-
67
-
68
-
69
-
70
-
71
-
72
-
73
-
74
-
75
-
76
-
77
-
78
-
79
-
80
-
81
-
82
-
83
-
84
-
85
-
86
-
87
-
88
-
89
-
90
-
91
-
92
-
93
-
94
-
95
-
96
-
97
-
98
-
99
-
100
-
101
-
102
-
103
-
104
-
105
-
 106
106 -
 107
107 -
 108
108 -
 109
109 -
 110
110 -
 111
111 -
 112
112 -
 113
113 -
 114
114 -
 115
115 -
 116
116 -
117
-
118
-
119
-
120
-
121
-
122
-
123
-
124
-
125
-
126
-
127
-
128
-
129
-
130
-
131
-
132
-
133
-
134
-
135
-
136
-
137
-
138
-
139
-
140
-
141
-
142
-
143
-
144
-
145
-
146
-
147
-
148
-
149
-
150
-
151
-
152
-
153
-
154
-
155
-
156
-
157
-
158
-
159
-
160
-
161
-
162
-
163
-
164
-
165
-
166
-
167
-
168
-
169
-
170
-
171
-
172
-
173
-
174
-
175
-
176
-
177
-
178
-
179
-
180
-
181
-
182
-
183
-
184
-
185
-
186
-
187
-
188
-
189
-
190
-
191
-
192
-
193
-
194
-
195
-
196
-
197
-
198
-
199
-
200
-
201
-
202
-
203
-
204
-
205
-
206
-
207
-
208
-
209
-
210
-
211
 |
 |