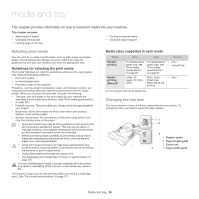
Samsung ML-2545 User Manual (user Manual) (ver.1.01) (English) - Page 27
Loading paper in the tray, Tray 1, Manual tray - software
 |
View all Samsung ML-2545 manuals
Add to My Manuals
Save this manual to your list of manuals |
Page 27 highlights
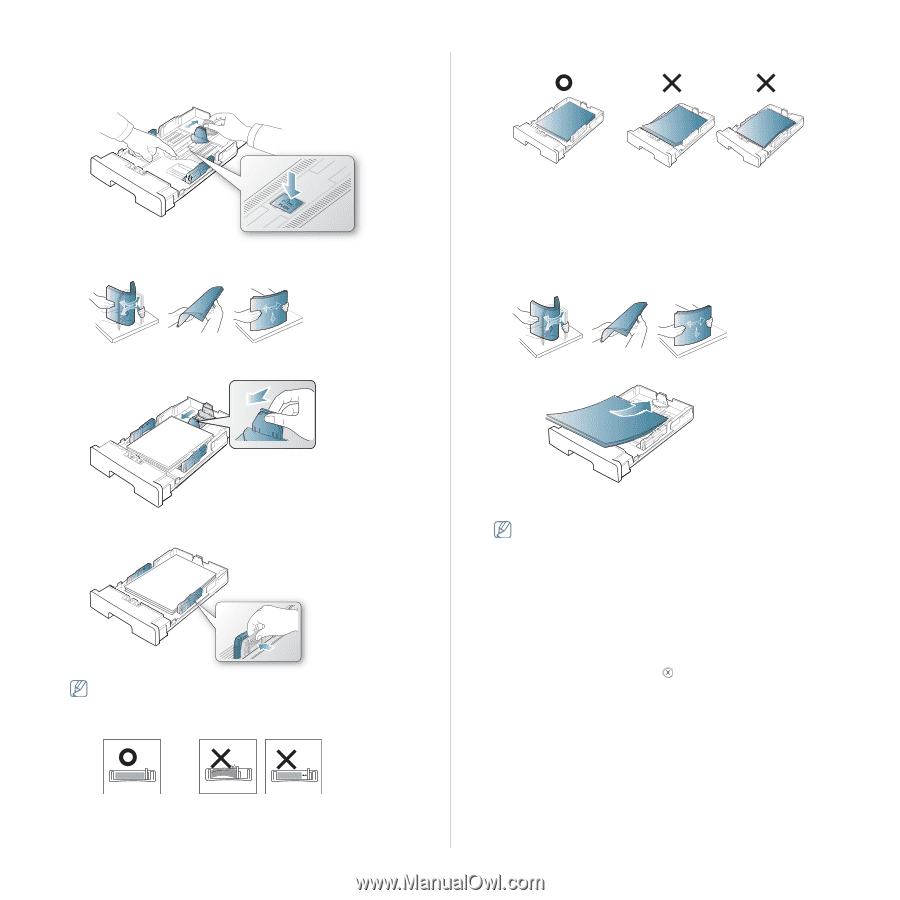
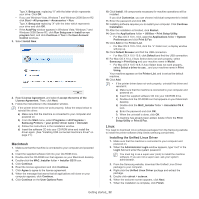
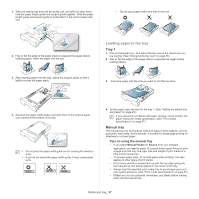
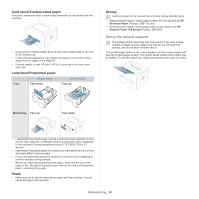
1. With one hand press and hold the guide lock, and with the other hand, hold the paper length guide and support guide together. Slide the paper length guide and support guide to locate them in the correct paper size slot. • Do not use a paper with more than 6 mm curl. 2. Flex or fan the edge of the paper stack to separate the pages before loading papers. Insert the paper into the tray. 3. After inserting paper into the tray, adjust the support guide so that it lightly touches the paper stack. Loading paper in the tray Tray 1 1. Pull out the paper tray . And adjust the tray size to the media size you are loading. (See "Changing the tray size" on page 26.) 2. Flex or fan the edge of the paper stack to separate the pages before loading papers. 3. And place paper with the side you want to print facing down. 4. Squeeze the paper width guides and slide them to the desired paper size marked at the bottom of the tray. • Do not push the paper width guide too far causing the media to warp. • If you do not adjust the paper width guide, it may cause paper jams. 4. Set the paper type and size for the tray 1. (See "Setting the default tray and paper" on page 25.) If you experience problems with paper feeding, check whether the paper meets the media specification. (See "Print media specifications" on page 57.) Manual tray The manual tray can hold special sizes and types of print material, such as postcards, note cards, and envelopes. It is useful for single page printing on letterhead or colored paper. Tips on using the manual tray • If you select Manual Feeder for Source from your software application, you need to press (cancel button) each time you print a page and load only one type, size and weight of print media at a time in the manual tray. • To prevent paper jams, do not add paper while printing. This also applies to other types of print media. • Print media should be loaded face up with the top edge going into the manual tray first and be placed in the center of the tray. • Always load the specified print media only to avoid paper jams and print quality problems. (See "Print media specifications" on page 57.) • Flatten any curl on postcards, envelopes, and labels before loading them into the manual tray. Media and tray_ 27
-
 1
1 -
2
-
3
-
4
-
5
-
6
-
7
-
8
-
9
-
10
-
11
-
12
-
13
-
14
-
15
-
16
-
17
-
18
-
19
-
20
-
21
-
 22
22 -
 23
23 -
 24
24 -
 25
25 -
 26
26 -
 27
27 -
 28
28 -
 29
29 -
 30
30 -
 31
31 -
 32
32 -
33
-
34
-
35
-
36
-
37
-
38
-
39
-
40
-
41
-
42
-
43
-
44
-
45
-
46
-
47
-
48
-
49
-
50
-
51
-
52
-
53
-
54
-
55
-
56
-
57
-
58
-
59
-
60
-
61
-
62
-
63
-
64
-
65
-
66
 |
 |