Samsung ML-3712DW User Manual (user Manual) (ver.1.02) (English) - Page 149
Easy Install, Install, Custom Install, Wireless Setting and Installation, Network, NameSSID,
 |
View all Samsung ML-3712DW manuals
Add to My Manuals
Save this manual to your list of manuals |
Page 149 highlights
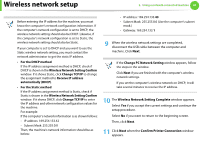
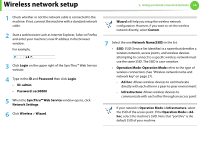
Wireless network setup 11 Select Easy Install and click Install. Easy Install is recommended for most users. All components necessary for machine operations will be installed. If you select Custom Install, you can choose individual operations will be installed. 12 Click Wireless Setting and Installation. 13 The software searches the wireless network devices. If the search has failed, check if the USB cable is connected between the computer and machine properly, and follow the instructions in the window. 14 After searching the wireless networks, a list of wireless networks your machine has searched appears. If you want to use the Samsung default ad hoc setting, select the last wireless network on the list, which Network Name(SSID) is portthru and Signal is Printer Self Network. Then, click Next. If you want to use other ad hoc settings, select another wireless network from the list. 2. Using a network-connected machine 46 If you want to change ad hoc settings click the Advanced Setting button. • Enter the wireless Network Name: Enter the SSID name you want (SSID is case-sensitive). • Operation Mode: Select ad hoc. • Channel: Select the channel (Auto Setting or 2412 MHz to 2467 MHz). • Authentication: Select an authentication type. Open System: Authentication is not used, and encryption may or may not be used, depending on the need for data security. Shared Key: Authentication is used. A device that has a proper WEP key can access the network. • Encryption: Select the encryption (None, WEP64, WEP128). • Network Key: Enter the encryption network key value. • Confirm Network Key: Confirm the encryption network key value. • WEP Key Index: If you are using WEP Encryption, select the appropriate WEP Key Index.
-
 1
1 -
2
-
3
-
4
-
5
-
6
-
7
-
8
-
9
-
10
-
11
-
12
-
13
-
14
-
15
-
16
-
17
-
18
-
19
-
20
-
21
-
22
-
23
-
24
-
25
-
26
-
27
-
28
-
29
-
30
-
31
-
32
-
33
-
34
-
35
-
36
-
37
-
38
-
39
-
40
-
41
-
42
-
43
-
44
-
45
-
46
-
47
-
48
-
49
-
50
-
51
-
52
-
53
-
54
-
55
-
56
-
57
-
58
-
59
-
60
-
61
-
62
-
63
-
64
-
65
-
66
-
67
-
68
-
69
-
70
-
71
-
72
-
73
-
74
-
75
-
76
-
77
-
78
-
79
-
80
-
81
-
82
-
83
-
84
-
85
-
86
-
87
-
88
-
89
-
90
-
91
-
92
-
93
-
94
-
95
-
96
-
97
-
98
-
99
-
100
-
101
-
102
-
103
-
104
-
105
-
106
-
107
-
108
-
109
-
110
-
111
-
112
-
113
-
114
-
115
-
116
-
117
-
118
-
119
-
120
-
121
-
122
-
123
-
124
-
125
-
126
-
127
-
128
-
129
-
130
-
131
-
132
-
133
-
134
-
135
-
136
-
137
-
138
-
139
-
140
-
141
-
142
-
143
-
 144
144 -
 145
145 -
 146
146 -
 147
147 -
 148
148 -
 149
149 -
 150
150 -
 151
151 -
 152
152 -
 153
153 -
 154
154 -
155
-
156
-
157
-
158
-
159
-
160
-
161
-
162
-
163
-
164
-
165
-
166
-
167
-
168
-
169
-
170
-
171
-
172
-
173
-
174
-
175
-
176
-
177
-
178
-
179
-
180
-
181
-
182
-
183
-
184
-
185
-
186
-
187
-
188
-
189
-
190
-
191
-
192
-
193
-
194
-
195
-
196
-
197
-
198
-
199
-
200
-
201
-
202
-
203
-
204
-
205
-
206
-
207
-
208
-
209
-
210
-
211
-
212
-
213
-
214
-
215
-
216
-
217
-
218
-
219
-
220
-
221
-
222
-
223
-
224
-
225
-
226
-
227
-
228
-
229
-
230
-
231
-
232
-
233
-
234
-
235
-
236
-
237
-
238
-
239
-
240
-
241
-
242
-
243
-
244
-
245
 |
 |