Samsung MW1150WA Service Manual - Page 8
Replacement of Door Assembly - plate
 |
View all Samsung MW1150WA manuals
Add to My Manuals
Save this manual to your list of manuals |
Page 8 highlights
4-3 Replacement of Door Assembly 4-3-1 Removal of Door "C" Insert flat screw driver into the gap between Door "A" and Door "C" to remove Door "C". Be careful when handling Door "C" because it is fragile. Then remove the door assembly. Door "A" Door "C" 4-3-2 Removal of Door "E" Following the procedure as shown in the figure, insert and bend a thin metal plate between Door "E" and Door "A" until you hear the 'tick' sound. 1. Insertion depth of the thin metal plate should be 0.1mm or less. 4-3-3 Removal of Key Door & Spring Remove pin hinge from Door "E" Detach spring from Door "E" and key door. Door "E" Door "E" Key Door Spring
-
 1
1 -
2
-
 3
3 -
 4
4 -
 5
5 -
 6
6 -
 7
7 -
 8
8 -
 9
9 -
 10
10 -
 11
11 -
 12
12 -
 13
13 -
14
-
15
-
16
-
17
-
18
-
19
-
20
-
21
-
22
-
23
 |
 |
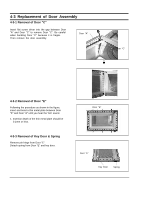
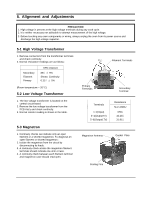
4-3 Replacement of Door Assembly
4-3-1 Removal of Door "C"
Insert flat screw driver into the gap between Door
"A" and Door "C" to remove Door "C". Be careful
when handling Door "C" because it is fragile.
Then remove the door assembly.
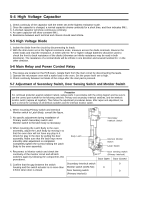
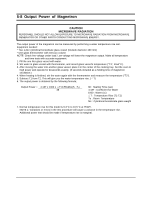
4-3-2 Removal of Door "E"
Following the procedure as shown in the figure,
insert and bend a thin metal plate between Door
"E" and Door "A" until you hear the 'tick' sound.
1. Insertion depth of the thin metal plate should be
0.1mm or less.
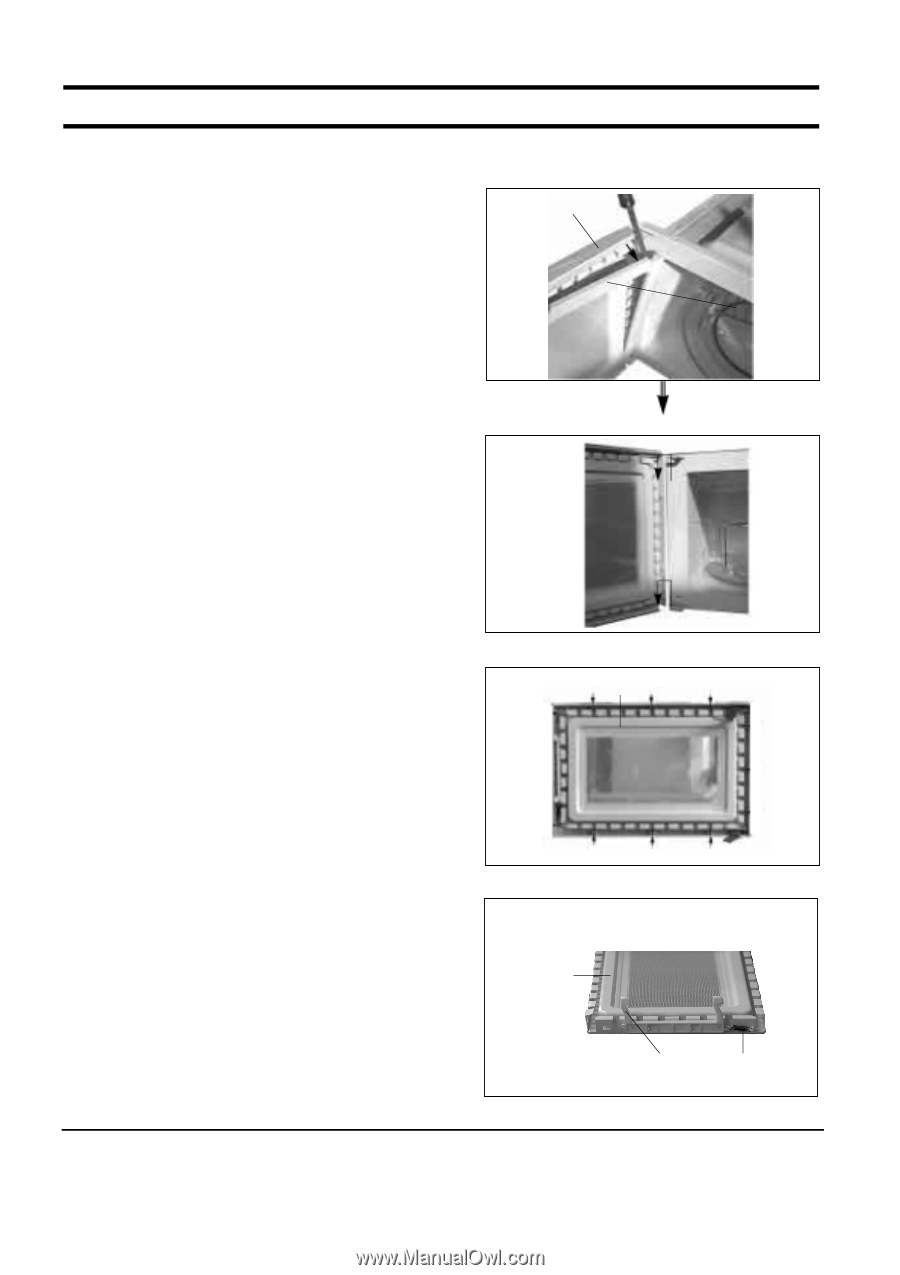
4-3-3 Removal of Key Door & Spring
Remove pin hinge from Door "E"
Detach spring from Door "E" and key door.
Door "E"
Key Door
Spring
Door "E"
Door "A"
Door "C"