Samsung NA36N9755TM/AA Installation Guide
Samsung NA36N9755TM/AA Manual
 |
View all Samsung NA36N9755TM/AA manuals
Add to My Manuals
Save this manual to your list of manuals |
Samsung NA36N9755TM/AA manual content summary:
- Samsung NA36N9755TM/AA | Installation Guide - Page 1
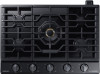
Quick guide LOCATION OF THE COOKTOP BURNERS AND WI-FI, BLUETOOTH BUTTONS The control knobs operate the cooktop burners on the cooktop. 03 02 LR RR 04 - Samsung NA36N9755TM/AA | Installation Guide - Page 2
Quick guide DIMENSIONS AND INSTALLLATION INFORMATION Overall cooktop dimensions A 27/16" (62 mm) countertop to grate surface 31/8" (79.3 mm) chassis Height 21" (533 mm) 223/8" (568 - Samsung NA36N9755TM/AA | Installation Guide - Page 3
clearance between countertop and top of drawer. • A 120-Volt, 60-Hz, AC, approved electrical service with 20-amp circuit breaker or time- delay fuse is required. 7/16" (11.1 mm) Countertop See built-in oven installation for complete installation instructions. 90° Elbow Cabinet Sides 2" Dia. Hole - Samsung NA36N9755TM/AA | Installation Guide - Page 4
detach Smart Connect module before installing the cooktop. See cooktop installation p.15 for detailed information. Correct installation Hold down bracket install guide Front of unit Case 1. Hold down bracket holes Power cord Gas inlet Hold Down Bracket Installation Chassis M4 L10 screw M4 - Samsung NA36N9755TM/AA | Installation Guide - Page 5
LED indicator stops blinking and turns solid. The cooktop is connected successfully. 4. If the Smart Connect LED indicator does not turn in, follow the instruction on the app to reconnect. NOTE The Smart Connect button is below the RF control knob. If you need to press the Smart Connect button - Samsung NA36N9755TM/AA | Installation Guide - Page 6
. Paring begins. 5. When Bluetooth pairing is finished, the Bluetooth icon LED stops blinking and glows steadily. 6. Follow the instructions in the user manual of the hood control model and the App guide to use the hood control. NOTE The Bluetooth button is below the LF control knob. If you need to - Samsung NA36N9755TM/AA | Installation Guide - Page 7
Guía rápida UBICACIÓN DE LOS QUEMADORES DE LA CUBIERTA Y DE LOS BOTONES WI-FI Y BLUETOOTH Las perillas de control operan los quemadores superiores de la cubierta. 03 02 TI TD 04 01 02 Central DI DD 01 02 03 04 05 07 06 Modelo 30" NA30N9755T* 03 TI TD 05 04 01 DI Central 05 DD - Samsung NA36N9755TM/AA | Installation Guide - Page 8
Guía rápida DIMENSIONES E INFORMACIÓN ACERCA DE LA INSTALACIÓN Dimensiones totales de la cubierta A 27/16" (62 mm) mesada a superficie de rejilla 31/8" (79.3 mm) altura chasis 21" (533 mm) 223/8" (568 mm) B C Modelo NA30N9755T* NA36N9755T* A 30" (762 mm) 36" (914.4 mm) Dimensiones de recorte - Samsung NA36N9755TM/AA | Installation Guide - Page 9
Requisitos de ubicación y requisitos eléctricos • Para garantizar espacio libre en la base de la cubierta, las paredes laterales del gabinete deben ser más anchas que el recorte. • Si el gabinete cuenta con un cajón, deje una distancia mínima de 39/16" entre la mesada y la parte superior del cajón. - Samsung NA36N9755TM/AA | Installation Guide - Page 10
Guía rápida PROTECTOR DE GOMA Y SOPORTES DE SUJECIÓN A PRESIÓN Goma Módulo Wi-Fi PRECAUCIÓN • Cuando inserte la cubierta en la abertura del recorte, no retire la goma para proteger el módulo WiFi. Retírela luego de insertar la cubierta con cuidado. Módulo de conexión inteligente • Cuando - Samsung NA36N9755TM/AA | Installation Guide - Page 11
USO DE LA FUNCIÓN CONEXIÓN INTELIGENTE Cómo conectar la cubierta Para utilizar las funciones remotas de la cubierta o el horno Samsung, antes debe vincularlos a la aplicación SmartThings. 1. Descargue y abra la aplicación SmartThings en su dispositivo inteligente. 2. Siga las instrucciones en - Samsung NA36N9755TM/AA | Installation Guide - Page 12
comienza. 5. Cuando finaliza la vinculación, el LED del icono de Bluetooth deja de parpadear y queda encendido de manera fija. 6. Siga las instrucciones del manual de usuario del modelo con control de campana y la guía de la aplicación para utilizar el control de campana. NOTA El botón Bluetooth se - Samsung NA36N9755TM/AA | Installation Guide - Page 13
Guide sommaire EMPLACEMENT DES BRÛLEURS DE LA TABLE DE CUISSON ET DES BOUTONS WI-FI ET BLUETOOTH Les boutons de commande permettent de faire fonctionner - Samsung NA36N9755TM/AA | Installation Guide - Page 14
Guide sommaire DIMENSIONS ET INFORMATIONS RELATIVES À L'INSTALLATION Dimensions de la table de cuisson entière 27/16" (62 mm) du plan de travail à la surface de - Samsung NA36N9755TM/AA | Installation Guide - Page 15
du plan de travail au centre de l'orifice de 2" de diam. Reportez-vous à la procédure d'installation du four intégré pour connaître les instructions d'installation complètes. Coude à 90° Côtés du meuble Orifice de 2" de diam. (207/8" du rebord antérieur du plan de travail au centre de l'orifice - Samsung NA36N9755TM/AA | Installation Guide - Page 16
de cuisson p.15 pour obtenir des informations détaillées. Installation correcte Guide d'installation des supports de maintien Avant de l'appareil Cas 1. Orifices des supports de maintien Cordon d'alimentation Arrivée de gaz Installation des supports de maintien Châssis Vis M4 L10 Vis M4 L16 - Samsung NA36N9755TM/AA | Installation Guide - Page 17
clignoter et devient fixe. La table de cuisson est connectée avec succès. 4. Si le témoin Connexion intelligente ne s'allume pas, suivez les instructions sur l'application pour vous reconnecter. REMARQUE Le bouton Connexion intelligente se trouve en dessous du bouton de commande avant droit. Si vous - Samsung NA36N9755TM/AA | Installation Guide - Page 18
devient fixe. 6. Pour utiliser la fonction de contrôle de la hotte, suivez les instructions fournies dans le manuel d'utilisation du modèle doté de la fonction de contrôle de la hotte et dans le guide de l'application. REMARQUE Le bouton Bluetooth se trouve en dessous du bouton de commande avant - Samsung NA36N9755TM/AA | Installation Guide - Page 19
Notes Quick-Guide_NA9300K_AA_DG68-01094A-01_EN+MES+CFR.indb 7 2018-07-31 4:18:40 - Samsung NA36N9755TM/AA | Installation Guide - Page 20
Quick-Guide_NA9300K_AA_DG68-01094A-01_EN+MES+CFR.indb 8 DG68-01094A-01 2018-07-31 4:18:40
-
 1
1 -
 2
2 -
 3
3 -
 4
4 -
 5
5 -
 6
6 -
 7
7 -
8
-
9
-
10
-
11
-
12
-
13
-
14
-
15
-
16
-
17
-
18
-
19
-
20
 |
 |

1
English
LOCATION OF THE COOKTOP BURNERS AND WI-FI, BLUETOOTH BUTTONS
The control knobs operate the cooktop burners on the cooktop.
04
05
03
02
01
01
02
03
04
05
06
07
LR
RR
LF
RF
Center
30" Model NA30N9755T*
04
05
03
02
01
01
02
03
04
05
06
07
Center
RR
LR
RF
LF
36" Model NA36N9755T*
01/02 . Semi Rapid burner
(Left Front/Left Rear)
General purpose simmering
03. Dual power burner (Center)
Large pots/Pans Quick boiling simmering
04. Simmer burner (Right Rear)
Simmering
05. Rapid burner (Right Front)
General purpose
06. Wi±Fi button (below knob)
07. Bluetooth button (below knob)
Quick guide
Quick-Guide_NA9300K_AA_DG68-01094A-01_EN+MES+CFR.indb
1
2018-07-31
°° 4:18:32