Samsung PS42B451B2WXXU User Manual - Page 21
Samsung PS42B451B2WXXU Manual
 |
View all Samsung PS42B451B2WXXU manuals
Add to My Manuals
Save this manual to your list of manuals |
Page 21 highlights
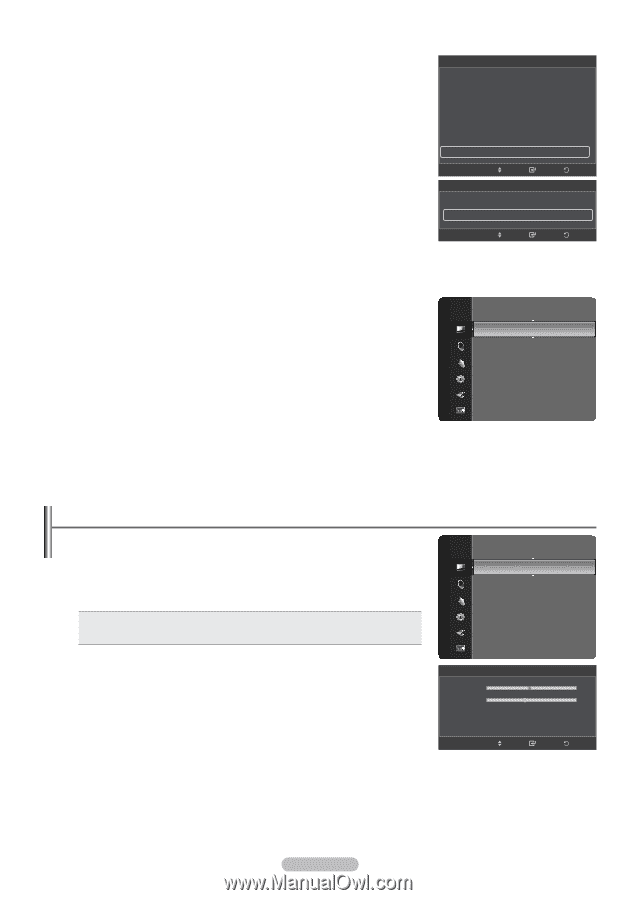
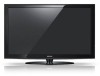
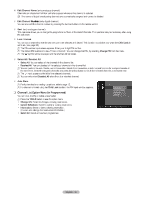
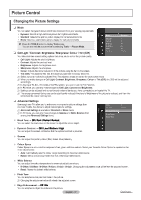
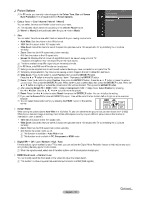
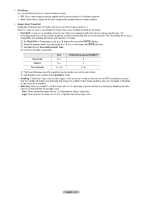
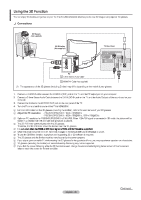
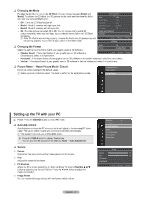
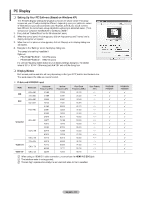
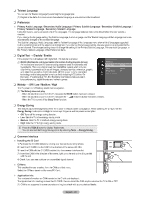
❑ Changing the Mode Provides the function to turn on the 3D Effect. You can choose between Mode1 and Mode2. To achieve the 3D effect, the 3D glasses shutter back and forth from the left to right and vice versa (left/right sync Off : Turns the 3D Effect function off. Mode1 : Mode 1 operates with right sync first. Mode2 : Mode 2 operates with left sync first. 2D : Provides picture converted 3D to 2D. You can choose this to watch 2D picture temporally when you feel dizzy, but you should choose Off to end 3D Effect completely. N If the 3D effect is not working properly, it means the Mode and 3D glasses may not be syncing properly. To put them in sync, switch to the other mode. Picture Options Size Screen Mode Digital NR HDMI Black Level Film Mode Screen Burn Protection 3D Effect Move Enter ▲ : 16:9 : 16:9 : Auto : Normal : Off ▶ Return 3D Effect Mode Format : Off : Checker Board ▶ Return ❑ Changing the Format Select the optimal input format to match your graphic cards or 3D Software. Enter Move • Checker Board : If the output format of your graphic card or 3D software is Checkerboard, select this input format. • Horizontal : If the output format of your graphic card or 3D software is Horizontal interleaved, select this input format. • Vertical : If the output format of your graphic card or 3D software is Vertical interleaved, select this input format. ❑ Picture Reset → Reset Picture Mode / Cancel Resets all picture settings to the default values. N Select a picture mode to be reset. The reset is performed for each picture mode. Picture Picture Advanced Settings Picture Options Picture Reset ► Setting up the TV with your PC N Preset: Press the SOURCE button to select PC mode. Brightness Sharpness Picture : 45 : 50 ► ❑ Auto Adjustment Auto Adjustment allows the PC screen of set to self-adjust to the incoming PC video signal. The values of fine, coarse and position are adjusted automatically. N This function does not work in DVI-HDMI mode. T Press the TOOLS button to display Tools menu. Auto Adjustment Screen Advanced Settings Picture Options Picture Reset You can also set the adjustment by selecting Tools → Auto Adjustment. ❑ Screen Coarse Adjusts the frequency when vertical noise appears on the screen. Fine Adjusts the screen to be clearer. PC Position Adjust the PC's screen positioning if it does not fit the TV screen. Press the ▲ or ▼ button to adjusting the Vertical-Position. Press the ◄ or ► button to adjust the Horizontal-Position. Image Reset You can replace all image settings with the factory default values. Screen Coarse Fine PC Position Image Reset Move Enter Return 50 44 English - 21
-
 1
1 -
2
-
3
-
4
-
5
-
6
-
7
-
8
-
9
-
10
-
11
-
12
-
13
-
14
-
15
-
 16
16 -
 17
17 -
 18
18 -
 19
19 -
 20
20 -
 21
21 -
 22
22 -
 23
23 -
 24
24 -
 25
25 -
 26
26 -
27
-
28
-
29
-
30
-
31
-
32
-
33
-
34
-
35
-
36
-
37
-
38
-
39
-
40
 |
 |