Samsung R225 User Manual (ENGLISH)
Samsung R225 - SGH Cell Phone Manual
 |
View all Samsung R225 manuals
Add to My Manuals
Save this manual to your list of manuals |
Samsung R225 manual content summary:
- Samsung R225 | User Manual (ENGLISH) - Page 1
- Samsung R225 | User Manual (ENGLISH) - Page 2
below, owned by or which is otherwise the property of Samsung or its respective suppliers relating to the SAMSUNG Phone, including but not limited to, accessories, parts, or software relating thereto (the "Phone System"), is proprietary to Samsung and protected under federal laws, state laws, and - Samsung R225 | User Manual (ENGLISH) - Page 3
12 Service Light 14 Getting Started 15 Installing the SIM Card and the Battery . . . 15 Charging a Battery 18 Switching the Phone On/Off 20 Call Functions 22 Making a Call 22 Adjusting the Volume 24 Answering or Rejecting a Call 25 Viewing Missed Calls 26 In-Call Options 28 Entering Text - Samsung R225 | User Manual (ENGLISH) - Page 4
3-4 73 Alert Type (Menu 3-5 73 Keypad Tone (Menu 3-6 74 Message Tone (Menu 3-7 74 Error Tone (Menu 3-8 75 Minute Minder (Menu 3-9 75 Connect Tone (Menu 3-0 75 Settings 76 Phone Settings (Menu 4-1 76 Network Services (Menu 4-2 81 Security Settings (Menu 4-3 86 LCD Settings (Menu 4-4 89 - Samsung R225 | User Manual (ENGLISH) - Page 5
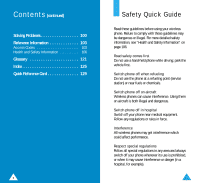
Contents (continued) Solving Problems 100 Reference Information 103 Access Codes 103 Health and Safety Information 106 Glossary 121 Index 125 Quick Reference Card 129 6 Safety Quick Guide Read these guidelines before using your wireless phone. Failure to comply with these guidelines may be - Samsung R225 | User Manual (ENGLISH) - Page 6
switched on. Accessories and batteries Use only SAMSUNG-approved accessories and batteries. Use qualified service Only qualified service personnel may install or repair your phone. 8 Unpacking Your package contains the following items. Phone Travel Adapter Battery Hand String Owner's Manual In - Samsung R225 | User Manual (ENGLISH) - Page 7
Layout The following illustration shows the main elements of your phone. Service light Earphone jack Antenna Earpiece Display Microphone 10 ~ Your Phone Soft keys Perform the functions indicated by the text above them (in the bottom line of the display). In the menu function, scroll through - Samsung R225 | User Manual (ENGLISH) - Page 8
on your SIM card, service provider or current context. 12 Your Phone Icons Signal strength: shows the received signal strength. The greater the number of bars, the better the signal strength. Service: appears when a call is in progress. New Message: appears when a new text message has been - Samsung R225 | User Manual (ENGLISH) - Page 9
; see page 45. 14 Getting Started Installing the SIM Card and the Battery When you subscribe to a cellular network, you are provided with a SIM card loaded with your subscription details (PIN, optional services available and so on). • Keep all SIM cards out of the reach of small children. • The - Samsung R225 | User Manual (ENGLISH) - Page 10
release the holder to lock it into place. 4. Insert the SIM card under the two tabs, ensuring that the cut corner is lower left and the gold contacts of the card face into the phone. 6. Place the battery back on the phone. Slide the battery up towards the catch until it locks into place. Make sure - Samsung R225 | User Manual (ENGLISH) - Page 11
a rechargeable Li-ion battery. A travel adapter is provided with your phone. Use only approved batteries and chargers. Ask your local SAMSUNG dealer for further details. The phone can be used while the battery is charging. Note: You must fully charge the battery before using your phone for the first - Samsung R225 | User Manual (ENGLISH) - Page 12
than one second to switch the phone on. Note: If "Insert SIM Card" appears on the display, please check that the SIM card is correctly inserted. The phone requires a 3 V SIM card. Please contact your service provider if you experience any problems. 2. If the phone asks for a password, key in the - Samsung R225 | User Manual (ENGLISH) - Page 13
. 2. Key in the country code, area code and phone number and press . Correcting the phone numbers of the people you call regularly in the SIM card memory, called the phonebook. You then simply select the required name to recall the associated number. For further details on the Phonebook feature - Samsung R225 | User Manual (ENGLISH) - Page 14
volume, use the or keys. In idle mode, you can access the Write Messages menu option by using the key. With the key, you can view the PhoneBook Call Functions Answering or Rejecting a Call When somebody calls you, the phone rings and the phone icon in the middle of the screen flashes. nnnn (( )) - Samsung R225 | User Manual (ENGLISH) - Page 15
reason, you can find out who was calling you, provided that this service is available. In this way, you can call the person back, if press at any time to exit the Missed Call feature. Note: You can access the Missed Call feature at any time by selecting the Missed Calls menu option (1-1); - Samsung R225 | User Manual (ENGLISH) - Page 16
a call, press the Options soft key. Switching the Microphone Off (Mute) You can temporarily switch your phone's microphone off, so that the other party cannot hear you. Example: You wish to say something to soft key. For a more detailed description of the Phonebook feature, refer to page 41. 29 - Samsung R225 | User Manual (ENGLISH) - Page 17
while you have a call in progress, proceed as follows. 1. Key in the phone number that you wish to dial or look it up in the phonebook. 2. answer an incoming call while you have a call in progress, if this service is supported by the network and you have set the Call Waiting menu option (4-2-2) - Samsung R225 | User Manual (ENGLISH) - Page 18
that allows up to six people to take part simultaneously in a multiparty or conference call. For more information, contact your service provider. Setting up the Multiparty Call 1. Call the first participant in the normal way. 2. Call the second participant in the normal way. The first call - Samsung R225 | User Manual (ENGLISH) - Page 19
SMS (Short Message Service) message during a call, the message icon ( ) appears in the display. After you have finished your call, you can read the message; refer to page 63 for further details. Note: You can also read or write a new SMS message during a call. 34 Entering Text When storing a name - Samsung R225 | User Manual (ENGLISH) - Page 20
the required mode, then press the Select soft key. Using the T9 Mode The T9 predictive text input mode allows you to enter words easily with a minimum of key presses. As you press each key, the phone selects a letter that makes up the word that it thinks you are typing, based on - Samsung R225 | User Manual (ENGLISH) - Page 21
one or more times to display the appropriate shift indicator and continue typing normally. Meet me at OK ENG Shift indicator Note: To exit the text input mode without saving your input, press . The phone returns to the previous menu level. Using the ABC Mode Use the to keys to enter your - Samsung R225 | User Manual (ENGLISH) - Page 22
to the text entry mode used immediately prior to selecting the Symbolic mode. 40 Phonebook You can store phone numbers and their corresponding names in the memory of your SIM card. In addition, you can store up to 100 numbers and names in the phone memory. The SIM card and phone memories, although - Samsung R225 | User Manual (ENGLISH) - Page 23
Phonebook 5. Press the right soft key to toggle between the phone (To Phone) and card (To Card) memories. 6. If you do not want to save the number and name in the suggested location, press to clear the location number and enter your - Samsung R225 | User Manual (ENGLISH) - Page 24
up to five numbers. If no specific color is assigned, the service light flashes with the color you set in Service Light Color option (4-5). Speed-Dialing by SIM Memory Location Once you have stored phone numbers in the SIM card, you can dial them easily whenever required. To speed-dial a number - Samsung R225 | User Manual (ENGLISH) - Page 25
can view the PhoenBook lists directly by pressing the key in idle mode. 2. If your SIM card provides Service Dialing Number (SDN) and Information Number services, you will see the following screen. 1.[Find Entry ] 2. Service Dir. 3. Information Numbers OK 3. Press the OK soft key when Find Entry is - Samsung R225 | User Manual (ENGLISH) - Page 26
SAMSUNG Dec 14 12:57 Menu PhoneBook Press the left soft key to access the menu feature. Press the right soft key to access the Phonebook feature a password or PIN. Enter the required code and press . Note: When you access a list of options, your phone highlights the current option. If, however, - Samsung R225 | User Manual (ENGLISH) - Page 27
Functions and Options Example: Selecting an Alert Type 1. When the idle screen is displayed, press the Menu soft key to enter the menu function. SAMSUNG Dec 14 12:57 Menu PhoneBook 2. Scroll through the menus until you reach the Tones menu, by pressing . Tones Select 3 3. To select the - Samsung R225 | User Manual (ENGLISH) - Page 28
, 4 for Settings, 1 for Phone Settings, 4 for Any-key Answer and 2 to set the Any-key Answer option to O N. Note: The numbers assigned to each menu option are indicated in the list on page 54. They may not match the menu number on the phone. It depends on the services supported by the SIM card. 53 - Samsung R225 | User Manual (ENGLISH) - Page 29
to each option • Page on which you can find a description of each feature Note: You can only see menu 0, if your SIM card supports the SIM Application Toolkit. This is a network feature. Please contact your service provider for more information. 1. Call Records 1-1 Missed Calls 1-2 Incoming Calls - Samsung R225 | User Manual (ENGLISH) - Page 30
Phone Settings Page 76 4-1-1 Greeting Message 4-1-2 Own Number 1 4-1-3 Language 4-1-3-1 Text Language 4-1-3-2 Input Mode 4-1-4 Any-key Answer 4-1-5 Backlight 4-1-6 Service 91 1 Shown only if supported by your SIM card. 2 May not be shown or supported by your network service provider. 57 - Samsung R225 | User Manual (ENGLISH) - Page 31
dial it or save it in the phonebook • Delete the call from the list Incoming Calls Menu 1-2 This option lets you view the last 10 phone calls received. You can also: • Edit the number if available and dial it or save it in the phonebook • Delete the call from the list - Samsung R225 | User Manual (ENGLISH) - Page 32
must first enter the phone password (see page 103) and then press the OK soft key. Note: The actual time invoiced for calls by your service provider may vary, depending on network features, rounding-off for billing purposes and so forth. 60 Call Records Call Cost (SIM Card Dependent) Menu 1-5 Note - Samsung R225 | User Manual (ENGLISH) - Page 33
Messages Your phone receives voice mail notification messages, and text messages. Voice mail and the Short Message Service (SMS) are network services. Please contact your service provider for more information. When the icon appears, you have received new text messages. If the Message Tone menu - Samsung R225 | User Manual (ENGLISH) - Page 34
or keys. You can choose the following options, by pressing the Options soft key. Text Reply: allows you to reply by sending a text message. You can also: • Send the message • Save and send the message • Save but not send the message Call back: allows you to call the sender back. Edit: allows you to - Samsung R225 | User Manual (ENGLISH) - Page 35
informs you whether or not your message has been delivered. Broadcast Menu 2-6 This network service allows you to receive text messages on various topics, such as the weather or traffic. Messages are displayed immediately they are received, provided that: • The phone is in the idle mode • The - Samsung R225 | User Manual (ENGLISH) - Page 36
between the text and image, press the right soft key. The following options are available. Save: allows you to save the picture message to your picture message list. Discard: allows you to discard the picture message without saving it. Note: This function is available between phones supporting Nokia - Samsung R225 | User Manual (ENGLISH) - Page 37
type • Sounds made when you press a key, make an error or receive a message Note: The silent mode allows you to turn the various tones off when discretion is the Melody Composer menu option (3-2). 70 Tones If your SIM card supports the ALS feature, this option also allows you to select a different - Samsung R225 | User Manual (ENGLISH) - Page 38
ringing tone. 5. To use the melody as the ringing tone, press the Yes soft key. The melody is saved and is played each time your phone rings. You can also select the melodies composed via the Ring Tone menu option (3-1). Deleting a Melody 1. Select the melody that you wish to delete. 72 - Samsung R225 | User Manual (ENGLISH) - Page 39
received. The following options are available. OFF: no ringer or vibrating when new messages are received. Light only: just the service light flashes indicating a new message has been received. No ring or Vibrate. Single: the phone vibrates or the selected SMS tone is heard one time. Periodic: the - Samsung R225 | User Manual (ENGLISH) - Page 40
to suit your preferences. All of these features are accessed via the Settings menu. Phone Settings Menu 4-1 Greeting Message This option allows you to set a greeting message to be displayed briefly when the phone is switched on. The current message is displayed. To... Then press the... Clear - Samsung R225 | User Manual (ENGLISH) - Page 41
to the Alternate Line Service, you can select a line with or . The following options are available: Edit: allows you to edit name and number. Erase: allows you to erase name and number. Language Your phone supports different languages in addition to English. The text features are changed when the - Samsung R225 | User Manual (ENGLISH) - Page 42
the backlight is not used. 78 Settings Service Light This option allows you to select whether or not the service light on the top of the phone is used. The following options are available. ON: the service light flashes when the phone is ready for use. OFF: the service light is not used. Auto Redial - Samsung R225 | User Manual (ENGLISH) - Page 43
. Note: You can make the keypad lock manually by pressing and holding the key in idle mode regardless phone password. Note: The password is preset to 0000. To change this password, refer to page 88. Network Services Menu 4-2 These menu functions are network services. Please contact your service - Samsung R225 | User Manual (ENGLISH) - Page 44
not supported by your network operator. This network service enables be different, depending on the SIM card. You can specify individual forwarding you are already using the phone 82 Settings To set your are to be forwarded. To enter the international code, press and hold 0 until the + sign - Samsung R225 | User Manual (ENGLISH) - Page 45
Settings Call Waiting This network service enables you to be informed when someone is trying you are connected to the first available network in the preferred list when roaming. If you select Manual, the phone scans for the available networks. Go to Step 3. 3. Press or until the preferred network is - Samsung R225 | User Manual (ENGLISH) - Page 46
people of your choice • The types of calls of your choice Various codes and passwords are used to protect the features of your phone. They are described in the following sections (also see page 103). PIN Check When the PIN Check feature is enabled, you must enter your PIN each time you switch the - Samsung R225 | User Manual (ENGLISH) - Page 47
the SIM Lock feature is enabled, your phone only works with the current SIM. Once you have entered the lock code, you are asked to confirm it by entering it again. To unlock the SIM, you must enter the SIM lock code. FDN Mode The FDN (Fixed Dial Number) mode, if supported by your SIM card, allows - Samsung R225 | User Manual (ENGLISH) - Page 48
option allows you to adjust the contrast of the LCD screen. Press to increase or to decrease the contrast. Service Light Color Menu 4-5 There are five colors available for the service light: normal (green), orange, red, violet and blue. You can scroll through these colors, by pressing the or key - Samsung R225 | User Manual (ENGLISH) - Page 49
Organizer The Organizer feature enables you to: • Write your schedule • Calculate • Set the current date and time • Set the alarm so that the phone rings at a of reminders, calls that you need to make, meetings and birthdays. The phone alarm rings when the date set for a birthday, reminder or call - Samsung R225 | User Manual (ENGLISH) - Page 50
a description and the time. Call: requires a phone number and the time. Meeting: requires a description and the time. B i rthday: requires a name and the time. 4. Enter the appropriate information, referring to page 35 for further details on how to enter text if necessary. 5. If you wish to set the - Samsung R225 | User Manual (ENGLISH) - Page 51
The alarm icon ( ) appears in the top line of the display. The service light flashes in white when the alarm rings. To stop the alarm when it To deactivate the alarm, select Remove Alarm. Note: If no battery is attached to the phone or the battery is discharged, when the alarm is to ring, the alarm - Samsung R225 | User Manual (ENGLISH) - Page 52
Note: When you have finished with the calculator, press to return to the previous menu level. 96 Organizer World Time Menu 5-4 You can use your phone to check the current time in 21 major cities around the world. Scroll through the cities using the or key. The screen shows the: • City - Samsung R225 | User Manual (ENGLISH) - Page 53
24H 98 Games Using this menu you can also enjoy popular games on the phone. Scroll to the chosen game and press the Select soft key. The following options then toggle between O N and OFF by pressing the On/Off soft key. Instructions: gives you an explanation of how to play the game. You can scroll - Samsung R225 | User Manual (ENGLISH) - Page 54
of an unnecessary service call. When you switch your phone on, the following messages appear Insert SIM Card • Check that the SIM card is correctly installed. • This phone requires a 3 V SIM card. Please contact your service provider if you experience any problems. Phone Locked • The automatic - Samsung R225 | User Manual (ENGLISH) - Page 55
details • A clear description of the problem Then contact your local dealer or SAMSUNG after-sales service. Reference Information Access Codes There are several access codes that are used by your phone and its SIM card. These codes help you protect the phone against unauthorised use. The access - Samsung R225 | User Manual (ENGLISH) - Page 56
Information PIN The PIN (Personal Identification Number) protects your SIM card against unauthorised use. The PIN is usually supplied with the SIM card. When the PIN Check feature is enabled (menu option 4-3-1), the PIN is needed each time the phone is switched on. If you key in an incorrect PIN - Samsung R225 | User Manual (ENGLISH) - Page 57
(Canada), Safety Code 6. The standards output. Before a phone model is available for sale to the public, it accessories. When carrying the phone while it is on, use the specific Samsung-supplied or approved carrying case, holster, or other body-worn accessory. Use of non-Samsung-approved accessories - Samsung R225 | User Manual (ENGLISH) - Page 58
. • Never use any charger or battery that is damaged in any way. • Use the battery only for its intended purpose. • If you use the phone near the network's base station, it uses less power; talk and standby time are greatly affected by the signal strength on the cellular network and the parameters - Samsung R225 | User Manual (ENGLISH) - Page 59
available, these features help you to place your call without taking your attention off the road. 2. When available, use a hands free device. If possible, add an additional layer of convenience and safety to your wireless phone with one of the many hands free accessories available today. 3. Position - Samsung R225 | User Manual (ENGLISH) - Page 60
Remember, it is a free call on your wireless phone! 9. Use your wireless phone to help others in emergencies phone or any accessory to another device, read its user's guide for detailed safety instructions. Do not connect incompatible products. As with other mobile radio transmitting equipment, users - Samsung R225 | User Manual (ENGLISH) - Page 61
explosive atmosphere and obey all signs and instructions. Sparks in such areas could cause an explosion or fire resulting in bodily injury or even death. Users are advised to switch off the phone while at a refueling point (service station). Users are reminded of the need to observe restrictions - Samsung R225 | User Manual (ENGLISH) - Page 62
phone networks or when certain network services and/or phone features are in use. Check with local service providers. To make an emergency call: 1. If the phone features off before you can make an emergency call. Consult this document and your local cellular service phone, its parts or accessories. - Samsung R225 | User Manual (ENGLISH) - Page 63
. Unauthorized antennas, modifications of attachments could damage the phone and may violate regulations governing radio devices. • If the phone, battery, charger, or any accessory is not working properly, take it to your nearest qualified service facility. The personnel there will assist you, and - Samsung R225 | User Manual (ENGLISH) - Page 64
energy and, if not installed and used in accordance with the instructions, may cause harmful interference to radio communications. However, there is reception, which can be determined by turning the equipment off and on, the user is encouraged to try to correct the interference by one or more of the - Samsung R225 | User Manual (ENGLISH) - Page 65
used in this booklet and take full advantage of the features on your mobile phone, here are a few definitions. Call Forwarding Ability to reroute users that they have an incoming call when engaged on another call. GSM (Global System for Mobile Communication) International standard for cellular - Samsung R225 | User Manual (ENGLISH) - Page 66
and memory information, as well as the subscriber's personal data). The SIM card fits into a small slot on the back of the phone and is protected by the battery. SMS (Short Message Service) Network service sending and receiving messages to and from another subscriber without having to speak to the - Samsung R225 | User Manual (ENGLISH) - Page 67
key Voice Mail Computerized answering service that automatically answers your calls when you are not available, plays a greeting (optionally in your own voice) and records a message. 124 Index A ABC text mode • 38 Access codes • 103 Accessories • 9 Alarm (5-2) • 93 Alert Type (3-5) • 44 - Samsung R225 | User Manual (ENGLISH) - Page 68
phone (4-3-3) • 87 SIM card (4-3-5) • 88 Low battery indicator • 19 M Maintenance • 118 Melody Composer (3-2) • 71 Memory status • 44 Menus • 52-58 Messages storing in the phonebook • 41 Network Selection (4-2-3) • 85 Network Services (4-2) • 81 Numbers copying phonebook • 44 correcting • 22 editing - Samsung R225 | User Manual (ENGLISH) - Page 69
and hold down . SGH-R225 GSM Telephone Quick Reference Card End a Call Adjust the Earpiece Volume Make a Call Index S (continued) Setup (2-5) • 66 Silent mode • 11;70 SIM card installing • 15 locking (4-3-5) • 88 precautions • 15 SMS see Messages Soft keys • 48 Solving problems • 100 Switching - Samsung R225 | User Manual (ENGLISH) - Page 70
Speed-Dial with SIM Locations 2 to 9 Redial the Last Call Press and hold down the appropriate number key. Press twice. Connect to the Voice Mail Server Press and hold
-
 1
1 -
 2
2 -
 3
3 -
 4
4 -
 5
5 -
 6
6 -
 7
7 -
8
-
9
-
10
-
11
-
12
-
13
-
14
-
15
-
16
-
17
-
18
-
19
-
20
-
21
-
22
-
23
-
24
-
25
-
26
-
27
-
28
-
29
-
30
-
31
-
32
-
33
-
34
-
35
-
36
-
37
-
38
-
39
-
40
-
41
-
42
-
43
-
44
-
45
-
46
-
47
-
48
-
49
-
50
-
51
-
52
-
53
-
54
-
55
-
56
-
57
-
58
-
59
-
60
-
61
-
62
-
63
-
64
-
65
-
66
-
67
-
68
-
69
-
70
 |
 |
