Samsung RF260BEAESR User Manual Ver.1.0 (English, French, Spanish) - Page 10
Installing The Water, Dispenser Line - lowes
 |
View all Samsung RF260BEAESR manuals
Add to My Manuals
Save this manual to your list of manuals |
Page 10 highlights
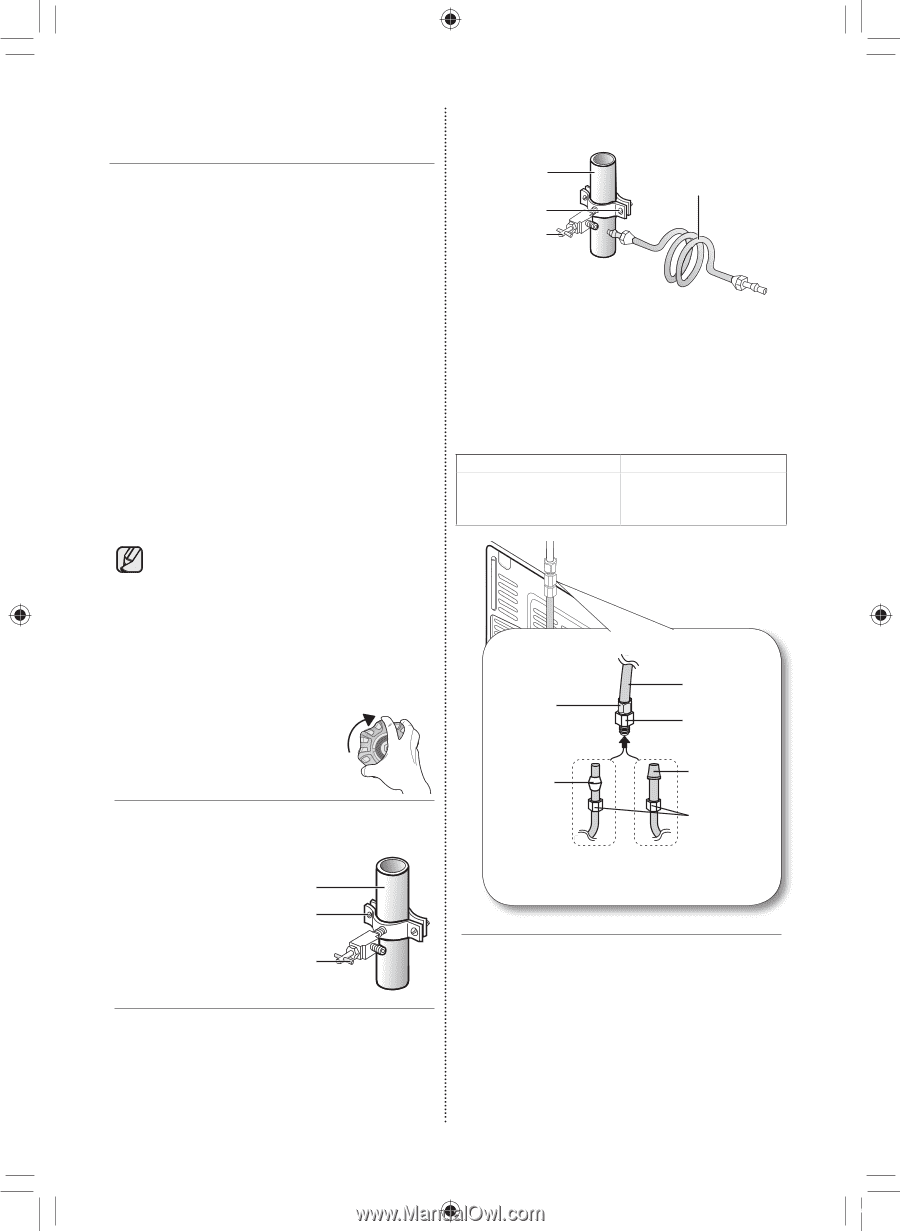
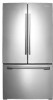
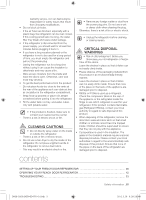
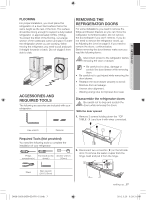
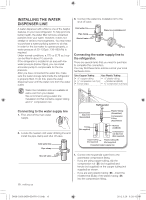
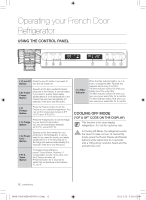
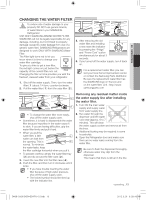
INSTALLing the WATER DISPENSER line A water dispenser with a filter is one of the helpful features on your new refrigerator. To help promote better health, the water filter removes unwanted particles from your water. However, it does not sterilize or destroy microorganisms. You may need to purchase a water purifying system to do that. In order for the ice maker to operate properly, a water pressure of 20~125psi ( 138~862kPa) is required. Under normal conditions, a 170 cc (5.75 oz.) cup can be filled in about 10 seconds. If the refrigerator is installed in an area with low water pressure (below 20psi), you can install a booster pump to compensate for the low pressure. After you have connected the water line, make sure the water storage tank inside the refrigerator is properly filled. To do this, press the water dispenser lever until the water runs from the water outlet. 333 Connect the water line installation kit to the shut off valve. Cold water line Pipe clamp Shut off valve Water line installation kit Connecting the water supply line to the refrigerator. There are several items that you need to purchase to complete this connection. You may find these items sold as a kit at your local hardware store. Use Copper Tubing Use Plastic Tubing •• ¼" copper tubing •• ¼" plastic tubing •• ¼" compression nut (1pc) → Molded end(Bulb) •• Ferrule (2pc) •• ¼" compression nut (1pc) Water line installation kits are available at extra cost from your dealer. We recommend using a water line installation kit that contains copper tubing and ¼" compression nut. Refrigerator Connecting to the water supply line 111 First, shut off the main water supply. 222 Locate the nearest cold water drinking line and install the pipe clamp and shut off valve. Cold water line Pipe clamp Compression Nut (1/4") (Assembled) Plastic Tubing (Assembled) Compression Fitting (Assembled) Ferrule (Not supplied) Molded end(Bulb) Compression nut (B) (1/4") (Not supplied) Copper tubing or Plastic tubing (B) (Not supplied) (Not supplied) Household water supply line Shut off valve 10_ setting up 111 Connect the household water line to the assembled compression fitting. -- If you are using copper tubing, slip the compression nut ( B ) (not supplied) and ferrule (not supplied) on the copper tubing (not supplied) as shown. -- If you are using plastic tubing ( B ) , insert the molded end (Bulb) of the plastic tubing ( B ) into the compression fitting. DA68-02601B(EN+ES+FR)-0.0.indb 10 2012.3.29 9:28:42 AM
-
 1
1 -
2
-
3
-
4
-
 5
5 -
 6
6 -
 7
7 -
 8
8 -
 9
9 -
 10
10 -
 11
11 -
 12
12 -
 13
13 -
 14
14 -
 15
15 -
16
-
17
-
18
-
19
-
20
-
21
-
22
-
23
-
24
-
25
-
26
-
27
-
28
-
29
-
30
-
31
-
32
-
33
-
34
-
35
-
36
-
37
-
38
-
39
-
40
-
41
-
42
-
43
-
44
-
45
-
46
-
47
-
48
-
49
-
50
-
51
-
52
-
53
-
54
-
55
-
56
-
57
-
58
-
59
-
60
-
61
-
62
-
63
-
64
-
65
-
66
-
67
-
68
-
69
-
70
-
71
-
72
-
73
-
74
-
75
-
76
-
77
-
78
-
79
-
80
-
81
-
82
-
83
-
84
 |
 |