Samsung RS261MDBP User Manual (user Manual) (ver.1.0) (English) - Page 9
RS261M - model
 |
UPC - 036725569621
View all Samsung RS261MDBP manuals
Add to My Manuals
Save this manual to your list of manuals |
Page 9 highlights
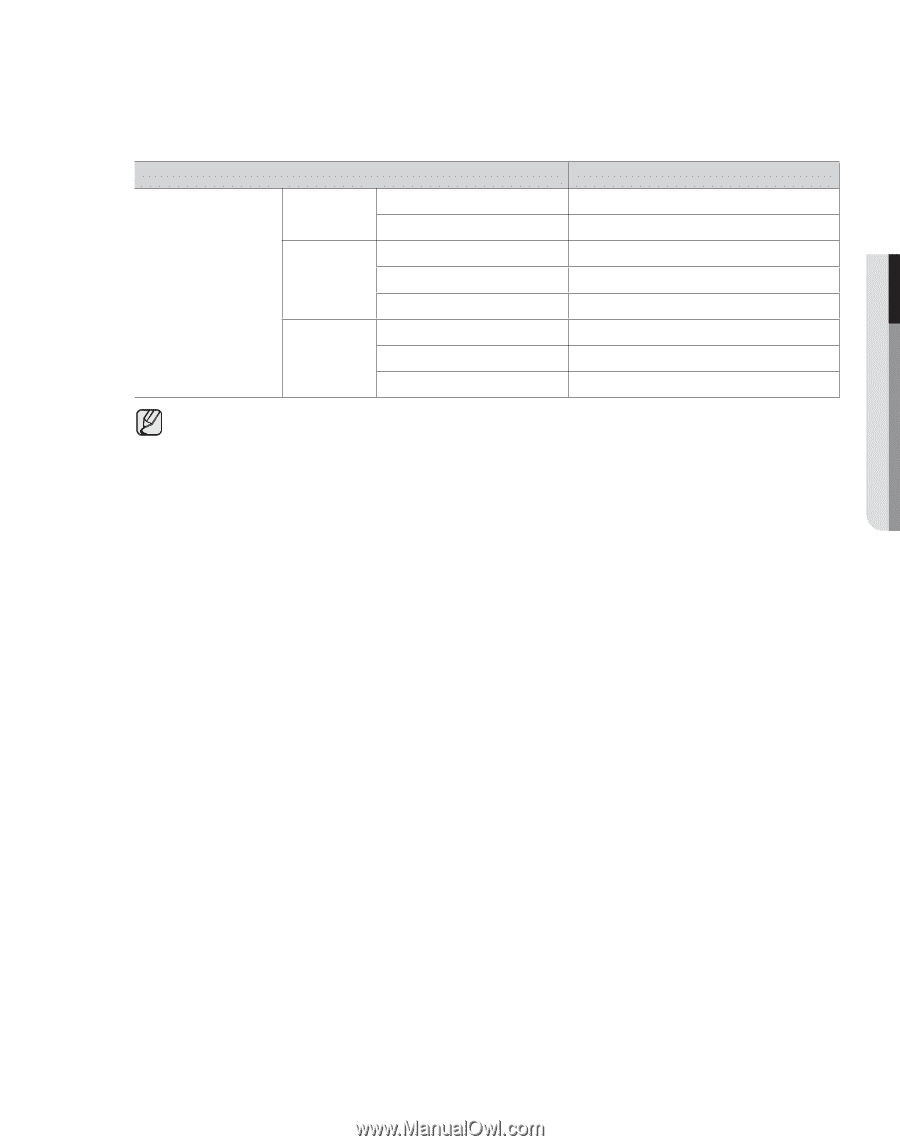
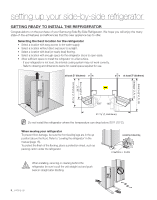
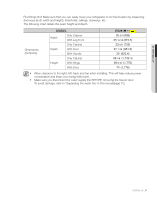
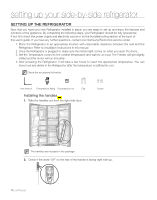
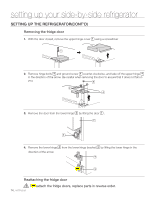
01 SETTING UP First things first! Make sure that you can easily move your refrigerator to its final location by measuring doorways (both width and height), thresholds, ceilings, stairways, etc. The following chart details the exact height and depth. Dimensions [inch(mm)] MODEL Width Only Cabinet With Leg Front Only Cabinet Depth With Door With Handle Only Cabinet Height With Hinge With Door RS261M 35 3/4 (908) 35 15/16 (915.5) 23 5/8 (735) 27 7/16 (861.2) 30 (920.4) 68 5/8 (1,742.4) 69 5/16 (1,776) 70 (1,776) • Allow clearance to the right, left, back and top when installing. This will help reduce power consumption and keep your energy bills lower. • Make sure you disconnect the water supply line BEFORE removing the freezer door. To avoid damage, refer to 'Separating the water line' in the manual(page 12). setting up _9
-
 1
1 -
2
-
3
-
 4
4 -
 5
5 -
 6
6 -
 7
7 -
 8
8 -
 9
9 -
 10
10 -
 11
11 -
 12
12 -
 13
13 -
 14
14 -
15
-
16
-
17
-
18
-
19
-
20
-
21
-
22
-
23
-
24
-
25
-
26
-
27
-
28
-
29
-
30
-
31
-
32
 |
 |