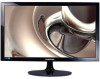
Samsung S24D300H User Manual
Samsung S24D300H Manual
 |
View all Samsung S24D300H manuals
Add to My Manuals
Save this manual to your list of manuals |
Samsung S24D300H manual content summary:
- Samsung S24D300H | User Manual - Page 1
User manual S19D300HY S19D340HY S19D300NY S20D300BY S20D300H S20D340H S20D300HY S20D340HY S22D300BY S22D300HY S22D340HY S22D300NY S24D300B S24D300BL S24D300H S24D340H S24D300HL S24D340HL The color and the appearance may differ depending on the product, and the specifications are subject to change - Samsung S24D300H | User Manual - Page 2
21 21 32 35 35 36 37 Copyright Icons used in this manual Cleaning Securing the Installation Space Precautions for storage Safety Precautions Symbols for S22D340HY / S22D300NY / S24D300B / S24D300BL / S24D300H / S24D340H / S24D300HL / S24D340HL) Removing the Stand (S19D300HY / S19D340HY / S19D300NY) - Samsung S24D300H | User Manual - Page 3
/ S24D300B / S24D300BL / S24D300H / S24D340H / S24D300HL / S24D340HL) Installing a Wall-mount Kit or Desktop Stand (S19D300HY / S19D340HY / S22D340HY / S24D300H / S24D340H / S24D300HL / S24D340HL) Connecting the Power Driver Installation Setting Optimum Resolution Brightness Configuring Brightness - Samsung S24D300H | User Manual - Page 4
SAMSUNG MAGIC Upscale 59 Image Size 59 Changing the Image Size 61 HDMI Black Level (S19D300HY / S19D340HY / S20D300H / S20D340H / S20D300HY / S20D340HY / S22D300HY / S22D340HY / S24D300H / S24D340H / S24D300HL / S24D340HL) 61 Configuring the HDMI Black Level Settings 63 Response Time - Samsung S24D300H | User Manual - Page 5
Gamma Configuring Gamma Language Configuring Language Menu H-Position & Menu V-Position Configuring Menu H-Position & Menu VPosition Display Time Configuring Display Time Transparency Changing Transparency Reset All Initializing Settings (Reset All) Eco Saving Configuring Eco Saving Off Timer - Samsung S24D300H | User Manual - Page 6
87 88 TROUBLESHOOTING 89 GUIDE 89 89 S24D300HL / S24D340HL) Configuring Source Detection INFORMATION Displaying INFORMATION Configuring Brightness and Contrast in the Initial Screen Easy Setting Box Installing the Software Removing the Software Requirements Before Contacting Samsung Customer Service - Samsung S24D300H | User Manual - Page 7
S22D340HY / S22D300NY) 98 General (S24D300BL / S24D300HL / S24D300H / S24D300B) 100 General (S24D340HL / S24D340H) 102 PowerSaver 104 Standard Signal Mode Table APPENDIX 109 115 115 115 115 116 116 117 Contact SAMSUNG WORLD WIDE Responsibility for the Pay Service (Cost to Customers) Not a product - Samsung S24D300H | User Manual - Page 8
Electronics owns the copyright for this manual. Use or reproduction of this manual in parts or entirety without the authorization of Samsung Electronics is prohibited. Microsoft and Windows are registered trademarks of Microsoft Corporation. VESA, DPM and DDC are registered trademarks of the Video - Samsung S24D300H | User Manual - Page 9
as the panel and exterior of advanced LCDs are easily scratched. Take the following steps when cleaning. 1. Power off the monitor and computer. 2. Disconnect the power cord from the monitor. Hold the power cable by the plug and do not touch the cable with wet hands. Otherwise, an electric shock may - Samsung S24D300H | User Manual - Page 10
(10 cm) 3.93 inches (10 cm) 3.93 inches (10 cm) 3.93 inches (10 cm) 3.93 inches (10 cm) Precautions for storage Be sure to contact Samsung Customer Service Center (page 109) if the inside of the monitor needs cleaning. (Service fee will be charged.) 10 Before Using the Product - Samsung S24D300H | User Manual - Page 11
(OR BACK). THERE ARE NO USER SERVICEABLE PARTS INSIDE. REFER ALL SERVICING TO QUALIFIED PERSONNEL. This symbol indicates instructions are not followed. Personal injury or damage to properties may result if instructions are not followed. Activities marked by this symbol are prohibited. Instructions - Samsung S24D300H | User Manual - Page 12
An electric shock or injury may result. Do not bend or pull the power cord with force. Do not weigh the power cord down with a heavy object. z A damaged power cord may cause an electric shock or fire. Do not place the power cord or product near heat sources. z An electric shock or fire may result - Samsung S24D300H | User Manual - Page 13
power cord for products other than authorized products supplied by Samsung. ! z An electric shock or fire may result. Keep the power socket where the power cord is connected unobstructed. z If any problem occurs in the product, unplug the power such as a bookshelf or wall closet. z Otherwise, a - Samsung S24D300H | User Manual - Page 14
Before Using the Product Do not install the product on an unstable or vibrating surface (insecure shelf, sloped surface, etc.). z The product may fall and break or cause a personal injury. z Using the product in an area with excess vibration may damage the product or cause a fire. Do not install - Samsung S24D300H | User Manual - Page 15
extended ! period of time) may seriously affect its performance. z Be sure to consult Samsung Customer Service Center (page 109) product falls or the exterior is damaged, power off the product, remove the power cord, and contact Samsung Customer Service Center (page 109). z Otherwise, an - Samsung S24D300H | User Manual - Page 16
the vent or ports of the product. z If water or any foreign substance enters the product, be sure to power off the product, remove the power cord, and contact Samsung Customer Service Center (page 109). z Product failure, an electric shock or fire may result. Do not place objects containing liquid - Samsung S24D300H | User Manual - Page 17
for an extended period of time, activate power-saving mode or a moving-picture screen saver. Disconnect the power cord from the power socket if you do not . Do not put DC power adapters together. z Otherwise, a fire may result. Remove the plastic bag from the DC power adapter before you use it. - Samsung S24D300H | User Manual - Page 18
screen too close for an extended period of time can deteriorate your eyesight. ! Do not hold the monitor upside-down or move it by holding the the screen when the product has been turned on for an extended period of time as it will become hot. Store the small accessories used with the product out - Samsung S24D300H | User Manual - Page 19
Before Using the Product Correct posture to use the product Use the product in the correct posture as follows: 50 cm z Straighten your back. z Allow a distance of 45 to 50 cm between your eye and the screen, and look slightly downward at the screen. Keep your eyes directly in front of the screen. z - Samsung S24D300H | User Manual - Page 20
Warranty card (Not available in some locations) Regulatory guide User manual (optional) DC power adapter (Integrated) (optional) DC power adapter (Detachable) (optional) Power cable (Only provided with the detachable DC power adapter.) D-SUB cable (optional) DVI cable (optional) HDMI cable - Samsung S24D300H | User Manual - Page 21
differ from what is shown. Specifications are subject to change without notice to improve quality. S19D300NY / S22D300NY MENU GAME MODE AUTO MENU Function Key Guide GAME MODE AUTO To activate a button on the product, tap the area on the bottom of the panel. Tapping around the button label on - Samsung S24D300H | User Manual - Page 22
shows the function of the button pressed.) To access the onscreen menu when the guide is displayed, press the corresponding button again. The Function Key Guide may vary depending on the function or product model. Refer to the actual product. The function buttons page shows if Game Mode is enabled - Samsung S24D300H | User Manual - Page 23
S22D300BY / S24D300B / S24D300BL MENU GAME MODE SOURCE AUTO MENU MENU Function Key Guide GAME MODE SOURCE AUTO GAME MODE SOURCE To activate a button on the product button. S20D300BY MENU GAME MODE SOURCE AUTO MENU MENU Function Key Guide GAME MODE SOURCE AUTO GAME MODE SOURCE - Samsung S24D300H | User Manual - Page 24
[ ] button when the OSD menu is not displayed will change the input source (Analog/DVI). If you power on the product or change the input source by pressing the [ ] button, a message that shows the will activate the Auto Adjustment function. z Available only in Analog mode. 24 1 Preparations - Samsung S24D300H | User Manual - Page 25
shows the function of the button pressed.) To access the onscreen menu when the guide is displayed, press the corresponding button again. The Function Key Guide may vary depending on the function or product model. Refer to the actual product. The function buttons page shows if Game Mode is enabled - Samsung S24D300H | User Manual - Page 26
1 Preparations S19D300HY / S19D340HY / S22D300HY / S22D340HY / S24D300HL / S24D340HL MENU GAME MODE SOURCE AUTO MENU MENU Function Key Guide GAME MODE SOURCE AUTO GAME MODE SOURCE To activate a button on the product, tap the area on the bottom of the panel. Tapping around the - Samsung S24D300H | User Manual - Page 27
the screen. Confirm a menu selection. Pressing the [ ] button when the OSD menu is not displayed will change the input source (Analog/HDMI). If you power on the product or change the input source by pressing the [ ] button, a message that shows the changed input source will appear at the top - Samsung S24D300H | User Manual - Page 28
shows the function of the button pressed.) To access the onscreen menu when the guide is displayed, press the corresponding button again. The Function Key Guide may vary depending on the function or product model. Refer to the actual product. The function buttons page shows if Game Mode is enabled - Samsung S24D300H | User Manual - Page 29
1 Preparations S24D300H / S24D340H MENU GAME MODE SOURCE AUTO MENU MENU Function Key Guide GAME MODE SOURCE AUTO GAME MODE SOURCE To activate a button on the product, tap the area on the bottom of the panel. Tapping around the - Samsung S24D300H | User Manual - Page 30
the screen. Confirm a menu selection. Pressing the [ ] button when the OSD menu is not displayed will change the input source (Analog/HDMI). If you power on the product or change the input source by pressing the [ ] button, a message that shows the changed input source will appear at the top - Samsung S24D300H | User Manual - Page 31
shows the function of the button pressed.) To access the onscreen menu when the guide is displayed, press the corresponding button again. The Function Key Guide may vary depending on the function or product model. Refer to the actual product. The function buttons page shows if Game Mode is enabled - Samsung S24D300H | User Manual - Page 32
to improve quality. z Provided ports may vary depending on the product. S19D300NY / S22D300NY S19D300NY S22D300NY Port DC 14V RGB IN Description Connects to the DC power adapter. Connect to a PC using the D-SUB cable. 32 1 Preparations - Samsung S24D300H | User Manual - Page 33
1 Preparations S20D300BY / S22D300BY / S24D300B / S24D300BL Port DC 14V DVI IN RGB IN Description Connects to the DC power adapter. Connects to a source device via a DVI cable. Connect to a PC using the D-SUB cable. 33 1 Preparations - Samsung S24D300H | User Manual - Page 34
/ S24D300H (LS24D300HSM* model only) S20D300H / S20D340H / S20D300HY / S20D340HY / S22D300HY / S22D340HY / S24D300H / S24D340H / S24D300HL / S24D340HL Port DC 14V HDMI IN RGB IN Description Connects to the DC power adapter. Connects to a source device via a HDMI cable. Connect to a PC using the - Samsung S24D300H | User Manual - Page 35
1 Preparations 1.3 Installation 1.3.1 Attaching the Stand (S19D300HY / S19D340HY / S19D300NY) Before assembling the product, place the product down on a flat and stable surface so that the screen is facing downwards. Insert the stand neck into the stand base in the direction shown in the figure. - Samsung S24D300H | User Manual - Page 36
Attaching the Stand (S20D300BY / S20D300H / S20D340H / S20D300HY / S20D340HY / S22D300BY / S22D300HY / S22D340HY / S22D300NY / S24D300B / S24D300BL / S24D300H / S24D340H / S24D300HL / S24D340HL) Before assembling the product, place the product down on a flat and stable surface so that the screen is - Samsung S24D300H | User Manual - Page 37
1 Preparations 1.3.3 Removing the Stand (S19D300HY / S19D340HY / S19D300NY) Place a soft cloth over the table to protect the product and place the product onto the cloth so that the front of the product faces downwards. While holding the stand neck with one hand, pound the other fisted hand down - Samsung S24D300H | User Manual - Page 38
Preparations 1.3.4 Removing the Stand (S20D300BY / S20D300H / S20D340H / S20D300HY / S20D340HY / S22D300BY / S22D300HY / S22D340HY / S22D300NY / S24D300B / S24D300BL / S24D300H / S24D340H / S24D300HL / S24D340HL) Place a soft cloth over the table to protect the product and place the product onto the - Samsung S24D300H | User Manual - Page 39
on the specifications. z Do not use screws that do not comply with the VESA standards. Do not attach the wall-mount kit or desktop stand using excessive force. The product may get damaged or fall and cause personal injury. Samsung shall not be held liable for any damage or injury caused by using - Samsung S24D300H | User Manual - Page 40
/ S20D340H / S20D300HY / S20D340HY / S22D300BY / S22D300HY / S22D340HY / S22D300NY / S24D300B / S24D300BL / S24D300H / S24D340H / S24D300HL / S24D340HL -1° (±2°) ~ 20° (±2°) -1° (±2°) ~ 20° (±2°) z You can adjust the tilt of your monitor. z Hold the lower part of the product and adjust the tilt - Samsung S24D300H | User Manual - Page 41
S22D340HY / S22D300NY / S24D300B / S24D300BL / S24D300H / S24D340H / S24D300HL / S24D340HL The color and shape of parts may differ from anti-theft locking device can be purchased separately. z Refer to the user guide provided with your anti-theft locking device for details. z Anti-theft locking - Samsung S24D300H | User Manual - Page 42
the back of the product and the RGB port on the PC. 2 Connect the DC power adapter to the product and a power socket. Next, turn on the power switch on the PC. (For details, refer to "2.2.6 Connecting the Power".) Provided ports may vary depending on the product. 42 2 Connecting and Using a Source - Samsung S24D300H | User Manual - Page 43
S24D300B / S24D300BL / S24D300H / S24D340H / S24D300HL / S24D340HL RGB IN 1 Connect the D-SUB cable to the [RGB IN] port on the back of the product and the RGB port on the PC. 2 Connect the DC power adapter to the product and a power socket. Next, turn on the power switch on the PC. (For details - Samsung S24D300H | User Manual - Page 44
Connect the DC power adapter to the product and a power socket. Next, turn on the power switch on the PC. (For details, refer to "2.2.6 Connecting the Power".) 3 Press [ / S22D340HY / S24D300H / S24D340H / S24D300HL / S24D340HL) Do not connect the power cable before connecting all other cables. - Samsung S24D300H | User Manual - Page 45
/ S22D340HY / S24D300H / S24D340H / S24D300HL / S24D340HL) Do not connect the power cable before connecting all other cables. Connect the DC power adapter to the product and a power socket. Next, turn on the power switch on the PC. (For details, refer to "2.2.6 Connecting the Power".) 3 Press - Samsung S24D300H | User Manual - Page 46
different products. z The exterior may differ depending on the product. Power connection using integrated DC power adapter z Connect the DC power adapter to the [DC 14V] port on the back of the product and to the power outlet. S19D300HY / S19D340HY / S19D300NY / S24D300H (LS24D300HSM* model only) DC - Samsung S24D300H | User Manual - Page 47
and Using a Source Device Power connection using detachable DC power adapter z Connect the power cable to the DC power adapter. Then, connect the DC power adapter to the [DC 14V] port on the back of the product. Next, connect the power cable to the power outlet. S19D300HY / S19D340HY / S19D300NY - Samsung S24D300H | User Manual - Page 48
. 2 Click "Windows Driver". 3 Follow the instructions given on the screen to proceed with installation. 4 Select your product model from the list of models. 5 Go to Display Properties and check that the resolution and refresh rate are appropriate. Refer to your Windows OS manual for further details - Samsung S24D300H | User Manual - Page 49
2 Connecting and Using a Source Device 2.2.8 Setting Optimum Resolution An information message about setting optimum resolution will appear if you power on the product for the first time after purchase. Select a language on the product and change the resolution on your PC to the optimum setting. - Samsung S24D300H | User Manual - Page 50
when Eco Saving is enabled. z The functions available on the monitor may vary depending on the model. Refer to the actual product Brightness 1 Press any button on the front of the product to display the Key guide. Next, press [MENU] to display the corresponding menu screen. 2 Press [ ] - Samsung S24D300H | User Manual - Page 51
. z The functions available on the monitor may vary depending on the model. button on the front of the product to display the Key guide. Next, press [MENU] to display the corresponding menu Brightness Contrast Sharpness Game Mode SAMSUNG MAGIC Bright SAMSUNG MAGIC Upscale Image Size 100 - Samsung S24D300H | User Manual - Page 52
available when Game Mode is enabled. z The functions available on the monitor may vary depending on the model. Refer to the actual product. Sharpness 1 Press any button on the front of the product to display the Key guide. Next, press [MENU] to display the corresponding menu screen. 2 Press [ ] - Samsung S24D300H | User Manual - Page 53
connected. The functions available on the monitor may vary depending on the model. on the front of the product to display the Key guide. Next, press [MENU] to display the corresponding menu option will be applied. z When the monitor turns off, enters power-saving mode or changes input sources, Game - Samsung S24D300H | User Manual - Page 54
monitor may vary depending on the model. Refer to the actual product. You can customize the brightness to suit your preferences. 3.5.1 Configuring SAMSUNG MAGIC Bright 1 Press any button on the front of the product to display the Key guide. Next, press [MENU - Samsung S24D300H | User Manual - Page 55
this mode when the surroundings are bright. This also provides a sharp image. z Movie: Select this mode when the surroundings are dark. This will save power and reduce eye fatigue. z Custom: Select this mode when you want to adjust the image according to your preferences. 4 Press [ ] to move to - Samsung S24D300H | User Manual - Page 56
available when Game Mode is enabled. z The functions available on the monitor may vary depending on the model. Refer to the actual product. This suit your preferences. 3.6.1 Configuring SAMSUNG MAGIC Angle 1 Press any button on the front of the product to display the Key guide. Next, press [MENU] - Samsung S24D300H | User Manual - Page 57
3 Screen Setup z Side Mode ˡ: Select this option to view from either side of the product. z Group View: Select this option for more than one viewer to view from places ˝, ˠ and ˡ. z Custom: Lean Back Mode 1 will be applied by default if Custom is selected. 4 Press [ ] to move to the option you - Samsung S24D300H | User Manual - Page 58
Game Mode is enabled. z The functions available on the monitor may vary depending on the model. Refer to the actual product. 3.7.1 Configuring SAMSUNG MAGIC Upscale 1 Press any button on the front of the product to display the Key guide. Next, press [MENU] to display the corresponding menu screen - Samsung S24D300H | User Manual - Page 59
monitor may vary depending on the model. Refer to the actual product. 3.8.1 Changing the Image Size 1 Press any button on the front of the product to display the Key guide on screen. AUTO PICTURE Image Size HDMI Black Level Response Time H-Position V-Position Coarse Fine Auto Wide 100 75 50 - Samsung S24D300H | User Manual - Page 60
picture displayed on screen. AUTO PICTURE Image Size HDMI Black Level Response Time H-Position V-Position Coarse Fine 4:3 16:9 Screen Fit 100 75 input signal is 480p, 576p, 720p, or 1080p and monitor can display normally (Not every model can support all of these signals.). † This can only be set - Samsung S24D300H | User Manual - Page 61
S22D340HY / S24D300H / S24D340H / S24D300HL / S24D340HL) If a DVD z The functions available on the monitor may vary depending on the model. on the front of the product to display the Key guide. Next, press [MENU] to display the corresponding menu HDMI Black Level Response Time H-Position V-Position - Samsung S24D300H | User Manual - Page 62
3 Screen Setup 4 Press [ ] to move to the option you want and press [ ]. 5 The selected option will be applied. HDMI Black Level may not be compatible with some source devices. 62 3 Screen Setup - Samsung S24D300H | User Manual - Page 63
monitor may vary depending on the model. Refer to the actual product. 3.10.1 Configuring the Response Time 1 Press any button on the front of the product to display the Key guide Response Time H-Position V-Position Coarse Fine Standard Faster Fastest Wide Accelerate the panel response rate - Samsung S24D300H | User Manual - Page 64
The functions available on the monitor may vary depending on the model on the front of the product to display the Key guide. Next, press [MENU] to display the corresponding menu screen AUTO PICTURE Image Size HDMI Black Level Response Time H-Position V-Position Coarse Fine AUTO Wide Faster - Samsung S24D300H | User Manual - Page 65
Coarse Fine Wide 50 42 2200 70 Move the image displayed on the screen up or down. PICTURE Image Size HDMI Black Level Response Time H-Position V-Position Coarse Fine AUTO 4 Press [ ] to configure H-Position or V-Position. 5 The selected option will be applied. 50 50 2200 0 Move the image - Samsung S24D300H | User Manual - Page 66
. z The functions available on the monitor may vary depending on the model. Refer any button on the front of the product to display the Key guide. Next, press [MENU] to display the corresponding menu screen. PICTURE Image Size HDMI Black Level Response Time H-Position V-Position Coarse Fine AUTO - Samsung S24D300H | User Manual - Page 67
only. z The functions available on the monitor may vary depending on the model. Refer on the front of the product to display the Key guide. Next, press [MENU] to display the corresponding menu applied. PICTURE Image Size HDMI Black Level Response Time H-Position V-Position Coarse Fine AUTO Wide - Samsung S24D300H | User Manual - Page 68
higher value will increase the intensity of the color. 4.1.1 Configuring Red 1 Press any button on the front of the product to display the Key guide. Next, press [MENU] to display the corresponding menu screen. 2 Press [ ] to move to COLOR and press [ ] on the product. 3 Press [ ] to move to - Samsung S24D300H | User Manual - Page 69
value will increase the intensity of the color. 4.2.1 Configuring Green 1 Press any button on the front of the product to display the Key guide. Next, press [MENU] to display the corresponding menu screen. 2 Press [ ] to move to COLOR and press [ ] on the product. 3 Press [ ] to move to - Samsung S24D300H | User Manual - Page 70
higher value will increase the intensity of the color. 4.3.1 Configuring Blue 1 Press any button on the front of the product to display the Key guide. Next, press [MENU] to display the corresponding menu screen. 2 Press [ ] to move to COLOR and press [ ] on the product. 3 Press [ ] to move to - Samsung S24D300H | User Manual - Page 71
when Game Mode is enabled. z The functions available on the monitor may vary depending on the model. Refer to the actual product. Tone Settings 1 Press any button on the front of the product to display the Key guide. Next, press [MENU] to display the corresponding menu screen. 2 Press [ ] - Samsung S24D300H | User Manual - Page 72
when Game Mode is enabled. z The functions available on the monitor may vary depending on the model. Refer to the actual product. Configuring Gamma 1 Press any button on the front of the product to display the Key guide. Next, press [MENU] to display the corresponding menu screen. 2 Press [ ] - Samsung S24D300H | User Manual - Page 73
1 Press any button on the front of the product to display the Key guide. Next, press [MENU] to display the corresponding menu screen. 2 Press [ appear. MENU SETTINGS Language Menu H-Position Menu V-Position Display Time Transparency Deutsch English Español Français Italiano Magyar Set the - Samsung S24D300H | User Manual - Page 74
1 Press any button on the front of the product to display the Key guide. Next, press [MENU] to display the corresponding menu screen. 2 Press [ or right. MENU SETTINGS Language Menu H-Position Menu V-Position Display Time Transparency AUTO English 100 2 20 sec On Move the menu position - Samsung S24D300H | User Manual - Page 75
menu is not used for a specified period of time. Display Time can be used to specify the time after which you want the OSD menu to disappear. 5.3.1 Configuring Display Time 1 Press any button on the front of the product to display the Key guide. Next, press [MENU] to display the corresponding menu - Samsung S24D300H | User Manual - Page 76
1 Press any button on the front of the product to display the Key guide. Next, press [MENU] to display the corresponding menu screen. 2 Press [ will appear. MENU SETTINGS Language Menu H-Position Menu V-Position Display Time Transparency Off On English 100 2 20 sec On Configure the - Samsung S24D300H | User Manual - Page 77
factory settings. The functions available on the monitor may vary depending on the model. on the front of the product to display the Key guide. Next, press [MENU] to display the corresponding menu screen Reset All Eco Saving Off Timer Key Repeat Time Return all the settings for the product to - Samsung S24D300H | User Manual - Page 78
the product to display the Key guide. Next, press [MENU] to display Time Source Detection AUTO 75% 50% Off Adjust the power consumption of the product to save energy. Acceleration Auto AUTO z 75%: Change the monitor power consumption to 75% of the default level. z 50%: Change the monitor power - Samsung S24D300H | User Manual - Page 79
monitor may vary depending on the model. Refer to the actual product. 6.3.1 Configuring Off Timer 1 Press any button on the front of the product to display the Key guide Mode Key Repeat Time Source Detection Enable power off automatically. z On: Activate the off timer so that the product powers - Samsung S24D300H | User Manual - Page 80
time 4h period. AUTO 5 Press [ ] to configure Turn Off After. 6 The selected option will be applied. z The off timer can be set within a range of 1 to 23 hours. The product will automatically power after the product powers on. This is done in accordance with power supply regulations. If you - Samsung S24D300H | User Manual - Page 81
S24D300HL / S24D340HL) Set PC/AV Mode to AV. The picture size will be enlarged. This option is useful when you view a movie. z This function does not support Analog mode. z Supplied for the wide models only such as 16:9 or 16:10. z If the monitor (when set to DVI or HDMI) is in power Repeat Time - Samsung S24D300H | User Manual - Page 82
6 Setup and Reset 5 Press [ ] to move to the option you want and press [ ]. 6 The selected option will be applied. 82 6 Setup and Reset - Samsung S24D300H | User Manual - Page 83
Key Repeat Time Control the response rate of a button when the button is pressed. The functions available on the monitor may vary depending on the model. Refer to the actual product. 6.5.1 Configuring Key Repeat Time 1 Press any button on the front of the product to display the Key guide. Next - Samsung S24D300H | User Manual - Page 84
/ S24D300H / S24D340H / S24D300HL / S24D340HL) You can activate Source Detection. The functions available on the monitor may vary depending on the All Eco Saving Off Timer PC/AV Mode Key Repeat Time Source Detection Auto Manual Decide how input sources will be detected. Off Auto AUTO z - Samsung S24D300H | User Manual - Page 85
View the current input source, frequency and resolution. 7.1.1 Displaying INFORMATION 1 Press any button on the front of the product to display the Key guide. Next, press [MENU] to display the corresponding menu screen. 2 Press [ ] to move to INFORMATION. The current input source, frequency and - Samsung S24D300H | User Manual - Page 86
when Game Mode is enabled. 1 Press any button on the front of the product (when no menu screen is displayed) to display the Key guide. Next, press [ ]. The following screen will appear. Brightness 100 Contrast 75 2 Press the [ ] button to alternate between the Brightness and Contrast settings - Samsung S24D300H | User Manual - Page 87
Box" enables users to use the monitor by partitioning multiple sections. 8.1.1 Installing the the Installation Wizard appears, click Next. 4 Follow the instructions given on the screen to proceed with installation. z press the F5 key. Restrictions and Problems with the Installation ("Easy Setting Box - Samsung S24D300H | User Manual - Page 88
8 Installing the Software 8.1.2 Removing the Software Click Start, select Settings/Control Panel, and then double-click Add or Remove Programs. Select "Easy Setting Box" from the program list and click the Add/Delete button. 88 8 Installing the Software - Samsung S24D300H | User Manual - Page 89
9 Troubleshooting Guide 9.1 Requirements Before Contacting Samsung Customer Service Center 9.1.1 Testing the Product Before calling Samsung Customer Service Center, test your product as follows. If the problem persists, contact Samsung Customer Service Center. Check if your product is operating - Samsung S24D300H | User Manual - Page 90
Standard Signal Mode Table (page 104) in this manual and the INFORMATION menu on the product. Adjust power LED blinks every 0.5 to 1 second. The product is operating in power-saving mode. Press any key on the keyboard or move the mouse to return to normal operating mode. 90 9 Troubleshooting Guide - Samsung S24D300H | User Manual - Page 91
9 Troubleshooting Guide Source device issue Issues Solutions A beeping sound is heard when my PC is booting. If a beeping sound is heard when your PC is booting, have your PC serviced. 91 9 Troubleshooting Guide - Samsung S24D300H | User Manual - Page 92
Screen Resolution Advanced settings Monitor, and adjust Refresh rate under Monitor settings. z Windows 8: Go to Settings Control Panel Appearance and Personalization Display Screen Resolution Advanced settings Monitor, and adjust Refresh rate under Monitor settings. 92 9 Troubleshooting Guide - Samsung S24D300H | User Manual - Page 93
or BIOS SETUP on the PC. z Windows 8: Set power-saving mode in Settings Control Panel Appearance and Personalization Personalize Screen Saver Settings or BIOS SETUP on the PC. Refer to the user manual for your PC or graphics card for further instructions on adjustment. 93 9 Troubleshooting Guide - Samsung S24D300H | User Manual - Page 94
Power Supply This product supports 100-240 V. Since the standard voltage may differ from country to country, please check the label on the back of the product. Dimensions (W x H x D) / Weight Without Stand With Stand VESA Mounting the monitor and PC system optimizes the monitor settings. Monitor - Samsung S24D300H | User Manual - Page 95
10 Specifications (USA only) Dispose unwanted electronics through an approved recycler. To find the nearest recycling location, go to our website: www.samsung.com/recyclingdirect or call, (877) 278 - 0799 95 10 Specifications - Samsung S24D300H | User Manual - Page 96
x 0.27 mm (V) 0.01 Inches (H) x 0.01 Inches (V) Power Supply This product supports 100-240 V. Since the standard voltage may differ from country to country between the monitor and PC system optimizes the monitor settings. Monitor installation takes samsung.com/recyclingdirect or call, (877) 278 - - Samsung S24D300H | User Manual - Page 97
0.24825 mm (V) 0.0098 Inches (H) x 0.0098 Inches (V) Power Supply This product supports 100-240 V. Since the standard voltage may differ from country between the monitor and PC system optimizes the monitor settings. Monitor installation takes samsung.com/recyclingdirect or call, (877) 278 - - Samsung S24D300H | User Manual - Page 98
23.6 Inches (59 cm) Display area 521.28 mm (H) x (Minimum) 293.22 mm (V) 20.52 Inches (H) x 11.54 Inches (V) 24 Inches (61 cm) 531.36 mm (H) x 298.89 mm (V) 20.92 Inches (H) x 11.77 Inches (V) Pixel Pitch Power Supply Dimensions (W x H x D) / Weight Without Stand With Stand VESA Mounting - Samsung S24D300H | User Manual - Page 99
10 Specifications This device is a Class B digital apparatus. (USA only) Dispose unwanted electronics through an approved recycler. To find the nearest recycling location, go to our website: www.samsung.com/recyclingdirect or call, (877) 278 - 0799 99 10 Specifications - Samsung S24D300H | User Manual - Page 100
Power Supply Dimensions (W x H x D) / Weight Environmental considerations Size 23.6 Inches (59 cm) 24 (V) 0.01090 Inches (H) x 0.01090 Inches (V) This product supports 100-240 V. Since the standard voltage may differ from country the monitor and PC system optimizes the monitor settings. Monitor - Samsung S24D300H | User Manual - Page 101
10 Specifications (USA only) Dispose unwanted electronics through an approved recycler. To find the nearest recycling location, go to our website: www.samsung.com/recyclingdirect or call, (877) 278 - 0799 101 10 Specifications - Samsung S24D300H | User Manual - Page 102
switching off the screen and controlling the power LED status if the product is not used for a specified period of time. The power is not turned off in power-saving mode. To switch the screen back on, press any key on the keyboard or move the mouse. Power-saving mode functions only when the product - Samsung S24D300H | User Manual - Page 103
10 Specifications PowerSaver Power Consumption (S24D300BL) Power Consumption (S24D300HL) Power Consumption (S24D340HL) Power Consumption (S24D300H) Power Consumption (S24D340H) Power Consumption (S24D300B) Energy Star Test Condition Typical 20 W Typical 20 W Typical 20 W Typical 18 W Typical 18 W - Samsung S24D300H | User Manual - Page 104
monitor (connected to a PC) for an LCD monitor. If the LCD monitor does not support 85Hz, change the vertical frequency to 60Hz using the CDT monitor before you exchange it with the LCD monitor / S24D300H / S24D340H / S24D300HL / S24D340HL 56 ~ 75 Hz power LED turns on. In such a - Samsung S24D300H | User Manual - Page 105
/ S19D300NY Resolution IBM, 720 x 400 VESA, 640 x 480 MAC, 640 x 480 VESA, 640 x 480 VESA, 640 x 480 VESA, 800 x 600 VESA, 800 x 600 VESA, 800 x 600 VESA, 800 x 600 MAC, 832 x 624 VESA, 1024 x 768 VESA, 1024 x 768 VESA, 1024 x 768 VESA, 1280 x 720 VESA, 1366 x 768 Horizontal Frequency (kHz - Samsung S24D300H | User Manual - Page 106
MAC, 640 x 480 VESA, 640 x 480 VESA, 640 x 480 VESA, 800 x 600 VESA, 800 x 600 VESA, 800 x 600 VESA, 800 x 600 MAC, 832 x 624 VESA, 1024 x 768 VESA, 1024 x 768 VESA, 1024 x 768 VESA, 1152 x 864 MAC, 1152 x 870 VESA, 1280 x 720 VESA, 1280 x 800 VESA, 1440 x 900 VESA, 1440 x 900 VESA, 1600 x 900 (RB - Samsung S24D300H | User Manual - Page 107
S24D300HL / S24D340HL Resolution IBM, 720 x 400 MAC, 640 x 480 MAC, 832 x 624 MAC, 1152 x 870 VESA, 640 x 480 VESA, 640 x 480 VESA, 640 x 480 VESA, 800 x 600 VESA, 800 x 600 VESA, 800 x 600 VESA, 800 x 600 VESA, 1024 x 768 VESA, 1024 x 768 VESA, 1024 x 768 VESA, 1152 x 864 VESA, 1280 x 720 VESA time - Samsung S24D300H | User Manual - Page 108
10 Specifications z Vertical Frequency Repeating the same picture dozens of times per second allows you to view natural pictures. The repeat frequency is called "vertical frequency" or "refresh rate" and is indicated in Hz. 108 10 Specifications - Samsung S24D300H | User Manual - Page 109
questions or comments relating to Samsung products, please contact the SAMSUNG customer care center. U.S.A CANADA NORTH AMERICA 1-800-SAMSUNG (726-7864) 1-800-SAMSUNG (726-7864) http://www.samsung.com/us http://www.samsung.com/ca (English) http://www.samsung.com/ca_fr (French) ARGENTINE BOLIVIA - Samsung S24D300H | User Manual - Page 110
) 800-7267 009 800 542 0001 0-800-777-08 1-800-682-3180 1-800-SAMSUNG (726-7864) 000 405 437 33 0-800-100-5303 EUROPE 0810 - SAMSUNG (7267864, € 0.07/min) 02-201-24-18 051 331 999 07001 33 11, share cost tariff 062 SAMSUNG (062 726 786) 8009 4000 only from landline http://www - Samsung S24D300H | User Manual - Page 111
Slovak, s.r.o. V Parku 2343/24, 148 00 Praha 4 70 70 19 70 http://www.samsung.com 0818 717100 http://www.samsung.com 800-7267 http://www.samsung.com/ee 030-6227 515 http://www.samsung.com 01 48 63 00 00 http://www.samsung.com/fr 0180 6 SAMSUNG bzw. http://www.samsung.com 0180 6 7267864 - Samsung S24D300H | User Manual - Page 112
8-10-800-500-55-500 http://www.samsung.com http://www.samsung.com http://www.samsung.com http://www.samsung.com http://www.samsung.com http://www.samsung.com http://www.samsung.com http://www.samsung.com http://www.samsung.com http://www.samsung.com http://www.samsung.com/ua (Ukrainian) http://www - Samsung S24D300H | User Manual - Page 113
-29-3232 1800 588 889 http://www.samsung.com/in http://www.samsung.com/id http://www.samsung.com http://www.samsung.com/my http://www.samsung.com/nz http://www.samsung.com/ph http://www.samsung.com/sg http://www.samsung.com/tw http://www.samsung.com/th http://www.samsung.com 0800 100 100 8000-4726 - Samsung S24D300H | User Manual - Page 114
com/africa_en http://www.samsung.com http://www.samsung.com http://www.samsung.com/africa_en http://www.samsung.com http://www.samsung.com http://www.samsung.com/africa_fr http://www.samsung.com http://www.samsung.com http://www.samsung.com http://www.samsung.com http://www.samsung.com Appendix 114 - Samsung S24D300H | User Manual - Page 115
time. z If a product is reinstalled to move to a different spot or to move to a different house. z If customer requests instructions supplies or separately sold product unspecified by Samsung. z repair from a person besides an engineer of outsourcing service company or partner of Samsung - Samsung S24D300H | User Manual - Page 116
to the environment or human health from uncontrolled waste disposal, please separate these items from other types of waste and recycle them responsibly to promote the sustainable reuse of material resources. Household users should contact either the retailer where they purchased this product, or - Samsung S24D300H | User Manual - Page 117
eye. The number of screen refreshes is called scanning rate and is measured in Hz. A scanning rate of 60Hz means that the screen refreshes 60 times per second. The screen scanning rate depends on the performance of the graphics cards in your PC and monitor. Horizontal Frequency Characters or images - Samsung S24D300H | User Manual - Page 118
the screen and is suitable for performing multiple tasks at the same time. E.g. A resolution of 1366 x 768 consists of 1366 horizontal automatic exchange of information between a monitor and PC to produce an optimum display environment. The monitor uses VESA DDC (international standard) to execute - Samsung S24D300H | User Manual - Page 119
21 PC/AV Mode 81 Q Q & A 92 R Red 68 Requirements Before Contacting Samsung Customer Service Center 89 Reset All 77 Response Time 63 Responsibility for the Pay Service (Cost to Customers) 115 S Safety Precautions 11 SAMSUNG MAGIC Angle 56 SAMSUNG MAGIC Bright 54 SAMSUNG MAGIC Upscale 58 Index 119 - Samsung S24D300H | User Manual - Page 120
Index Sharpness 52 Source Detection 84 Standard Signal Mode Table 104 T Terminology 117 Transparency 76 Index 120
-
 1
1 -
 2
2 -
 3
3 -
 4
4 -
 5
5 -
 6
6 -
 7
7 -
8
-
9
-
10
-
11
-
12
-
13
-
14
-
15
-
16
-
17
-
18
-
19
-
20
-
21
-
22
-
23
-
24
-
25
-
26
-
27
-
28
-
29
-
30
-
31
-
32
-
33
-
34
-
35
-
36
-
37
-
38
-
39
-
40
-
41
-
42
-
43
-
44
-
45
-
46
-
47
-
48
-
49
-
50
-
51
-
52
-
53
-
54
-
55
-
56
-
57
-
58
-
59
-
60
-
61
-
62
-
63
-
64
-
65
-
66
-
67
-
68
-
69
-
70
-
71
-
72
-
73
-
74
-
75
-
76
-
77
-
78
-
79
-
80
-
81
-
82
-
83
-
84
-
85
-
86
-
87
-
88
-
89
-
90
-
91
-
92
-
93
-
94
-
95
-
96
-
97
-
98
-
99
-
100
-
101
-
102
-
103
-
104
-
105
-
106
-
107
-
108
-
109
-
110
-
111
-
112
-
113
-
114
-
115
-
116
-
117
-
118
-
119
-
120
 |
 |

User manual
S19D300HY
S19D340HY
S19D300NY
S20D300BY
S20D300H
S20D340H
S20D300HY
S20D340HY
S22D300BY
S22D300HY
S22D340HY
S22D300NY
S24D300B
S24D300BL
S24D300H
S24D340H
S24D300HL
S24D340HL
The color and the appearance may differ depending on
the product, and the specifications are subject to
change without prior notice to improve the performance.
BN46-00382G-04