Samsung SCH-I220 User Manual (user Manual) (ver.f7) (English) - Page 83
Shooting Mode, Size, Night Shot
 |
View all Samsung SCH-I220 manuals
Add to My Manuals
Save this manual to your list of manuals |
Page 83 highlights
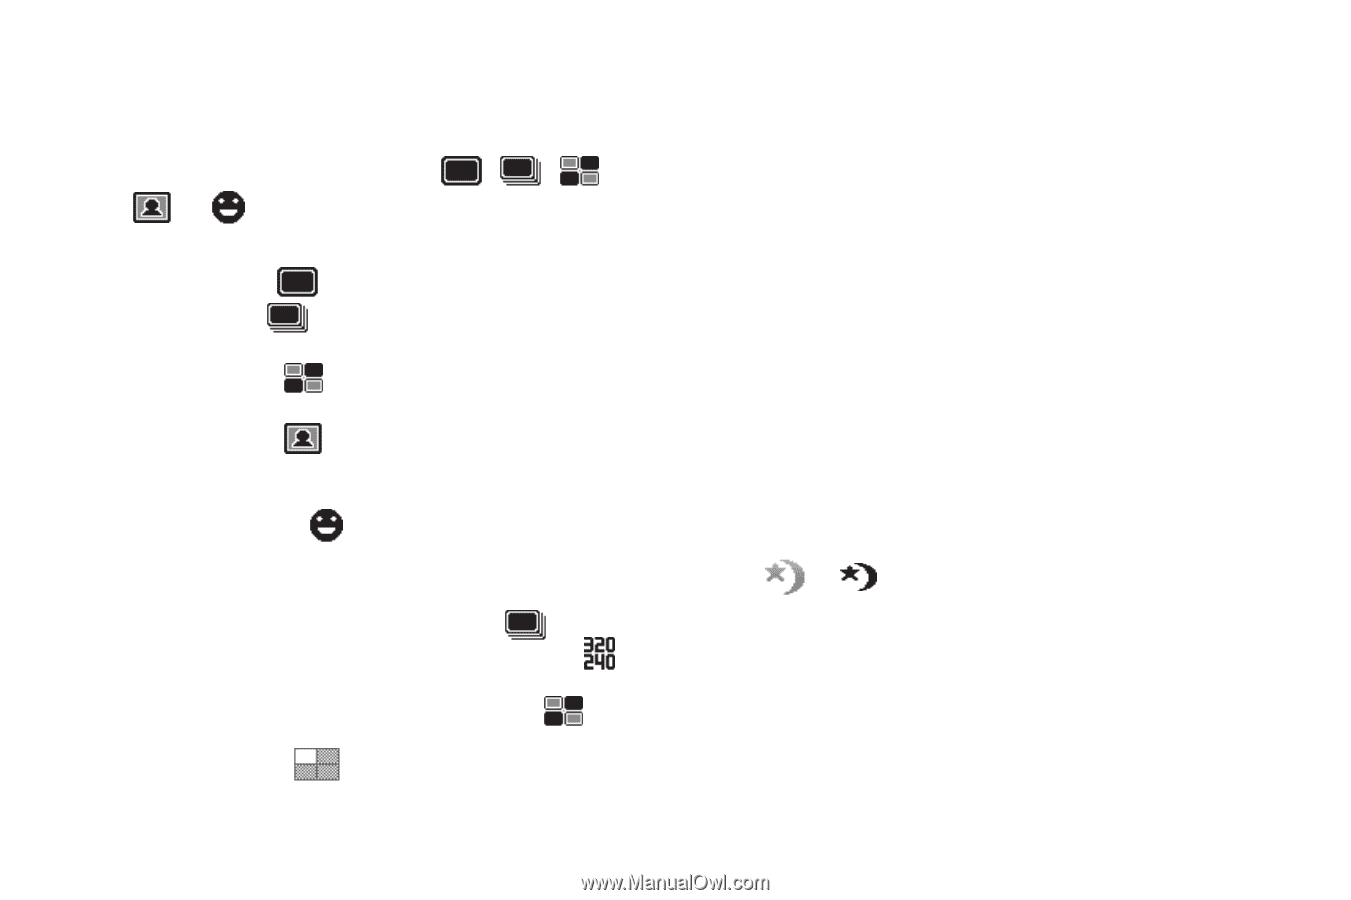
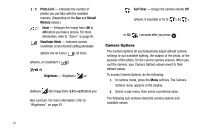
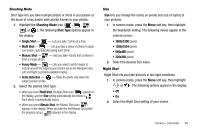
Shooting Mode Shot Type lets you take multiple photos or shots in succession at the touch of a key and/or add colorful frames to your photos. 1. Highlight the Shooting Mode icon ( , , , , or ). The following Shot Type options appear in the display: • Single Shot - - Lets you take 1 photo at a time. • Multi Shot - - Lets you take a series of photos in quick succession, automatically saving each photo. • Mosaic Shot - - Lets you take 4 shots that combine to form a mosaic photo. • Funny Mask - - Lets you select colorful masks to include around the subjects your photos (press the Navigation key Left and Right to preview available masks). • Smile Detection - - Takes the photo only when the subject person smiles. 2. Select the desired Shot Type. • When you select Multi Shot, the Multi Shot icon ( ) appears in the display, and the Size setting automatically decreases to . Each photo is automatically saved. • When you select Mosaic Shot, the Mosaic Shot icon ( ) appears in the display. When you take the first Mosaic Shot photo the progress array ( ) appears in the display. Size Size lets you change the clarity (in pixels) and size (in bytes) of your pictures. 1. In camera mode, press the Menu soft key, then highlight the Resolution setting. The following values appear in the camera screen: • 1600x1200 (pixels) • 1280x1024 (pixels) • 640x480 (pixels) • 320x240 (pixels) 2. Select the desired Size value. Night Shot Night Shot lets you take pictures in low light conditions. 1. In camera mode, press the Menu soft key, then highlight or . The following options appear in the display: • Off • On 2. Select the Night Shot setting of your choice. Camera - Camcorder 80
-
 1
1 -
2
-
3
-
4
-
5
-
6
-
7
-
8
-
9
-
10
-
11
-
12
-
13
-
14
-
15
-
16
-
17
-
18
-
19
-
20
-
21
-
22
-
23
-
24
-
25
-
26
-
27
-
28
-
29
-
30
-
31
-
32
-
33
-
34
-
35
-
36
-
37
-
38
-
39
-
40
-
41
-
42
-
43
-
44
-
45
-
46
-
47
-
48
-
49
-
50
-
51
-
52
-
53
-
54
-
55
-
56
-
57
-
58
-
59
-
60
-
61
-
62
-
63
-
64
-
65
-
66
-
67
-
68
-
69
-
70
-
71
-
72
-
73
-
74
-
75
-
76
-
77
-
 78
78 -
 79
79 -
 80
80 -
 81
81 -
 82
82 -
 83
83 -
 84
84 -
 85
85 -
 86
86 -
 87
87 -
 88
88 -
89
-
90
-
91
-
92
-
93
-
94
-
95
-
96
-
97
-
98
-
99
-
100
-
101
-
102
-
103
-
104
-
105
-
106
-
107
-
108
-
109
-
110
-
111
-
112
-
113
-
114
-
115
-
116
-
117
-
118
-
119
-
120
-
121
-
122
-
123
-
124
-
125
-
126
-
127
-
128
-
129
-
130
-
131
-
132
-
133
-
134
-
135
-
136
-
137
-
138
-
139
-
140
-
141
-
142
-
143
-
144
-
145
-
146
-
147
-
148
-
149
-
150
-
151
-
152
-
153
-
154
-
155
-
156
-
157
-
158
-
159
-
160
-
161
 |
 |