Samsung SCH-I220 User Manual (user Manual) (ver.f7) (English) - Page 91
Effect, Settings, Quality, Audio, Sound Start - enable call recording
 |
View all Samsung SCH-I220 manuals
Add to My Manuals
Save this manual to your list of manuals |
Page 91 highlights
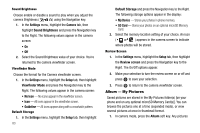
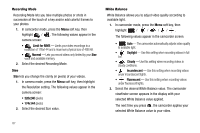
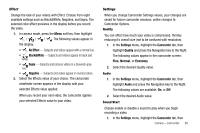
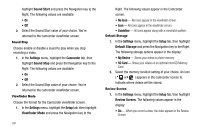
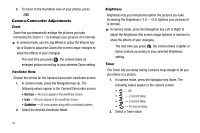
Effect Change the look of your videos with Effect. Choose from eight available settings such as Black&White, Negative, and Sepia. The selected color effect previews in the display before you record the video. 1. In camera mode, press the Menu soft key, then highlight / / / . The following values appear in the display: • No Effect - Subjects and videos appear with a normal hue. • Black&White - Subjects and videos appear in black and white. • Sepia - Subjects and pictures videos in a brownish-gray hue. • Negative - Subjects and videos appear in inverted colors. 2. Select the Effects value of your choice. The camcorder viewfinder screen appears in the display with your selected Effects value applied. When you record your next video, the camcorder applies your selected Effects value to your video. Settings When you change Camcorder Settings values, your changes are saved for future camcorder sessions, unlike changes to Camcorder Options. Quality You can affect how much your video is compressed, thereby reducing it's overall size (not to be confused with resolution). 1. In the Settings menu, highlight the Camcorder tab, then highlight Quality and press the Navigation key to the Right. The following values appear in the camcorder screen: Fine, Normal, or Economy. 2. Select the desired Quality value. Audio 1. In the Settings menu, highlight the Camcorder tab, then highlight Audio and press the Navigation key to the Right. The following values are available: On, or Off. 2. Select the desired Audio value. Sound Start Choose enable or disable a sound to play when you begin recording a video. 1. In the Settings menu, highlight the Camcorder tab, then Camera - Camcorder 88
-
 1
1 -
2
-
3
-
4
-
5
-
6
-
7
-
8
-
9
-
10
-
11
-
12
-
13
-
14
-
15
-
16
-
17
-
18
-
19
-
20
-
21
-
22
-
23
-
24
-
25
-
26
-
27
-
28
-
29
-
30
-
31
-
32
-
33
-
34
-
35
-
36
-
37
-
38
-
39
-
40
-
41
-
42
-
43
-
44
-
45
-
46
-
47
-
48
-
49
-
50
-
51
-
52
-
53
-
54
-
55
-
56
-
57
-
58
-
59
-
60
-
61
-
62
-
63
-
64
-
65
-
66
-
67
-
68
-
69
-
70
-
71
-
72
-
73
-
74
-
75
-
76
-
77
-
78
-
79
-
80
-
81
-
82
-
83
-
84
-
85
-
 86
86 -
 87
87 -
 88
88 -
 89
89 -
 90
90 -
 91
91 -
 92
92 -
 93
93 -
 94
94 -
 95
95 -
 96
96 -
97
-
98
-
99
-
100
-
101
-
102
-
103
-
104
-
105
-
106
-
107
-
108
-
109
-
110
-
111
-
112
-
113
-
114
-
115
-
116
-
117
-
118
-
119
-
120
-
121
-
122
-
123
-
124
-
125
-
126
-
127
-
128
-
129
-
130
-
131
-
132
-
133
-
134
-
135
-
136
-
137
-
138
-
139
-
140
-
141
-
142
-
143
-
144
-
145
-
146
-
147
-
148
-
149
-
150
-
151
-
152
-
153
-
154
-
155
-
156
-
157
-
158
-
159
-
160
-
161
 |
 |