Samsung SCH-R380 User Manual (user Manual) (ver.f4) (English) - Page 46
EDIT CONTACT, Personal Email, Business Email, CONTACT, Picture, MY IMAGES, Camera, MyPics
 |
View all Samsung SCH-R380 manuals
Add to My Manuals
Save this manual to your list of manuals |
Page 46 highlights
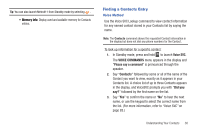
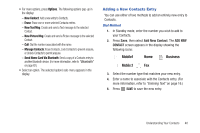
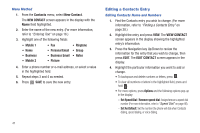
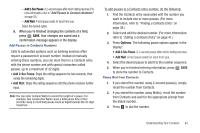
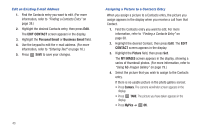
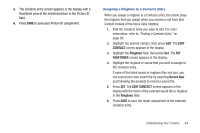
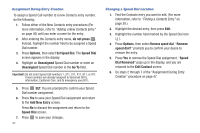
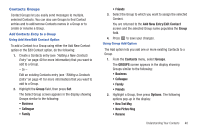
Edit an Existing E-mail Address 1. Find the Contacts entry you want to edit. (For more information, refer to "Finding a Contacts Entry" on page 38.) 2. Highlight the desired Contacts entry, then press Edit. The EDIT CONTACT screen appears in the display. 3. Highlight the Personal Email or Business Email field. 4. Use the keypad to edit the e-mail address. (For more information, refer to "Entering Text" on page 16.) 5. Press SAVE to save your changes. Assigning a Picture to a Contacts Entry When you assign a picture to a Contacts entry, the picture you assign appears in the display when you receive a call from that Contact. 1. Find the Contacts entry you want to edit. For more information, refer to "Finding a Contacts Entry" on page 38. 2. Highlight the desired Contact, then press Edit. The EDIT CONTACT screen appears in the display. 3. Highlight the Picture field, then press Set. The MY IMAGES screen appears in the display, showing a series of thumbnail photos. (For more information, refer to "Using My Images Gallery" on page 79.) 4. Select the picture that you wish to assign to the Contacts entry. If there is no usable picture in the photo gallery screen: • Press Camera. The camera viewfinder screen appears in the display. • Press TAKE. The picture you have taken appears in the display. • Press MyPics ➔ OK. 43
-
 1
1 -
2
-
3
-
4
-
5
-
6
-
7
-
8
-
9
-
10
-
11
-
12
-
13
-
14
-
15
-
16
-
17
-
18
-
19
-
20
-
21
-
22
-
23
-
24
-
25
-
26
-
27
-
28
-
29
-
30
-
31
-
32
-
33
-
34
-
35
-
36
-
37
-
38
-
39
-
40
-
 41
41 -
 42
42 -
 43
43 -
 44
44 -
 45
45 -
 46
46 -
 47
47 -
 48
48 -
 49
49 -
 50
50 -
 51
51 -
52
-
53
-
54
-
55
-
56
-
57
-
58
-
59
-
60
-
61
-
62
-
63
-
64
-
65
-
66
-
67
-
68
-
69
-
70
-
71
-
72
-
73
-
74
-
75
-
76
-
77
-
78
-
79
-
80
-
81
-
82
-
83
-
84
-
85
-
86
-
87
-
88
-
89
-
90
-
91
-
92
-
93
-
94
-
95
-
96
-
97
-
98
-
99
-
100
-
101
-
102
-
103
-
104
-
105
-
106
-
107
-
108
-
109
-
110
-
111
-
112
-
113
-
114
-
115
-
116
-
117
-
118
-
119
-
120
-
121
-
122
-
123
-
124
-
125
-
126
-
127
-
128
 |
 |