Samsung SCH-R380 User Manual (user Manual) (ver.f4) (English) - Page 50
do not press, Options, Set Speed Dial, Speed Dial, Unassigned, Go To, Add New Entry, Remove speed
 |
View all Samsung SCH-R380 manuals
Add to My Manuals
Save this manual to your list of manuals |
Page 50 highlights
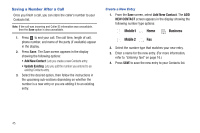
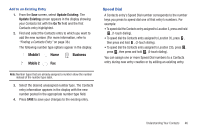
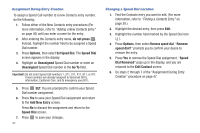
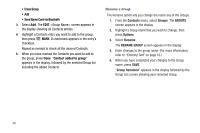
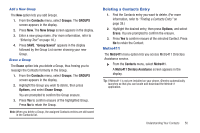
Assignment During Entry Creation To assign a Speed Call number to a new Contacts entry number, do the following: 1. Follow either of the New Contacts entry procedures (For more information, refer to "Adding a New Contacts Entry" on page 40) until you enter a name for the entry. 2. After entering the Contacts entry name, do not press . Instead, highlight the number field to be assigned a Speed Dial number. 3. Press Options, then select Set Speed Dial. The Speed Dial screen appears in the display. 4. Highlight an Unassigned Speed Dial number or enter an Unassigned Speed Dial number in the Go To field. Important!: Do not enter Speed Call numbers 1, 211, 311, 411, 611, or 911. These numbers are already assigned to Voicemail (001), information, Customer Care, and to emergency use (911). 5. Press SET. You are prompted to confirm your Speed Dial number assignment. 6. Press Yes to save your Speed Dial assignment and return to the Add New Entry screen. Press No to discard the assignment and return to the Speed Dial screen. 7. Press to save your changes. 47 Changing a Speed Dial Location 1. Find the Contacts entry you want to edit. (For more information, refer to "Finding a Contacts Entry" on page 38.) 2. Highlight the desired entry, then press Edit. 3. Highlight the number field marked by the Speed Dial icon ( ). 4. Press Options, then select Remove speed dial. "Remove speed dial?" prompts you to confirm your desire to remove the entry. 5. Press Yes to remove the Speed Dial assignment. "Speed Dial Removed" pops up in the display, and you are returned to the Edit Contact screen. 6. Do steps 2 through 7 of the "Assignment During Entry Creation" procedure on page 47.
-
 1
1 -
2
-
3
-
4
-
5
-
6
-
7
-
8
-
9
-
10
-
11
-
12
-
13
-
14
-
15
-
16
-
17
-
18
-
19
-
20
-
21
-
22
-
23
-
24
-
25
-
26
-
27
-
28
-
29
-
30
-
31
-
32
-
33
-
34
-
35
-
36
-
37
-
38
-
39
-
40
-
41
-
42
-
43
-
44
-
 45
45 -
 46
46 -
 47
47 -
 48
48 -
 49
49 -
 50
50 -
 51
51 -
 52
52 -
 53
53 -
 54
54 -
 55
55 -
56
-
57
-
58
-
59
-
60
-
61
-
62
-
63
-
64
-
65
-
66
-
67
-
68
-
69
-
70
-
71
-
72
-
73
-
74
-
75
-
76
-
77
-
78
-
79
-
80
-
81
-
82
-
83
-
84
-
85
-
86
-
87
-
88
-
89
-
90
-
91
-
92
-
93
-
94
-
95
-
96
-
97
-
98
-
99
-
100
-
101
-
102
-
103
-
104
-
105
-
106
-
107
-
108
-
109
-
110
-
111
-
112
-
113
-
114
-
115
-
116
-
117
-
118
-
119
-
120
-
121
-
122
-
123
-
124
-
125
-
126
-
127
-
128
 |
 |