Samsung SCH-R560 User Manual (user Manual) (ver.f10) (English) - Page 45
Editing a Contacts Entry, Editing Contacts Name and Numbers, Add Pauses to Contacts Numbers
 |
View all Samsung SCH-R560 manuals
Add to My Manuals
Save this manual to your list of manuals |
Page 45 highlights
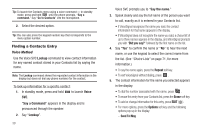
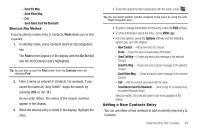
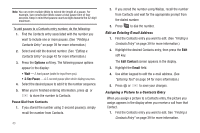
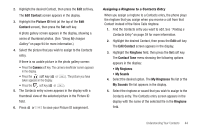
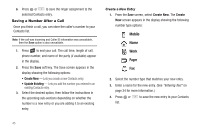
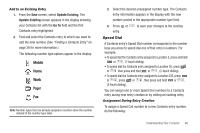
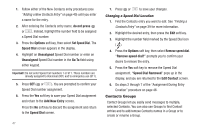
5. Repeat steps 3 and 4 as needed. 6. Press or to save the new entry. Editing a Contacts Entry Editing Contacts Name and Numbers 1. Find the Contacts entry you wish to change. See "Finding a Contacts Entry" on page 39 for more information. 2. Highlight the entry and press VIEW ( or ). The View Contact screen appears in the display showing the highlighted entry's information. 3. Use the Up/Down navigation keys to review the information for the entry that you wish to change, then press EDIT ( or ). The Edit Contact screen appears in the display. 4. Highlight the particular information you want to add or change. • To backspace and delete numbers or letters, press or . • To clear all numbers or letters in the highlighted field, press and hold or . • For more options, press the Options soft key and the following options pop-up in the display: - Set Speed Dial / Remove speed dial - Assign/remove a speed dial number (see "Speed Dial" on page 46 for more information). - Set as default - Set the number the phone will dial when Contacts dialing, speed dialing, or voice dialing. - Wait - A hard pause (waits for input from you). - 2-Sec Pause - A 2-second pause after which dialing resumes (see "Add Pauses to Contacts Numbers" on page 42 for more information). Select the desired option. 5. When you're finished changing the contents of a field, press or . Your changes are saved and a confirmation message appears in the display. Add Pauses to Contacts Numbers Calls to automated systems such as banking services often require a password or account number. Instead of manually entering these numbers, you can store them in a Contacts entry with the phone number and with special characters called pauses, up to a maximum of 32 digits. • Wait - Stops the calling sequence until the phone receives further input. • 2-Sec Pause - Stops the calling sequence for two seconds, then sends the remaining digits. Understanding Your Contacts 42
-
 1
1 -
2
-
3
-
4
-
5
-
6
-
7
-
8
-
9
-
10
-
11
-
12
-
13
-
14
-
15
-
16
-
17
-
18
-
19
-
20
-
21
-
22
-
23
-
24
-
25
-
26
-
27
-
28
-
29
-
30
-
31
-
32
-
33
-
34
-
35
-
36
-
37
-
38
-
39
-
 40
40 -
 41
41 -
 42
42 -
 43
43 -
 44
44 -
 45
45 -
 46
46 -
 47
47 -
 48
48 -
 49
49 -
 50
50 -
51
-
52
-
53
-
54
-
55
-
56
-
57
-
58
-
59
-
60
-
61
-
62
-
63
-
64
-
65
-
66
-
67
-
68
-
69
-
70
-
71
-
72
-
73
-
74
-
75
-
76
-
77
-
78
-
79
-
80
-
81
-
82
-
83
-
84
-
85
-
86
-
87
-
88
-
89
-
90
-
91
-
92
-
93
-
94
-
95
-
96
-
97
-
98
-
99
-
100
-
101
-
102
-
103
-
104
-
105
-
106
-
107
-
108
-
109
-
110
-
111
-
112
-
113
-
114
-
115
-
116
-
117
-
118
-
119
-
120
-
121
-
122
-
123
-
124
-
125
-
126
-
127
-
128
-
129
-
130
-
131
-
132
-
133
-
134
-
135
-
136
-
137
-
138
-
139
-
140
-
141
-
142
-
143
-
144
-
145
-
146
-
147
-
148
-
149
-
150
-
151
-
152
-
153
-
154
-
155
-
156
-
157
-
158
-
159
-
160
-
161
-
162
-
163
-
164
-
165
-
166
-
167
 |
 |