Samsung SCH-R720 User Manual (user Manual) (ver.f4) (English(north America)) - Page 35
Adding a Corporate Exchange account, Sync Gmail
 |
View all Samsung SCH-R720 manuals
Add to My Manuals
Save this manual to your list of manuals |
Page 35 highlights
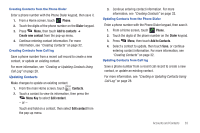
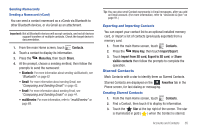
• Sync Contacts: When enabled, synchronizes your Google contacts with your phone's Contacts. • Sync Gmail: When enabled, synchronizes your Gmail messages on your phone. • Sync Calendar: When enabled, synchronizes your Google calendar with your phone. Adding a Corporate Exchange account 1. From the Home screen, press Settings ➔ Accounts & sync. Menu, then touch 2. Touch Add account ➔ Corporate. 3. At the Add an Exchange account screen, enter your Email address and Password, then touch Next. 4. At the Server settings screen, enter server settings, then touch Next. The phone communicates with the server to confirm your account. 5. At the Account options screen, select account settings, then touch Next. 6. At the Set up email screen, enter a name for the account (this name will display on screen), and enter your name to appear on outgoing messages. Touch Done to complete set-up. 7. Your Corporate account appears in the Manage accounts area of the Accounts & sync settings screen, and in the Email application. Managing a Corporate Exchange account 1. From the Home screen, press Settings ➔ Accounts & sync. Menu, then touch 2. Touch your Corporate account to display settings, then touch Account settings for these settings: • General settings - Account name: Enter a name to identify the account. - Your name: Enter your name, to be used in outgoing emails. - Signature: Enter the signature you want to appear at the bottom of all of the emails you send. - Amount to synchronize: Choose a time period to determine how many days' email will synchronize. - Inbox check frequency: Choose a frequency for the phone to check the server for new emails. - Default account: Touch to assign or un-assign this account as the default account for sending email from your phone. • Notification settings - Email notifications: Enable or disable display of a new email icon in the Annunciator line when new mail arrives. - Select ringtone: Assign a ringtone for new email notifications. - Vibrate: Enable or disable vibration with new email notifications. • Server settings - Incoming settings: Modify server settings. Accounts and Contacts 31
-
 1
1 -
2
-
3
-
4
-
5
-
6
-
7
-
8
-
9
-
10
-
11
-
12
-
13
-
14
-
15
-
16
-
17
-
18
-
19
-
20
-
21
-
22
-
23
-
24
-
25
-
26
-
27
-
28
-
29
-
 30
30 -
 31
31 -
 32
32 -
 33
33 -
 34
34 -
 35
35 -
 36
36 -
 37
37 -
 38
38 -
 39
39 -
 40
40 -
41
-
42
-
43
-
44
-
45
-
46
-
47
-
48
-
49
-
50
-
51
-
52
-
53
-
54
-
55
-
56
-
57
-
58
-
59
-
60
-
61
-
62
-
63
-
64
-
65
-
66
-
67
-
68
-
69
-
70
-
71
-
72
-
73
-
74
-
75
-
76
-
77
-
78
-
79
-
80
-
81
-
82
-
83
-
84
-
85
-
86
-
87
-
88
-
89
-
90
-
91
-
92
-
93
-
94
-
95
-
96
-
97
-
98
-
99
-
100
-
101
-
102
-
103
-
104
-
105
-
106
-
107
-
108
-
109
-
110
-
111
-
112
-
113
-
114
-
115
-
116
-
117
-
118
-
119
-
120
-
121
-
122
-
123
-
124
-
125
-
126
-
127
-
128
-
129
-
130
-
131
-
132
-
133
-
134
-
135
-
136
 |
 |