Samsung SCX 4725FN User Manual (ENGLISH) - Page 115
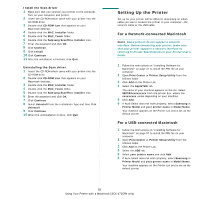
Setting Up the Printer, For a Network-connected Macintosh
 |
UPC - 635753613117
View all Samsung SCX 4725FN manuals
Add to My Manuals
Save this manual to your list of manuals |
Page 115 highlights
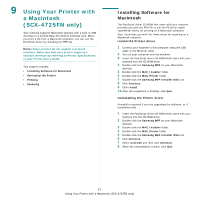
Install the Scan driver 1 Make sure that you connect your printer to the computer. Turn on your computer and printer. 2 Insert the CD-ROM which came with your printer into the CD-ROM drive. 3 Double-click CD-ROM icon that appears on your Macintosh desktop. 4 Double-click the MAC_Installer folder. 5 Double-click the MAC_Twain folder. 6 Double-click the Samsung ScanThru Installer icon. 7 Enter the password and click OK. 8 Click Continue. 9 Click Install. 10 Click Continue. 11 After the installation is finished, click Quit. Uninstalling the Scan driver 1 Insert the CD-ROM which came with your printer into the CD-ROM drive. 2 Double-click CD-ROM icon that appears on your Macintosh desktop. 3 Double-click the MAC_Installer folder. 4 Double-click the MAC_Twain folder. 5 Double-click the Samsung ScanThru Installer icon. 6 Enter the password and click OK. 7 Click Continue. 8 Select Uninstall from the Installation Type and then Click Uninstall. 9 Click Continue. 10 When the uninstallation is done, click Quit. Setting Up the Printer Set up for your printer will be different depending on which cable you use to connect the printer to your computer-the network cable or the USB cable. For a Network-connected Macintosh NOTE: Some printers do not support a network interface. Before connecting your printer, make sure that your printer supports a network interface by referring to Printer Specifications in your Printer User's Guide. 1 Follow the instructions on "Installing Software for Macintosh" on page 37 to install the PPD file on your computer. 2 Open Print Center or Printer Setup Utility from the Utilities folder. 3 Click Add on the Printer List. 4 Select the AppleTalk tab. The name of your machine appears on the list. Select SEC000xxxxxxxxx from the printer box, where the xxxxxxxxx varies depending on your machine. 5 Click Add. 6 If Auto Select does not work properly, select Samsung in Printer Model and your printer name in Model Name. Your machine appears on the Printer List and is set as the default printer. For a USB-connected Macintosh 1 Follow the instructions on "Installing Software for Macintosh" on page 37 to install the PPD file on your computer. 2 Open Print Center or Printer Setup Utility from the Utilities folder. 3 Click Add on the Printer List. 4 Select the USB tab. 5 Select your printer name and click Add. 6 If Auto Select does not work properly, select Samsung in Printer Model and your printer name in Model Name. Your machine appears on the Printer List and is set as the default printer. 38 Using Your Printer with a Macintosh (SCX-4725FN only)
-
 1
1 -
2
-
3
-
4
-
5
-
6
-
7
-
8
-
9
-
10
-
11
-
12
-
13
-
14
-
15
-
16
-
17
-
18
-
19
-
20
-
21
-
22
-
23
-
24
-
25
-
26
-
27
-
28
-
29
-
30
-
31
-
32
-
33
-
34
-
35
-
36
-
37
-
38
-
39
-
40
-
41
-
42
-
43
-
44
-
45
-
46
-
47
-
48
-
49
-
50
-
51
-
52
-
53
-
54
-
55
-
56
-
57
-
58
-
59
-
60
-
61
-
62
-
63
-
64
-
65
-
66
-
67
-
68
-
69
-
70
-
71
-
72
-
73
-
74
-
75
-
76
-
77
-
78
-
79
-
80
-
81
-
82
-
83
-
84
-
85
-
86
-
87
-
88
-
89
-
90
-
91
-
92
-
93
-
94
-
95
-
96
-
97
-
98
-
99
-
100
-
101
-
102
-
103
-
104
-
105
-
106
-
107
-
108
-
109
-
 110
110 -
 111
111 -
 112
112 -
 113
113 -
 114
114 -
 115
115 -
 116
116 -
 117
117 -
 118
118 -
 119
119 -
 120
120 -
121
 |
 |