Samsung SCX 4725FN User Manual (ENGLISH) - Page 32
In the manual tray - paper jam
 |
UPC - 635753613117
View all Samsung SCX 4725FN manuals
Add to My Manuals
Save this manual to your list of manuals |
Page 32 highlights
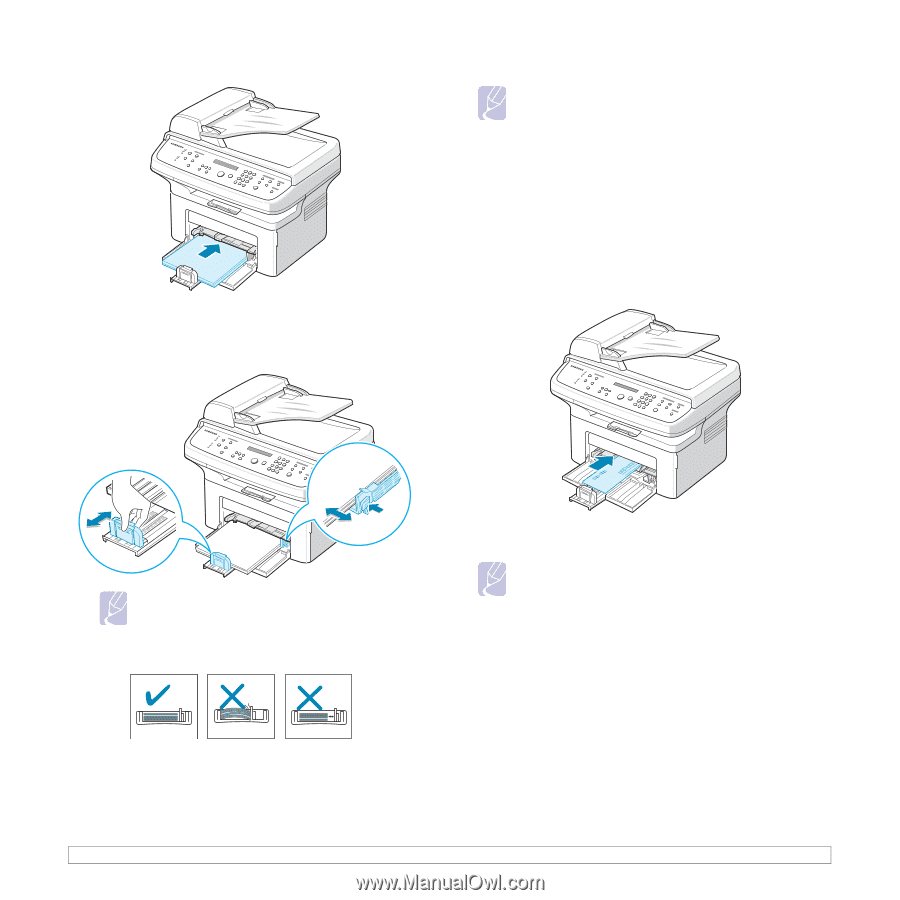
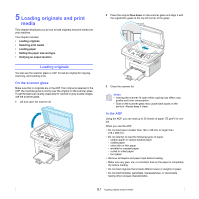
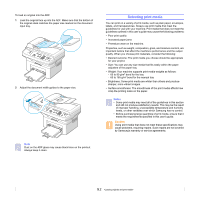
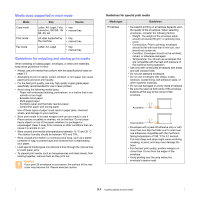
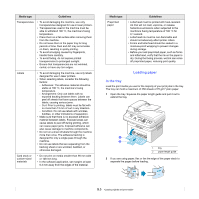
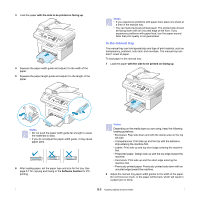
3 Load the paper with the side to be printed on facing up. 4 Squeeze the paper width guide and adjust it to the width of the paper. 5 Squeeze the paper length guide and adjust it to the length of the paper. Notes • If you experience problems with paper feed, place one sheet at a time in the manual tray. • You can load previously printed paper. The printed side should be facing down with an uncurled edge at the front. If you experience problems with paper feed, turn the paper around. Note that print quality is not guaranteed. In the manual tray The manual tray can hold special size and type of print material, such as transparency, postcard, note card, and envelope. The manual tray can hold 1 sheet of paper. To load paper in the manual tray: 1 Load the paper with the side to be printed on facing up. Notes • Do not push the paper width guide far enough to cause the materials to warp. • If you do not adjust the paper width guide, it may cause paper jams. 6 After loading paper, set the paper type and size for the tray. See page 5.7 for copying and faxing or the Software Section for PCprinting. Notes Depending on the media type you are using, keep the following loading guidelines: • Envelopes: Flap side down and with the stamp area on the top left side. • Transparencies: Print side up and the top with the adhesive strip entering the machine first. • Labels: Print side up and top short edge entering the machine first. • Preprinted paper: Design side up with the top edge toward the machine. • Card stock: Print side up and the short edge entering the machine first. • Previously printed paper: Previously printed side down with an uncurled edge toward the machine. 2 Adjust the manual tray paper width guides to the width of the paper. Do not force too much, or the paper will be bent, which will result in a paper jam or skew. 5.6
-
 1
1 -
2
-
3
-
4
-
5
-
6
-
7
-
8
-
9
-
10
-
11
-
12
-
13
-
14
-
15
-
16
-
17
-
18
-
19
-
20
-
21
-
22
-
23
-
24
-
25
-
26
-
 27
27 -
 28
28 -
 29
29 -
 30
30 -
 31
31 -
 32
32 -
 33
33 -
 34
34 -
 35
35 -
 36
36 -
 37
37 -
38
-
39
-
40
-
41
-
42
-
43
-
44
-
45
-
46
-
47
-
48
-
49
-
50
-
51
-
52
-
53
-
54
-
55
-
56
-
57
-
58
-
59
-
60
-
61
-
62
-
63
-
64
-
65
-
66
-
67
-
68
-
69
-
70
-
71
-
72
-
73
-
74
-
75
-
76
-
77
-
78
-
79
-
80
-
81
-
82
-
83
-
84
-
85
-
86
-
87
-
88
-
89
-
90
-
91
-
92
-
93
-
94
-
95
-
96
-
97
-
98
-
99
-
100
-
101
-
102
-
103
-
104
-
105
-
106
-
107
-
108
-
109
-
110
-
111
-
112
-
113
-
114
-
115
-
116
-
117
-
118
-
119
-
120
-
121
 |
 |