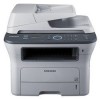
Samsung SCX 4826FN User Manual (ENGLISH) - Page 28
Using the save modes, Setting print job timeout, Changing the font setting, Toner Save mode - toner error
 |
UPC - 635753614824
View all Samsung SCX 4826FN manuals
Add to My Manuals
Save this manual to your list of manuals |
Page 28 highlights
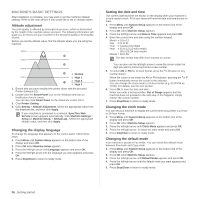
Using the save modes Toner Save mode Toner save mode allows your machine to use less toner on each page. Activating this mode extends the life of the toner cartridge beyond what one would experience in the normal mode, but it reduces print quality. 1. Press Menu until System Setup appears on the bottom line of the display and press OK. 2. Press OK when Machine Setup appears. 3. Press the left/right arrow until Toner Save appears and press OK. 4. Press the left/right arrow until the time setting you want appears and press OK. 5. Press Stop/Clear to return to ready mode. Power Save mode Power Save mode allows your machine to reduce power consumption when it is not in actual use. You can turn this mode on and select a length of time for which the machine waits after a job is printed before it switches to a reduced power state. 1. Press Menu until System Setup appears on the bottom line of the display and press OK. 2. Press OK when Machine Setup appears. 3. Press the left/right arrow until Power Save appears and press OK. 4. Press the left/right arrow until the time setting you want appears and press OK. 5. Press Stop/Clear to return to ready mode. Setting print job timeout You can set the amount of time a single print job is active before it must print.The machine handles incoming data as a single job if it comes in within the specified time. When an error occurs while processing data from the computer and the data flow stops, the machine waits the specified time and then cancels printing if data flow does not resume. 1. Press Menu until System Setup appears on the bottom line of the display and press OK. 2. Press OK when Machine Setup appears. 3. Press the left/right arrow until Job Timeout appears and press OK. 4. Press the left/right arrow until the time setting you want appears and press OK. 5. Press Stop/Clear to return to ready mode. Changing the font setting Your machine has preset the font for your region or country. If you want to change the font or set the font for special condition such as the DOS environment, you can change the font setting as follows: 1. Ensure that you have installed the printer driver from the provided software CD. 2. Double-click the Smart Panel icon on the Windows task bar. 3. Click Printer Setting. 4. Click Emulation. 5. Confirm if PCL is selected in Emulation Setting. 6. Click Setting. 7. Select your preferred font in the Symbol set list. 8. Click Apply. Following information shows the proper font list for corresponding languages. • Russian: CP866, ISO 8859/5 Latin Cyrillic • Hebrew: Hebrew 15Q, Hebrew-8, Hebrew-7 (Israel only) • Greek: ISO 8859/7 Latin Greek, PC-8 Latin/Greek • Arabic & Farsi: HP Arabic-8, Windows Arabic, Code Page 864, Farsi, ISO 8859/6 Latin Arabic • OCR : OCR-A, OCR-B 28 _Getting started
-
 1
1 -
2
-
3
-
4
-
5
-
6
-
7
-
8
-
9
-
10
-
11
-
12
-
13
-
14
-
15
-
16
-
17
-
18
-
19
-
20
-
21
-
22
-
 23
23 -
 24
24 -
 25
25 -
 26
26 -
 27
27 -
 28
28 -
 29
29 -
 30
30 -
 31
31 -
 32
32 -
 33
33 -
34
-
35
-
36
-
37
-
38
-
39
-
40
-
41
-
42
-
43
-
44
-
45
-
46
-
47
-
48
-
49
-
50
-
51
-
52
-
53
-
54
-
55
-
56
-
57
-
58
-
59
-
60
-
61
-
62
-
63
-
64
-
65
-
66
-
67
-
68
-
69
-
70
-
71
-
72
-
73
-
74
-
75
-
76
-
77
-
78
-
79
-
80
-
81
-
82
-
83
-
84
-
85
-
86
-
87
-
88
-
89
-
90
-
91
-
92
-
93
-
94
-
95
-
96
-
97
-
98
-
99
-
100
-
101
-
102
-
103
-
104
-
105
-
106
-
107
-
108
-
109
-
110
-
111
-
112
-
113
-
114
-
115
-
116
-
117
-
118
-
119
-
120
-
121
-
122
-
123
-
124
-
125
-
126
-
127
-
128
-
129
-
130
-
131
-
132
-
133
-
134
-
135
-
136
-
137
-
138
 |
 |