Samsung SCX 4826FN User Manual (ENGLISH) - Page 38
-up or 4-up copying, Poster copying, Clone copying, Adjusting background images, Copy Feature, Layout
 |
UPC - 635753614824
View all Samsung SCX 4826FN manuals
Add to My Manuals
Save this manual to your list of manuals |
Page 38 highlights
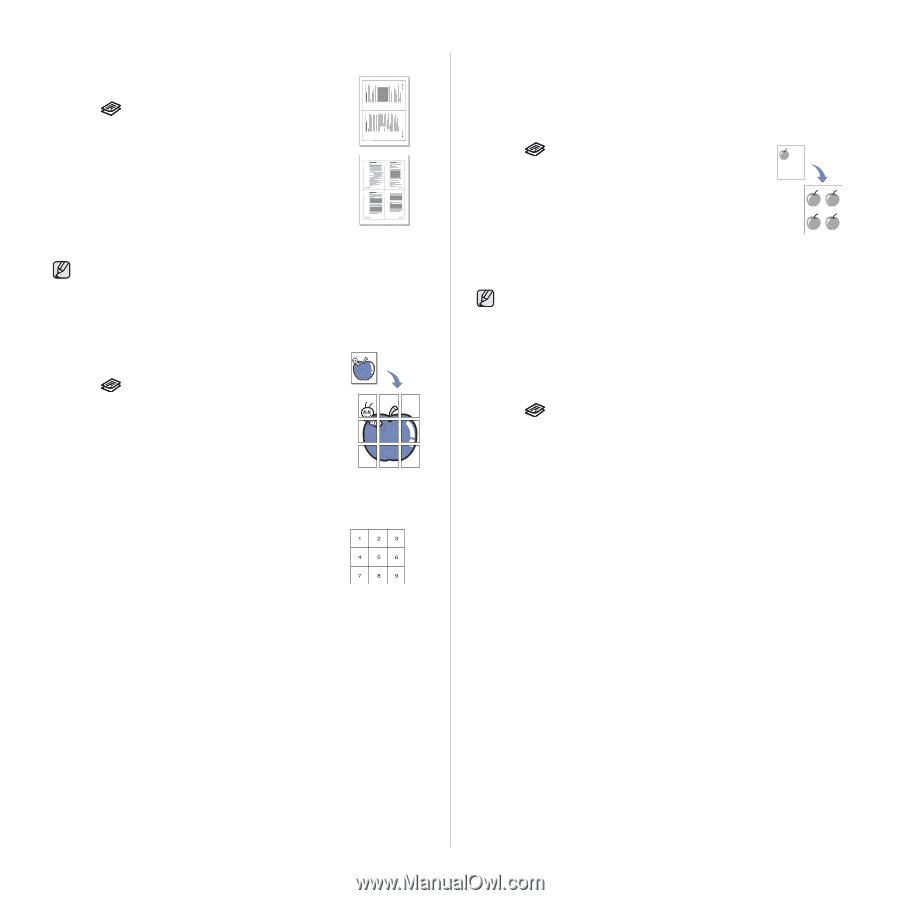
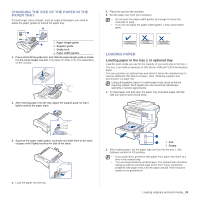
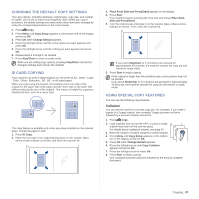
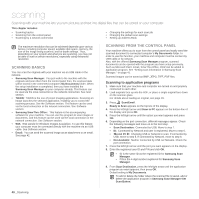
2-up or 4-up copying Your machine can print 2 or 4 original images reduced to fit onto one sheet of paper. 2 1. Press Copy. 2. Load originals face up into the ADF, or place a single original face down on the scanner glass. For details about loading an original, see page 29. 3. Press Menu until Copy Feature appears on the bottom line of the display and press OK. 4. Press the left/right arrow until Layout appears and press OK. 5. Press the left/right arrow until 2-Up or 4-Up appears and press OK. 6. Press Start to begin copying. 1 1 2 3 4 You cannot adjust the copy size using the Reduce/Enlarge button for making a 2- or 4-up copy. Poster copying Your machine can print an image onto 9 sheets of paper (3x3). You can paste the printed pages together to make one poster-sized document. This copy feature is available only when you place originals on the scanner glass. Unload the paper in ADF. 1. Press Copy. 2. Place a single original face down on the scanner glass. For details about loading an original, see page 29. 3. Press Menu until Copy Feature appears on the bottom line of the display and press OK. 4. Press the left/right arrow until Layout appears and press OK. 5. Press the left/right arrow until Poster Copy appears and press OK. 6. Press Start to begin copying. Your original is divided into 9 portions. Each portion is scanned and printed one by one in the following order: Clone copying Your machine can print multiple image copies from the original document on a single page. The number of images is automatically determined by the original image and paper size. This copy feature is available only when you place originals on the scanner glass. Unload the paper in ADF. 1. Press Copy. 2. Place a single original face down on the scanner glass. For details about loading an original, see page 29. 3. Press Menu until Copy Feature appears on the bottom line of the display and press OK. 4. Press the left/right arrow until Layout appears and press OK. 5. Press the left/right arrow until Clone Copy appears and press OK. 6. Press Start to begin copying. You cannot adjust the copy size using the Reduce/Enlarge button while making a clone copy. Adjusting background images You can set the machine to print an image without its background. This copy feature removes the background color and can be helpful when copying an original containing color in the background, such as a newspaper or a catalog. 1. Press Copy. 2. Load originals face up into the ADF, or place a single original face down on the scanner glass. For details about loading an original, see page 29. 3. Press Menu until Copy Feature appears on the bottom line of the display and press OK. 4. Press the left/right arrow until Adjust Bkgd. appears and press OK. 5. Press the left/right arrow until the binding option you want appears. • Off: Does not use this feature. • Auto: Optimizes the background. • Enhance Lev. 1~2: The higher the number is, the more vivid the background is. • Erase Lev. 1~4: The higher the number is, the lighter the background is. 6. Press Start to begin copying. 7. Press Stop/Clear to return to ready mode. 38 _Copying
-
 1
1 -
2
-
3
-
4
-
5
-
6
-
7
-
8
-
9
-
10
-
11
-
12
-
13
-
14
-
15
-
16
-
17
-
18
-
19
-
20
-
21
-
22
-
23
-
24
-
25
-
26
-
27
-
28
-
29
-
30
-
31
-
32
-
 33
33 -
 34
34 -
 35
35 -
 36
36 -
 37
37 -
 38
38 -
 39
39 -
 40
40 -
 41
41 -
 42
42 -
 43
43 -
44
-
45
-
46
-
47
-
48
-
49
-
50
-
51
-
52
-
53
-
54
-
55
-
56
-
57
-
58
-
59
-
60
-
61
-
62
-
63
-
64
-
65
-
66
-
67
-
68
-
69
-
70
-
71
-
72
-
73
-
74
-
75
-
76
-
77
-
78
-
79
-
80
-
81
-
82
-
83
-
84
-
85
-
86
-
87
-
88
-
89
-
90
-
91
-
92
-
93
-
94
-
95
-
96
-
97
-
98
-
99
-
100
-
101
-
102
-
103
-
104
-
105
-
106
-
107
-
108
-
109
-
110
-
111
-
112
-
113
-
114
-
115
-
116
-
117
-
118
-
119
-
120
-
121
-
122
-
123
-
124
-
125
-
126
-
127
-
128
-
129
-
130
-
131
-
132
-
133
-
134
-
135
-
136
-
137
-
138
 |
 |