Samsung SCX 4826FN User Manual (ENGLISH) - Page 99
Installing Software for Network Printing, Typical Installation
 |
UPC - 635753614824
View all Samsung SCX 4826FN manuals
Add to My Manuals
Save this manual to your list of manuals |
Page 99 highlights
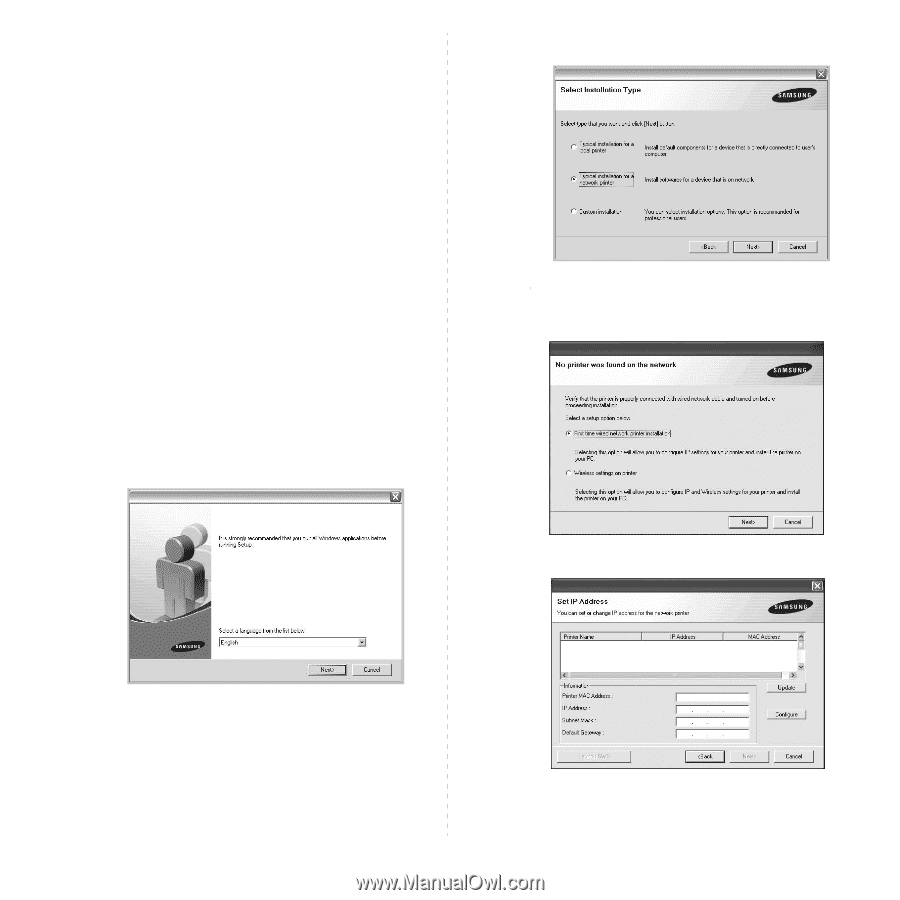
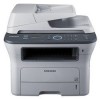
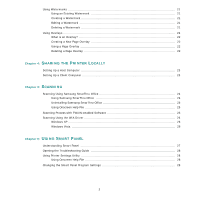
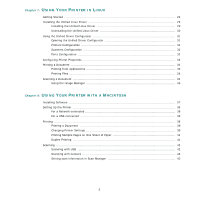
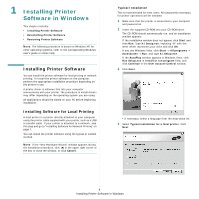
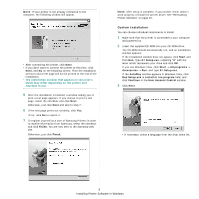
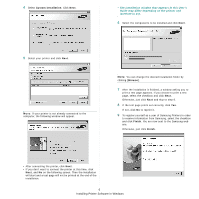
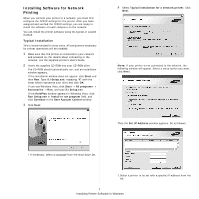
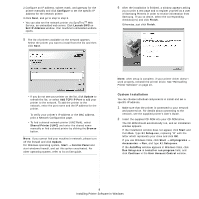
Installing Software for Network Printing When you connect your printer to a network, you must first configure the TCP/IP settings for the printer. After you have assigned and verified the TCP/IP settings, you are ready to install the software on each computer on the network. You can install the printer software using the typical or custom method. Typical Installation This is recommended for most users. All components necessary for printer operations will be installed. 1 Make sure that the printer is connected to your network and powered on. For details about connecting to the network, see the supplied printer's User's Guide. 2 Insert the supplied CD-ROM into your CD-ROM drive. The CD-ROM should automatically run, and an installation window appears. If the installation window does not appear, click Start and then Run. Type X:\Setup.exe, replacing "X" with the letter which represents your drive and click OK. If you use Windows Vista, click Start → All programs → Accessories → Run, and type X:\Setup.exe. If the AutoPlay window appears in Windows Vista, click Run Setup.exe in Install or run program field, and click Continue in the User Account Control window. 3 Click Next. 4 Select Typical installation for a network printer. Click Next. NOTE: If your printer is not connected to the network, the following window will appear. Select a setup option you want, click Next. Then the Set IP Address window appears. Do as follows: • If necessary, select a language from the drop-down list. 1.Select a printer to be set with a specific IP address from the list. 7 Installing Printer Software in Windows
-
 1
1 -
2
-
3
-
4
-
5
-
6
-
7
-
8
-
9
-
10
-
11
-
12
-
13
-
14
-
15
-
16
-
17
-
18
-
19
-
20
-
21
-
22
-
23
-
24
-
25
-
26
-
27
-
28
-
29
-
30
-
31
-
32
-
33
-
34
-
35
-
36
-
37
-
38
-
39
-
40
-
41
-
42
-
43
-
44
-
45
-
46
-
47
-
48
-
49
-
50
-
51
-
52
-
53
-
54
-
55
-
56
-
57
-
58
-
59
-
60
-
61
-
62
-
63
-
64
-
65
-
66
-
67
-
68
-
69
-
70
-
71
-
72
-
73
-
74
-
75
-
76
-
77
-
78
-
79
-
80
-
81
-
82
-
83
-
84
-
85
-
86
-
87
-
88
-
89
-
90
-
91
-
92
-
93
-
 94
94 -
 95
95 -
 96
96 -
 97
97 -
 98
98 -
 99
99 -
 100
100 -
 101
101 -
 102
102 -
 103
103 -
 104
104 -
105
-
106
-
107
-
108
-
109
-
110
-
111
-
112
-
113
-
114
-
115
-
116
-
117
-
118
-
119
-
120
-
121
-
122
-
123
-
124
-
125
-
126
-
127
-
128
-
129
-
130
-
131
-
132
-
133
-
134
-
135
-
136
-
137
-
138
 |
 |