Samsung SCX4521F User Manual (ENGLISH)
Samsung SCX4521F - B/W Laser - All-in-One Manual
 |
UPC - 635753616040
View all Samsung SCX4521F manuals
Add to My Manuals
Save this manual to your list of manuals |
Samsung SCX4521F manual content summary:
- Samsung SCX4521F | User Manual (ENGLISH) - Page 1
- Samsung SCX4521F | User Manual (ENGLISH) - Page 2
also provides all of the detailed instructions for using your machine as a printer, a scanner, a copier, and a facsimile, and information for maintaining and troubleshooting the machine. The Software User's Guide which is the second section of this guide provides information you need for installing - Samsung SCX4521F | User Manual (ENGLISH) - Page 3
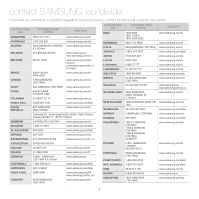
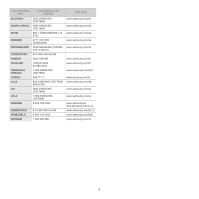
com/in www.samsung.com/id www.samsung.com/it www.samsung.com/latin www.samsung.com/jp www.samsung.com/lv www.samsung.com/lt www.samsung.com/lu www.samsung.com/my www.samsung.com/mx www.samsung/ua www.samsung.com/ua_ru www.samsung.com/nl www.samsung.com/nz www.samsung.com/latin www.samsung.com/no www - Samsung SCX4521F | User Manual (ENGLISH) - Page 4
.com/za www.samsung.com/es www.samsung.com/se www.samsung.com/ch www.samsung.com/tw www.samsung.com/th www.samsung.com/latin www.samsung.com/tr www.samsung.com/ae www.samsung.com/uk www.samsung.com/us www.samsung/ua www.samsung.com/ua_ru www.samsung.com/kz_ru www.samsung.com/latin www.samsung.com/vn - Samsung SCX4521F | User Manual (ENGLISH) - Page 5
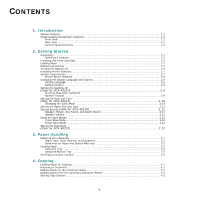
Paper ...2.3 Making Connections ...2.4 Turning the Machine On ...2.6 Installing Printer Software ...2.7 System requirements ...2.7 Printer Driver Features ...2.8 Changing the Display Language and Country 2.9 Setting Language ...2.9 Setting Country ...2.9 Setting the Machine ID (Only for SCX-4521F - Samsung SCX4521F | User Manual (ENGLISH) - Page 6
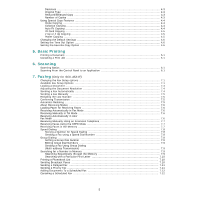
Basics ...6.1 Scanning From the Control Panel to an Application 6.1 7. Faxing (Only for SCX-4521F) Changing the Fax Setup options 7.1 Available Fax Setup Options ...7.1 Loading a Document ...7.3 Adjusting the Document Resolution 7.4 Sending a Fax Automatically ...7.4 Sending a Fax Manually - Samsung SCX4521F | User Manual (ENGLISH) - Page 7
SCX-4521F 8.5 Consumables and Replacement Parts 8.5 Replacing the ADF Rubber Pad 8.6 9. Troubleshooting Clearing Document Jams ...9.1 Input Misfeed ...9.1 Exit Misfeed ...9.2 Clearing Paper Jams ...9.2 In the Tray ...9.2 In the Manual Tray ...9.2 In the Fuser Area or Around the Toner Cartridge - Samsung SCX4521F | User Manual (ENGLISH) - Page 8
there is never any human access to laser radiation above a Class I level during normal operation, user maintenance or prescribed service condition. WARNING Never operate or service the printer with the protective cover removed from Laser/Scanner assembly. The reflected beam, although invisible, can - Samsung SCX4521F | User Manual (ENGLISH) - Page 9
org, eiae.org, or call 1-800-Samsung Power Saver This machine contains advanced energy of any machine or service. Recycling Please recycle or Frequency Emissions FCC Information to the User This device complies with Part 15 of in accordance with the instructions, may cause harmful interference - Samsung SCX4521F | User Manual (ENGLISH) - Page 10
void the user's authority to machine, you may experience transmission and reception problems with all the equipment. It is recommended service dispatcher of your intentions. The dispatcher will give you further instructions .samsung.com/printer, go to Support > Download center and enter your printer - Samsung SCX4521F | User Manual (ENGLISH) - Page 11
WARNING If you cut off the moulded plug, get rid of it straight away. You cannot rewire the plug and you may receive an electric shock if you plug it into a socket. IMPORTANT WARNING: You must earth this machine. The wires in the mains lead have the following color code: • Green and Yellow: - Samsung SCX4521F | User Manual (ENGLISH) - Page 12
are magnified and printed across the sheet of paper and taped together to form a poster. For details, see Software User's Guide. Save time and money • Allows you to use the Toner Save mode to save the toner. For details, see Software User's Guide and "Toner Save Mode" on page 2.12. • You can print - Samsung SCX4521F | User Manual (ENGLISH) - Page 13
Document Guides Document Input Tray Document Output Tray Document Cover Paper Output Extension Document Glass Control Panel (SCX-4521F: see page 1.3. SCX-4321: see page 1.3.) Paper Input Tray Front Door Output Tray (Face Down) Toner Cartridge Manual Tray The figure above shows an SCX-4521F - Samsung SCX4521F | User Manual (ENGLISH) - Page 14
Panel Functions SCX-4521F Allows you to access a list of your PC software programs that an image can be scanned to. You 6 Scan-to must create the scan list using the Samsung software (Printer Settings Utility) provided with this machine. For details, see Software User's Guide. 7 Toner Save - Samsung SCX4521F | User Manual (ENGLISH) - Page 15
SCX-4521F and UK) 2.1 Getting Started Paper Cover*** *.The appearance of the power cord and the telephone line cord may differ depending on your country's specifications. **.The CD-ROM contains the Samsung printer drivers, Scan drivers, Printer Settings Utility, SmarThru software, the User's Guide - Samsung SCX4521F | User Manual (ENGLISH) - Page 16
Back: 3.9 in./100 mm (enough space for ventilation) • Right: 3.9 in./100 mm (enough space for ventilation) Installing the Toner Cartridge 1 Open the front door. 2 Remove the toner cartridge from its bag and remove the paper protecting the cartridge by pulling the packing tape. 2.2 Getting Started - Samsung SCX4521F | User Manual (ENGLISH) - Page 17
machine.) Loading Paper The tray can hold a maximum of 150 sheets of 20 lb (75 g/m2 bond) plain paper. 1 Grasp the tray and pull it toward you to open. Pinch the rear guide and pull it out to extend the tray. NOTE: Carefully insert or pull out the toner cartridge not to scratch against the printer - Samsung SCX4521F | User Manual (ENGLISH) - Page 18
not to overload paper. Paper overloading may cause paper jams. 4 Pinch the rear guide to adjust for the paper length and pinch the side guide to slide it to the edge of the paper. Making Connections 1 If you have SCX-4321: Skip this step and proceed to step 2. If you have SCX-4521F: Plug one end - Samsung SCX4521F | User Manual (ENGLISH) - Page 19
supplied TAM lead and plug the cord of the TAM lead into the EXT. jack on the back of your machine. For France users only TAM lead (For UK users only) NOTES: • Use the TAM lead and the telephone line cord supplied with your machine. • In the United Kingdom, if a three-wire - Samsung SCX4521F | User Manual (ENGLISH) - Page 20
To the USB port on your computer If you want to use a parallel printer cable, purchase only an IEEE-1284 compliant parallel cable and connect it to the : • The fusing area at the rear portion of the inside of your printer is hot when powered. Be careful not to be burned when accessing this area - Samsung SCX4521F | User Manual (ENGLISH) - Page 21
and if you are a Linux OS user, download the software from the Samsung website (www.samsung.com/printer) and install. For details, see Software User's Guide.: Programs for Windows To use your machine as a printer and scanner in Windows, you must install the MFP driver. You can install selectively or - Samsung SCX4521F | User Manual (ENGLISH) - Page 22
Your printer drivers support the following standard features: • Paper source selection • Paper size, orientation and media type • number of copies The following table lists a general overview of features supported by your printer drivers. Feature Windows Printer Driver Linux Macintosh Toner Save - Samsung SCX4521F | User Manual (ENGLISH) - Page 23
. 6 To return to Standby mode, press Stop/Clear. NOTE: Changing the country clears the memory. 2.9 Getting Started Setting the Machine ID (Only for SCX-4521F) In some countries, you are required by law to indicate your fax number on any fax you send. The Machine ID, containing your telephone number - Samsung SCX4521F | User Manual (ENGLISH) - Page 24
at the corresponding location. Setting the Date and Time (Only for SCX-4521F) When you turn your machine on for the first time, the display When turning on the machine after turning it off for a long time, you need to reset date and time. 1 Press Menu until "Machine Setup" appears on the top line - Samsung SCX4521F | User Manual (ENGLISH) - Page 25
Enter to access the menu item. 5 Use the scroll button ( or ) to find the paper type you are using and press Enter to save it. 6 To return to Standby mode, press Stop/Clear. Setting Sounds (Only for SCX-4521F) You can control the following sounds: • Speaker: You can turn on or off the - Samsung SCX4521F | User Manual (ENGLISH) - Page 26
toner. NOTE: When PC-printing, you can also turn on or off the toner save mode in the printer properties. For details, see Software User's Guide to Standby mode, press Stop/Clear. Setting the Dial Mode (Only for SCX-4521F) You can select the type of the telephone dial system where your machine is - Samsung SCX4521F | User Manual (ENGLISH) - Page 27
listed on page 10.2 may cause problems that may require service. This service is not covered by the warranty or service agreements. Paper Type, Input Sources, and Capacities Paper Type* Plain paper Input Tray/Capacity** Tray Manual tray 150 1 Envelopes 1 1 Labels 1 1 Transparencies - Samsung SCX4521F | User Manual (ENGLISH) - Page 28
bag, to prevent dust and moisture from contaminating your paper. • Load special paper types one sheet at a time through the manual tray or the tray to avoid paper jams. • Only use materials specifically recommended for use in laser printers. • To prevent special materials, such as transparencies and - Samsung SCX4521F | User Manual (ENGLISH) - Page 29
the print material without bending the material. 3 Select Manual Feed for Source from the software application, and then select the correct paper size and type. For details, see Software User's Guide. 4 Operate printing. 5 The display shows "Add Paper & Press Start" then press Start on the machine - Samsung SCX4521F | User Manual (ENGLISH) - Page 30
Options • Using Special Copy Features • Changing the Default Settings • Setting the Time Out Option • Setting the Favorite Copy Option Loading Paper for Copying The instructions for loading print materials are the same whether you are printing, faxing, or copying. For further details, see "Loading - Samsung SCX4521F | User Manual (ENGLISH) - Page 31
keep it clean. • To get the best scan quality, especially for colored or gray- scaled the bottom of the document stack matches the paper size marked on the document tray. NOTE: open while copying may affect copy quality and toner consumption. • If you are copying a page guides to the document size. - Samsung SCX4521F | User Manual (ENGLISH) - Page 32
copy size you want appears on the display. Pressing and holding the button allows you to quickly scroll to the number you want. For the SCX-4521F, you can enter the value using the number keypad. 4 Press Enter to save the selection. NOTE: When you make a reduced copy, black lines may appear - Samsung SCX4521F | User Manual (ENGLISH) - Page 33
"Auto Fit Copying" on page 4.4. • ID Card Copy: Prints 2-sided ID card like a drivers licence on one sheet of paper. See "ID Card Copying" on page 4.5. • 2/4 Up: Prints 2/4 original images reduced to fit onto one sheet of paper. See "2 Up or 4 Up Copying" on page 4.5. • Poster: Prints an image onto - Samsung SCX4521F | User Manual (ENGLISH) - Page 34
You can copy both sides of the ID Card like a drivers licence to a single side of paper. When you copy using this feature, the machine prints one Options" on page 4.3. 6 Press Start to begin copying. Your machine begins scanning the front side. 7 When "Set Backside" displays on the bottom line, - Samsung SCX4521F | User Manual (ENGLISH) - Page 35
. 4 When the option you want to set appears, press Enter to access the option. 5 Change the setting using the scroll button ( or ). For the SCX-4521F, you can enter the value using the number keypad. 6 Press Enter to save the selection. 7 Repeat steps 3 through 6, as needed. 8 To return to Standby - Samsung SCX4521F | User Manual (ENGLISH) - Page 36
Software User's Guide. Canceling a Print Job If the print job is waiting in a print queue or print spooler, such as the Printer group in Windows, delete the job as follows: 1 Click the Windows Start button. 2 For Windows 2000, select Settings and then Printers. For Windows XP/2003, select Printers - Samsung SCX4521F | User Manual (ENGLISH) - Page 37
details, see Software User's Guide. • From the Windows Images Acquisition (WIA) driver: Your machine also supports the WIA driver for scanning images. For details, see Software User's Guide. • From the Samsung SmarThru software: Launch Samsung SmarThru and open Scan To to begin scanning. For details - Samsung SCX4521F | User Manual (ENGLISH) - Page 38
internet service printer. • Super Fine for documents containing extremely fine detail. Super Fine mode is enabled only if the remote machine also supports supports color fax reception and you send the fax manually. In this mode, memory transmission is not available. 7.1 Faxing (Only for SCX-4521F - Samsung SCX4521F | User Manual (ENGLISH) - Page 39
document to fit it onto the appropriately-sized paper and discard does not occur. If the Auto Settings range from 0 to 9. See "Receiving Manually Using an Extension Telephone" on page 7.7 for Pattern Detection (DRPD) feature, which enables a user to use a single telephone line to answer SCX-4521F) - Samsung SCX4521F | User Manual (ENGLISH) - Page 40
the ADF, you can load up to 30 sheets of 20 lb (75 g/m2 bond) paper at a time. You can, of course, place only one sheet at a time on align it at the top left corner of the glass. 2 Adjust the document guide on the ADF to match the width of the document. NOTE: Make sure Faxing (Only for SCX-4521F) - Samsung SCX4521F | User Manual (ENGLISH) - Page 41
pages are scanned, select "2:No" when the display shows "Another Page?". 6 The number is dialed and then the machine begins sending the fax when the receiving fax machine is ready. NOTE: When you want to cancel a fax job, press Stop/Clear at any time while sending. 7.4 Faxing (Only for SCX-4521F) - Samsung SCX4521F | User Manual (ENGLISH) - Page 42
Sending a Fax Manually 1 Load the document(s) face up into the ADF. OR Place a single document face down on the document glass. For details about loading a . To change the time interval between redials and the number of redial attempts. See "Redial Term" on page 7.2. 7.5 Faxing (Only for SCX-4521F) - Samsung SCX4521F | User Manual (ENGLISH) - Page 43
is a telephone company service which enables a user to use a single telephone on page 7.13. Loading Paper for Receiving Faxes The instructions for loading paper in the tray are the volume, see "Setting Sounds (Only for SCX-4521F)" on page 2.11. Receiving Manually in Tel Mode You can receive a fax - Samsung SCX4521F | User Manual (ENGLISH) - Page 44
Receiving Manually Using an Extension Telephone This Receiving Faxes Using the DRPD Mode "Distinctive Ring" is a telephone company service which enables a user to use a single telephone line to answer several different telephone numbers. The prints the fax. 7.7 Faxing (Only for SCX-4521F) - Samsung SCX4521F | User Manual (ENGLISH) - Page 45
and press and hold the last digit button. 4 The corresponding entry's name briefly displays. 5 The document scans into memory. When a document is placed on the document glass, the LCD display asks if you want to and 7 to enter other speed dial numbers into the group. 7.8 Faxing (Only for SCX-4521F) - Samsung SCX4521F | User Manual (ENGLISH) - Page 46
a Number in Memory There are two ways to search for a number in the machine's memory. You can either scan from A to Z sequentially, or you can search using the first letter of the name associated with the number. number you want displays, press Start or Enter to dial. 7.9 Faxing (Only for SCX-4521F) - Samsung SCX4521F | User Manual (ENGLISH) - Page 47
finish entering fax numbers, press 2 to select "No" at the Another No. prompt. The document is scanned into memory before transmission. The display shows memory capacity and the number of pages being stored in memory. For in the order in which you entered them. 7.10 Faxing (Only for SCX-4521F) - Samsung SCX4521F | User Manual (ENGLISH) - Page 48
on the following day. 12 Press Enter when the starting time displays correctly. 13 The document is scanned into memory before transmission. The display shows memory capacity and the number of pages being stored in memory not want to assign a name, skip this step. 7.11 Faxing (Only for SCX-4521F) - Samsung SCX4521F | User Manual (ENGLISH) - Page 49
8 Press Enter. The document is scanned into memory before transmission. The display shows memory capacity and the number of pages being stored in memory. For a canceled and the machine returns to Standby mode. To cancel your selection, press 2 to select "No". 7.12 Faxing (Only for SCX-4521F) - Samsung SCX4521F | User Manual (ENGLISH) - Page 50
on the faxes you have recently received. System Data List This list shows the status of the user-selectable options. You may print this list to confirm your changes after changing any settings. Scheduled after sending documents from more than one location. 7.13 Faxing (Only for SCX-4521F) - Samsung SCX4521F | User Manual (ENGLISH) - Page 51
set to print out automatically don't print out when there is no paper loaded or a paper jam has occurred. Printing a Report 1 Press Menu until "Reports" appears out. Using Advanced Fax Settings Your machine has various user-selectable setting options for sending or receiving faxes. These SCX-4521F) - Samsung SCX4521F | User Manual (ENGLISH) - Page 52
by Phone (Only for SCX-4521F) • Cleaning Your Machine • Maintaining the Toner Cartridge • Consumables and Replacement Parts • Replacing the ADF Rubber Pad Clearing the Memory You can selectively clear information stored in your machine's memory. CAUTION: For SCX-4521F users, before clearing the - Samsung SCX4521F | User Manual (ENGLISH) - Page 53
prevent damage to the toner cartridge, do not expose it to light for more than a few minutes. Cover it with a piece of paper, if necessary. • Do not touch the green underside of the toner cartridge. Use the handle on the cartridge to avoid touching this area. 4 Remove the manual tray by pulling it - Samsung SCX4521F | User Manual (ENGLISH) - Page 54
gently swab the glass to see if dirt turns the white cotton black. 7 Reinsert the manual tray, toner cartridge and close the door. 8 Plug in the power cord and turn the machine on. Cleaning the Scan Unit Keeping the scan unit clean helps ensure the best possible copies. We suggest that you clean the - Samsung SCX4521F | User Manual (ENGLISH) - Page 55
SCX-4521F)" on page 8.5. Remove the old toner cartridge and install a new toner cartridge. See "Installing the Toner Cartridge" on page 2.2. Setting the Notify Toner Option (Only for SCX-4521F) If you set the Notify Toner menu option to "On", your machine automatically sends a fax to your service - Samsung SCX4521F | User Manual (ENGLISH) - Page 56
surface are affixed to the paper. 5 If the problem remains, repeat steps 1 through 4. 6 To return to Standby mode, press Stop/Clear. Ignoring the Toner Empty Message (Only for SCX-4521F) When the toner cartridge is nearly empty, the machine shows the "[Toner Empty]" message and continues printing - Samsung SCX4521F | User Manual (ENGLISH) - Page 57
Replacing the ADF Rubber Pad You can purchase an ADF rubber pad from your Samsung dealer or the retailer where you bought your machine. 1 Open the ADF cover. 2 Remove the ADF rubber pad from the ADF, as shown. 3 Insert a new ADF rubber pad into place. 4 Close the ADF cover. 8.6 Maintenance - Samsung SCX4521F | User Manual (ENGLISH) - Page 58
9 Troubleshooting This chapter gives helpful information for what to do if you encounter an error. This chapter includes: • Clearing Document Jams • Clearing Paper Jams • Clearing LCD Error Messages • Solving Other Problems • Common Linux Problems • Common Macintosh Problems Clearing Document Jams - Samsung SCX4521F | User Manual (ENGLISH) - Page 59
tray or manual tray page 9.2 [Paper Jam 1] Open/Close Door In the fuser area or around the toner cartridge. page 9.3 [Paper Jam 2] Check Inside In the paper exit area page 9.3 To avoid tearing the paper, pull out the jammed paper gently and slowly. Follow the instructions in the following - Samsung SCX4521F | User Manual (ENGLISH) - Page 60
the toner cartridge and close the front door. Printing automatically resumes. In the Paper Exit Area 1 Open and close the front door. The jammed paper automatically exits the machine. If the paper does not exit, continue to step 2. 2 Gently pull the paper out of the output tray. 9.3 Troubleshooting - Samsung SCX4521F | User Manual (ENGLISH) - Page 61
(only for SCX4521F) CRU Fuse Error The machine has a communication problem. Ask the sender to try again. The toner cartridge is not installed correctly. Install the toner cartridge correctly. See "Replacing the Toner Cartridge" on page 8.4. [Document Jam] The loaded document has jammed in the - Samsung SCX4521F | User Manual (ENGLISH) - Page 62
LSU (Laser Scanning Unit). Unplug the power cord and plug it back in. If the problem persists, please call for service. The fax jobs queue in Cancel unnecessary fax jobs the memory is full. in the memory. Display Memory Full (only for SCX4521F) [No Answer] (only for SCX4521F) [No Cartridge] Not - Samsung SCX4521F | User Manual (ENGLISH) - Page 63
stick together in the paper exit. Use only transparencies specifically designed for laser printers. Remove each transparency as it exits from the machine. Envelopes skew or fail to feed correctly. Ensure that the paper guides are against both sides of the envelopes. 9.6 Troubleshooting - Samsung SCX4521F | User Manual (ENGLISH) - Page 64
the problem, clear it. • Close the door. • Clear the paper jam. See "Clearing Paper Jams" on page 9.2. • Load paper. See "Loading Paper" on page 2.3. • Install the toner cartridge. See "Installing the Toner Cartridge" on page 2.2. If a printer system error occurs, contact your service representative - Samsung SCX4521F | User Manual (ENGLISH) - Page 65
is bad. The manufacturing processes can cause some areas to reject toner. Try a different kind or brand of paper. • The toner cartridge may be defective. See "Vertical repetitive defects" on page 9.9. • If these steps do not correct the problem, contact a service representative. 9.8 Troubleshooting - Samsung SCX4521F | User Manual (ENGLISH) - Page 66
the Toner Cartridge" on page 8.4. • Parts of the machine may have toner on them. If the defects occur on the back of the page, the problem will likely correct itself after a few more pages. • The fusing assembly may be damaged. Contact a service representative. • If you use inferior quality paper - Samsung SCX4521F | User Manual (ENGLISH) - Page 67
supply. Check/adjust the paper guides, if necessary. • Ensure that the paper is the proper paper weight. 20 lb (75 g/m2 bond) paper is recommended. • Check for copy paper or pieces of copy paper remaining in the machine after a paper jam has been cleared. Toner cartridge produces fewer copies than - Samsung SCX4521F | User Manual (ENGLISH) - Page 68
to analyze and reproduce the scanned image. Set your computer to the ECP printer mode through BIOS setting. It will help to increase the speed. For details about how to set BIOS, refer to your computer User's Guide. Fax Problems (Only for SCX-4521F) Condition Suggested solutions The machine - Samsung SCX4521F | User Manual (ENGLISH) - Page 69
Common Linux Problems Problem The machine doesn't print. Possible Cause and Solution • Check if the printer driver is installed in your system. Open MFP configurator and switch to the Printers tab in Printers configuration window to look at the list of available printers. Make sure that your - Samsung SCX4521F | User Manual (ENGLISH) - Page 70
Common Macintosh Problems Problems in Printer Setup Utility Problem Possible Cause and Solution There is described "driver not installed" at Product List Window after you click Add and Select USB. • Software is not installed correctly. Reinstall the software. See Software User's Guide. • Make - Samsung SCX4521F | User Manual (ENGLISH) - Page 71
chapter includes: • General Specifications • Scanner and Copier Specifications • Printer Specifications • Facsimile Specifications (Only for SCX-4521F) • Paper Specifications General Specifications Item Description Model name SCX-4321(WT21MFC) SCX-4521F(WT21MFF) Automatic document feeder Up - Samsung SCX4521F | User Manual (ENGLISH) - Page 72
Monarch), JIS B5, ISO B5 * Min.: 3 x 5 in. (76 x 127 mm) Max.: 8.5 x 14 in. (216 x 356 mm) Printer resolution 600 x 600 dpi Emulation SPL (Samsung Printer Language) OS Compatibility** Windows 2000/XP/2003/2008/Vista/7/Server 2008 R2, Various Linux OS (USB only), Macintosh 10.3~10.6 Memory 10 - Samsung SCX4521F | User Manual (ENGLISH) - Page 73
Specifications (Only for SCX-4521F) Item Description paper, insure the paper meets the requirements specified in this user's guide. CAUTION: Using paper that does not meet these specifications may cause problems, requiring repairs. These repairs are not covered by the Samsung warranty or service - Samsung SCX4521F | User Manual (ENGLISH) - Page 74
in its moisture-proof wrapping. Increased gray background shading/ printer wear Too heavy Use lighter paper. Excessive curl problems with feeding Too moist, wrong grain direction or short-grain construction Use long-grain paper. Jamming, damage to machine Cutouts or perforations Do not use - Samsung SCX4521F | User Manual (ENGLISH) - Page 75
within the following size ranges. Minimum 3 x 5 in. (76 x 127 mm) Maximum 8.5 x 14 in. (216 x 356 mm) NOTES: • Load only one sheet of paper at a time to print envelopes. • You may experience some paper jams when using any media with a length less than 5.5 in. (140 mm). This may be caused by - Samsung SCX4521F | User Manual (ENGLISH) - Page 76
the envelope may wrinkle during printing. Labels CAUTIONS: • To avoid damaging the machine, use only labels recommended for laser printers. • To prevent serious jams, always load one sheet of paper at a time to print labels. • Never print on the same sheet of labels more than once and never print - Samsung SCX4521F | User Manual (ENGLISH) - Page 77
characters, enter 2.9 cleaning drum 8.5 inside 8.2 LSU 8.3 outside 8.2 scan unit 8.3 clone, special copy 4.4 collation, special copy 4.4 components 7.8 I installing toner cartridge 2.2 J jam, clear document 9.1 paper 9.2 L Linux common problems 9.12 requirements 2.8 load paper manual tray 3.3 tray - Samsung SCX4521F | User Manual (ENGLISH) - Page 78
manually 7.5 sounds, set 2.11 specifications facsimile 10.3 general 10.1 paper 10.3 printer 10.2 scanner and copier 10.2 speed dial dialing 7.8 storing 7.8 system requirements Windows 2.7 T tel line, connect 2.4 toner cartridge installing 2.2 maintaining 8.3 redistributing 8.4 replacing 8.4 toner - Samsung SCX4521F | User Manual (ENGLISH) - Page 79
Samsung Printer Software section - Samsung SCX4521F | User Manual (ENGLISH) - Page 80
CONTENTS Chapter 1: INSTALLING PRINTER SOFTWARE IN WINDOWS Installing Printer Software ...4 Reinstalling Printer Software ...6 Removing Printer Software ...6 Chapter 2: BASIC PRINTING Printing a Document ...7 Printing to a file (PRN) ...8 Printer Settings ...8 Layout Tab ...9 Paper Tab ...9 Graphics - Samsung SCX4521F | User Manual (ENGLISH) - Page 81
the Troubleshooting Guide 18 Changing the Smart Panel Program Settings 19 Chapter 6: SCANNING Scanning Using Samsung SmarThru 20 Uninstalling Samsung SmarThru 20 Using Samsung SmarThru 20 Using Onscreen Help File 21 Scanning Process with TWAIN-enabled Software 22 Scanning Using the WIA Driver - Samsung SCX4521F | User Manual (ENGLISH) - Page 82
29 Chapter 8: USING YOUR PRINTER WITH A MACINTOSH Installing Software ...31 Setting Up the Printer ...32 For a Network-connected 32 For a USB-connected ...32 Printing ...33 Printing a Document ...33 Changing Printer Settings 33 Printing Multiple Pages on One Sheet of Paper 35 Scanning ...35 3 - Samsung SCX4521F | User Manual (ENGLISH) - Page 83
window. 3 Click Next. • If necessary, select a language from the drop-down list. • View User's Guide: Allows you to view the User's Guide. If your computer doesn't have Adobe Acrobat, click on this option and it will automatically install Adobe Acrobat Reader for you. 4 Installing Printer Software - Samsung SCX4521F | User Manual (ENGLISH) - Page 84
common software for your printer. This is recommended for most users. • Custom: Allows you to choose the individual components you want to install. NOTE: If your printer is not already connected to the computer, the following window will appear. NOTE: After setup is complete, if your printer driver - Samsung SCX4521F | User Manual (ENGLISH) - Page 85
The reinstallation window that appears in this User's Guide may differ depending on the printer and interface in use. 4 Select the components you want to reinstall and click Next. If you you select your printer driver name and reinstall the printer software for local printing, the window asking you - Samsung SCX4521F | User Manual (ENGLISH) - Page 86
• Printing to a file (PRN) • Printer Settings - Layout Tab - Paper Tab - Graphics Tab - Extras Tab - About Tab - Printer Tab - Using a Favorite Setting - Using Help Printing a Document NOTES: • Your printer driver Properties window that appears in this User's Guide may differ depending on the - Samsung SCX4521F | User Manual (ENGLISH) - Page 87
, you can review and change the settings needed for your print job. Your printer properties window may differ, depending on your operating system. This Software User's Guide shows the Properties window for Windows XP. Your printer driver Properties window that appears in this User's Guide may differ - Samsung SCX4521F | User Manual (ENGLISH) - Page 88
the Size box, click Custom. When the Custom Paper Setting window appears, set the paper size and click OK. The setting appears in the Manual Tray or Multi-Purpose Tray. If the paper source is set to Auto Selection, the printer automatically picks up print material in the following tray order: Manual - Samsung SCX4521F | User Manual (ENGLISH) - Page 89
Save Mode Selecting this option extends the life of your toner cartridge and reduces your cost per page without a significant reduction in print quality. Some printers do not support this feature. • Printer Setting: If you select this option, this feature is determined by the setting you've made - Samsung SCX4521F | User Manual (ENGLISH) - Page 90
Some printers do not support Windows XP. For other Windows OS, refer to the corresponding Windows User's Guide or online help. 1 Click the Windows Start menu. 2 Select Printers and Faxes. 3 Select your printer driver icon. 4 Right-click on the printer driver forms and letterhead paper. For details, - Samsung SCX4521F | User Manual (ENGLISH) - Page 91
that can be activated by clicking the Help button in the printer properties window. These help screens give detailed information about the printer features provided by the printer driver. You can also click from the upper right corner of the window, and then click on any setting. 12 Basic Printing - Samsung SCX4521F | User Manual (ENGLISH) - Page 92
This chapter explains printing options and advanced printing tasks. NOTE: • Your printer driver Properties window that appears in this User's Guide may differ depending on the printer in use. However the composition of the printer properties window is similar. • If you need to know the exact name of - Samsung SCX4521F | User Manual (ENGLISH) - Page 93
's content to appear larger or smaller on the printed page. 1 To change the print settings from your software application, access printer properties. See "Printing a Document" on page 7. 2 From the Paper tab, select Reduce/Enlarge in the Printing Type drop-down list. 3 Enter the scaling rate in the - Samsung SCX4521F | User Manual (ENGLISH) - Page 94
message and options. 4 Click Update to save the changes. 5 Click OK until you exit the Print window. Deleting a Watermark 1 To change the print settings from your software application, access printer properties. See "Printing a Document" on page 7. 2 From the Extras tab, click the Edit button in the - Samsung SCX4521F | User Manual (ENGLISH) - Page 95
preprinted forms and letterhead paper. Rather than using preprinted the print settings from your software application, access printer properties. See "Printing a begins. The selected overlay downloads with your print job and prints no longer use. 1 In the printer properties window, click the Extras tab. 2 - Samsung SCX4521F | User Manual (ENGLISH) - Page 96
Specifications in your Printer User's Guide. • If you need to know the exact name of your printer, you can check the supplied CD-ROM. Setting Up a Host Computer 1 Start Windows. 2 From the Start menu select Printers and Faxes. 3 Double-click your printer driver icon. 4 From the Printer menu, select - Samsung SCX4521F | User Manual (ENGLISH) - Page 97
remaining in the toner cartridge(s). The printer and the number of the toner cartridge(s) shown above window may differ depending on the printer in use. Buy Now You can order replacement toner cartridge online. Troubleshooting Guide You can view Help to solve problems. Driver Setting You can use - Samsung SCX4521F | User Manual (ENGLISH) - Page 98
Changing the Smart Panel Program Settings Right-click the Smart Panel icon on the Windows task bar and select Options. Select the settings you want from the Options window. 19 Using Smart Panel - Samsung SCX4521F | User Manual (ENGLISH) - Page 99
: • Scanning Using Samsung SmarThru • Scanning Process with TWAIN-enabled Software • Scanning Using the WIA Driver NOTES: • Check the Operating System(s) that are compatible with your printer. Please refer to the OS Compatibility section of Printer Specifications in your Printer User's Guide. • You - Samsung SCX4521F | User Manual (ENGLISH) - Page 100
. This is available when your machine supports the fax feature. 4 Click Scan To. The Scan To menu bar appears on the SmarThru 4 window. Scan To menu bar Adjust the scan settings. Click to start scanning. Scan To lets you use the following services: •Application Scanning an image and placing it in - Samsung SCX4521F | User Manual (ENGLISH) - Page 101
image. NOTE: You need to follow the program's instructions for acquiring an image. Please refer to the user's guide of the application. Scanning Using the WIA Driver Your machine also supports the Windows Image Acquisition (WIA) driver for scanning images. WIA is one of the standard components - Samsung SCX4521F | User Manual (ENGLISH) - Page 102
Started You need to download Linux software package from the Samsung website (www.samsung.com/printer) to install the printer and scanner softwares. Samsung's Unified Linux Driver package contains printer and scanner drivers, providing the ability to print documents and scan images. The package also - Samsung SCX4521F | User Manual (ENGLISH) - Page 103
screen. Uninstalling the Unified Linux Driver 1 When the Administrator Login window appears, type in root in the Login field and enter the system password. NOTE: You must log in as a super user (root) to install the printer software. If you are not a super user, ask your system administrator - Samsung SCX4521F | User Manual (ENGLISH) - Page 104
and select Samsung Unified Driver and then Unified Driver Configurator. 2 Press each button on the Modules pane to switch to the corresponding configuration window. Printers Configuration button Scanners Configuration button Ports Configuration button Printers Configuration Printers configuration - Samsung SCX4521F | User Manual (ENGLISH) - Page 105
printer class. Scanners Configuration In this window, you can monitor the activity of scanner devices, view a list of installed Samsung MFP devices, change device properties, and scan images. Switches to Scanners do this with the assistance of an Unified Driver Configurator. In this case you will be - Samsung SCX4521F | User Manual (ENGLISH) - Page 106
various properties for your machine as a printer. 1 Open the Unified Driver Configurator. If necessary, switch to Printers configuration. 2 Select your machine on the available printers list and click Properties. 3 The Printer Properties window opens. Printing a Document Printing from Applications - Samsung SCX4521F | User Manual (ENGLISH) - Page 107
page 27. 3 Click OK to start printing. Scanning a Document You can scan a document using the Unified Driver Configurator window. 1 Double-click the Unified Driver Configurator on your desktop. 2 Click the button to switch to Scanners Configuration. 3 Select the scanner on the list. Click your - Samsung SCX4521F | User Manual (ENGLISH) - Page 108
button enables you to set the page size manually. If you want to use one of the preset scan option settings, select from the Job Type down list. 2 The next time you open the Scanner Properties window, the saved setting is automatically selected for the scan job. To delete a Job Type setting: 1 Select - Samsung SCX4521F | User Manual (ENGLISH) - Page 109
the image out. Zooms the image in. Allows you to scale the image size; you can enter the size manually, or set the rate to scale proportionally, vertically, or horizontally. Allows you to rotate the image; you can Image Manager application, refer to the onscreen help. 30 Using Your Printer in Linux - Samsung SCX4521F | User Manual (ENGLISH) - Page 110
NOTE: Some printers do not support a network interface. Make sure that your printer supports a network interface by referring to Printer Specifications in your Printer User's Guide. This chapter includes: • Installing Software • Setting Up the Printer • Printing • Scanning Installing Software The CD - Samsung SCX4521F | User Manual (ENGLISH) - Page 111
a Network-connected NOTE: Some printers do not support a network interface. Before connecting your printer, make sure that your printer supports a network interface by referring to Printer Specifications in your Printer User's Guide. 1 Follow the instructions on "Installing Software" on page 31 to - Samsung SCX4521F | User Manual (ENGLISH) - Page 112
User's Guide may differ depending on the printer in use. However the composition of the printer properties window is similar. • You can check your printer name in the supplied CDROM. Printing a Document When you print with a Macintosh, you need to check the printer software of Paper" on the next - Samsung SCX4521F | User Manual (ENGLISH) - Page 113
material, select the corresponding paper type. ?Mac OS 10.4 • Toner Save Mode Selecting this option extends the life of your toner cartridge and reduces your cost per page without a significant reduction in print quality. Some printers do not support this feature. - Printer Setting: If you select - Samsung SCX4521F | User Manual (ENGLISH) - Page 114
of paper on the Scan process differ according to TWAIN-compliant softwares. Please refer to the user's guide of the software. • When scanning does not operate in Image Capture, update Mac OS to the latest version. Image Capture operates properly in Mac OS 10.4.7 or higher. 35 Using Your Printer - Samsung SCX4521F | User Manual (ENGLISH) - Page 115
12 I install printer driver Macintosh 31 Windows 4 installing Linux software 23 L Layout properties, set Windows 9 Linux driver, install 23 printer properties 27 printing 27 scanning 28 M Macintosh driver install 31 uninstall 31 printing 33 scanning 35 setting up the printer 32 MFP driver, install - Samsung SCX4521F | User Manual (ENGLISH) - Page 116
true-type option 10 software install Macintosh 31 Windows 4 reinstall Windows 6 system requirements Macintosh 31 uninstall Macintosh 31 Windows 6 status monitor, use 18 T toner save, set 10, 34 TWAIN, scan 22 U uninstall, software Macintosh 31 Windows 6 uninstalling MFP driver Linux 24 W watermark - Samsung SCX4521F | User Manual (ENGLISH) - Page 117
www.samsungprinter.com Rev.7.00
-
 1
1 -
 2
2 -
 3
3 -
 4
4 -
 5
5 -
 6
6 -
 7
7 -
8
-
9
-
10
-
11
-
12
-
13
-
14
-
15
-
16
-
17
-
18
-
19
-
20
-
21
-
22
-
23
-
24
-
25
-
26
-
27
-
28
-
29
-
30
-
31
-
32
-
33
-
34
-
35
-
36
-
37
-
38
-
39
-
40
-
41
-
42
-
43
-
44
-
45
-
46
-
47
-
48
-
49
-
50
-
51
-
52
-
53
-
54
-
55
-
56
-
57
-
58
-
59
-
60
-
61
-
62
-
63
-
64
-
65
-
66
-
67
-
68
-
69
-
70
-
71
-
72
-
73
-
74
-
75
-
76
-
77
-
78
-
79
-
80
-
81
-
82
-
83
-
84
-
85
-
86
-
87
-
88
-
89
-
90
-
91
-
92
-
93
-
94
-
95
-
96
-
97
-
98
-
99
-
100
-
101
-
102
-
103
-
104
-
105
-
106
-
107
-
108
-
109
-
110
-
111
-
112
-
113
-
114
-
115
-
116
-
117
 |
 |