Samsung SGH-A707 User Manual (user Manual) (ver.f5) (English) - Page 134
Calendar
 |
View all Samsung SGH-A707 manuals
Add to My Manuals
Save this manual to your list of manuals |
Page 134 highlights
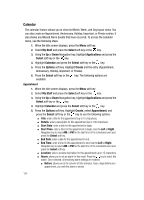
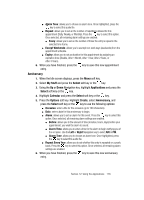
Calendar The calendar feature allows you to view the Month, Week, and Day layout views. You can also create an Appointment, Anniversary, Holiday, Important, or Private entries. It also shows any Missed Alarm Events that have occurred. To access the Calender menu, use the following steps: 1. When the Idle screen displays, press the Menu soft key. 2. Select My Stuff and press the Select soft key or the key. 3. Using the Up or Down Navigation key, highlight Applications and press the Select soft key or the key. 4. Highlight Calendar and press the Select soft key or the key. 5. Press the Options soft key. Highlight Create and the entry (Appointment, Anniversary, Holiday, Important, or Private). 6. Press the Select soft key or the key. The following options are available: Appointment 1. When the Idle screen displays, press the Menu soft key. 2. Select My Stuff and press the Select soft key or the key. 3. Using the Up or Down Navigation key, highlight Applications and press the Select soft key or the key. 4. Highlight Calendar and press the Select soft key or the key. 5. Press the Options soft key. Highlight Create, select Appointment, and press the Select soft key or the key to use the following options: ⅷ Title: enter a title for this appointment (up to 15 characters). ⅷ Details: enter a description for this appointment (up to 100 characters). ⅷ Start Date: enter a date for this appointment to begin. ⅷ Start Time: enter a time for this appointment to begin. Use the Left or Right Navigation key to select AM or PM for the start time of the scheduled event and press the Select soft key. ⅷ End Date: enter a date for this appointment to end. ⅷ End Time: enter a time for this appointment to end. Use the Left or Right Navigation key to select AM or PM for the start time of the scheduled event and press the Select soft key. ⅷ Location: enter a location description for this appointment (up to 15 characters). ⅷ Alarm: allows you to set an alarm for this event. Press the key to select this option. Once selected, all remaining alarm settings are enabled. ⅷ Before: allows you to the amount of time (minutes, hours, days) before your appointment, you wish the alarm to sound. 134
-
 1
1 -
2
-
3
-
4
-
5
-
6
-
7
-
8
-
9
-
10
-
11
-
12
-
13
-
14
-
15
-
16
-
17
-
18
-
19
-
20
-
21
-
22
-
23
-
24
-
25
-
26
-
27
-
28
-
29
-
30
-
31
-
32
-
33
-
34
-
35
-
36
-
37
-
38
-
39
-
40
-
41
-
42
-
43
-
44
-
45
-
46
-
47
-
48
-
49
-
50
-
51
-
52
-
53
-
54
-
55
-
56
-
57
-
58
-
59
-
60
-
61
-
62
-
63
-
64
-
65
-
66
-
67
-
68
-
69
-
70
-
71
-
72
-
73
-
74
-
75
-
76
-
77
-
78
-
79
-
80
-
81
-
82
-
83
-
84
-
85
-
86
-
87
-
88
-
89
-
90
-
91
-
92
-
93
-
94
-
95
-
96
-
97
-
98
-
99
-
100
-
101
-
102
-
103
-
104
-
105
-
106
-
107
-
108
-
109
-
110
-
111
-
112
-
113
-
114
-
115
-
116
-
117
-
118
-
119
-
120
-
121
-
122
-
123
-
124
-
125
-
126
-
127
-
128
-
 129
129 -
 130
130 -
 131
131 -
 132
132 -
 133
133 -
 134
134 -
 135
135 -
 136
136 -
 137
137 -
 138
138 -
 139
139 -
140
-
141
-
142
-
143
-
144
-
145
-
146
-
147
-
148
-
149
-
150
-
151
-
152
-
153
-
154
-
155
-
156
-
157
-
158
-
159
-
160
-
161
-
162
-
163
-
164
-
165
-
166
-
167
-
168
-
169
-
170
-
171
-
172
-
173
-
174
-
175
-
176
-
177
 |
 |
