Samsung SGH-A797 User Manual (user Manual) (ver.f12) (English) - Page 132
Using your History, Changing the WAP Profiles, AT&T MMS
 |
View all Samsung SGH-A797 manuals
Add to My Manuals
Save this manual to your list of manuals |
Page 132 highlights
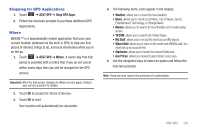
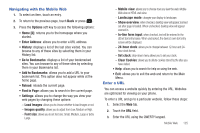
Using your History The History list provides you with a list of the most recently visited websites. These entries can be used to return to previously unmarked web pages. 1. When the Idle screen displays, touch ➔ Mobile Web, then touch Options ➔ History. 2. Touch an entry from the list to access the site. 3. Touch Clear to clear the history content. 4. When you have finished, touch Back to return or press to exit from the browser. Changing the WAP Profiles Connection can be made via either one of three available connection profiles: MEdia Net, AT&T MMS (MultiMedia Server), or AT&T IMS. Use this menu to create and customize the profiles containing the settings for connecting your phone to the network. You need these settings to use the WAP browser or to send MMS messages or Email messages. Note: Although the active connection can be changed by the user, it is recommended that this choice be made with the assistance of either the retailer or customer service representative. 128 1. In Idle mode, touch ➔ Settings ➔ Applications Settings ➔ Browser ➔ Browser Profiles. 2. Touch one of the following profiles: • MEdia Net • AT&T MMS • AT&T IMS Caution!: The WAPs are pre-configured and can not be altered using this screen. If you change the settings without first checking with your service provider, the web browser, MMS, and e-mail features may not work properly. 3. To create a new connection profile, touch Create and follow the onscreen prompts. - or - To edit an existing profile, touch a profile from list, scroll to the desired field, and use the onscreen keypad/keyboard to edit the parameter you want to edit: • Set Name: enter a profile name. • Access Name: edit the access point name. • Auth Type: select the type of authentication used for this WAP connection: None, Normal, or Secure. • User ID: enter the User ID required to connect to the network.
-
 1
1 -
2
-
3
-
4
-
5
-
6
-
7
-
8
-
9
-
10
-
11
-
12
-
13
-
14
-
15
-
16
-
17
-
18
-
19
-
20
-
21
-
22
-
23
-
24
-
25
-
26
-
27
-
28
-
29
-
30
-
31
-
32
-
33
-
34
-
35
-
36
-
37
-
38
-
39
-
40
-
41
-
42
-
43
-
44
-
45
-
46
-
47
-
48
-
49
-
50
-
51
-
52
-
53
-
54
-
55
-
56
-
57
-
58
-
59
-
60
-
61
-
62
-
63
-
64
-
65
-
66
-
67
-
68
-
69
-
70
-
71
-
72
-
73
-
74
-
75
-
76
-
77
-
78
-
79
-
80
-
81
-
82
-
83
-
84
-
85
-
86
-
87
-
88
-
89
-
90
-
91
-
92
-
93
-
94
-
95
-
96
-
97
-
98
-
99
-
100
-
101
-
102
-
103
-
104
-
105
-
106
-
107
-
108
-
109
-
110
-
111
-
112
-
113
-
114
-
115
-
116
-
117
-
118
-
119
-
120
-
121
-
122
-
123
-
124
-
125
-
126
-
 127
127 -
 128
128 -
 129
129 -
 130
130 -
 131
131 -
 132
132 -
 133
133 -
 134
134 -
 135
135 -
 136
136 -
 137
137 -
138
-
139
-
140
-
141
-
142
-
143
-
144
-
145
-
146
-
147
-
148
-
149
-
150
-
151
-
152
-
153
-
154
-
155
-
156
-
157
-
158
-
159
-
160
-
161
-
162
-
163
-
164
-
165
-
166
-
167
-
168
-
169
-
170
-
171
-
172
-
173
-
174
-
175
-
176
-
177
 |
 |