Samsung SGH-A797 User Manual (user Manual) (ver.f12) (English) - Page 69
Caller Image, Add New, Contact, First Name, Display Name, Mobile, Others, Tones, Music, Recorded Audio - copy contact
 |
View all Samsung SGH-A797 manuals
Add to My Manuals
Save this manual to your list of manuals |
Page 69 highlights
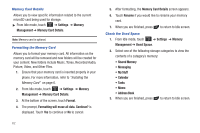
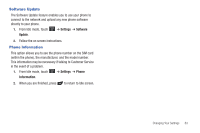
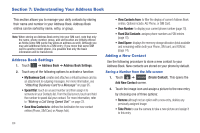
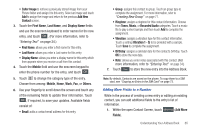
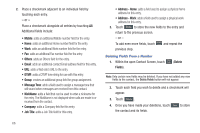
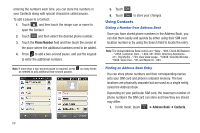
• Caller Image to retrieve a previously stored image from your Picture folder and assign it to this entry. Select an image and touch Add to assign the image and return to the previous Add New Contact screen. 3. Touch the First Name, Last Name, and Display Name fields and use the onscreen keyboard to enter names for the new entry, and touch OK . (For more information, refer to "Entering Text" on page 34.) • First Name: allows you enter a first name for this entry. • Last Name: allows you enter a Last name for this entry. • Display Name: allows you enter a display name for this entry which then appears when you receive a call from this contact. 4. Touch the Mobile field and use the onscreen keypad to enter the phone number for the entry, and touch OK . 5. Touch to change the category type of the entry. Choose from among: Mobile, Home, Work, Fax, or Others. 6. Use your fingertip to scroll down the screen and touch any of the remaining fields to update their information. Touch OK , if required, to save your updates. Available fields consist of: • Email: adds a contact email address for this entry. • Group: assigns this contact to group. Touch an group type to complete the assignment. For more information, refer to "Creating New Group" on page 71. • Ringtone: assigns a ringtone for this contact information. Choose from Tones, Music, or Recorded Audio categories. Touch a music file to play a short sample and then touch Add to complete the assignment. • Vibration: assigns a vibration type for this contact information. Touch a setting (Vibration 1 - 5) to be provided with a sample. Touch Save to complete the assignment. • Birthday: assigns a calendar date for the contact's birthday. Touch OK to store the new date. • Note: allows you enter notes associated with this contact. (For more information, refer to "Entering Text" on page 34.) 7. Touch Save to store the new entry into the Address Book. Note: By default, Contacts are saved on the phone. To copy them to a SIM card, see "Copying an Entry to the SIM Card" on page 73. Adding More Fields to a Number While in the process of creating a new entry or editing an existing contact, you can add additional fields to the entry's list of information. 1. Within the open Contact Screen, touch AddMoreFields (Add More Fields). Understanding Your Address Book 65
-
 1
1 -
2
-
3
-
4
-
5
-
6
-
7
-
8
-
9
-
10
-
11
-
12
-
13
-
14
-
15
-
16
-
17
-
18
-
19
-
20
-
21
-
22
-
23
-
24
-
25
-
26
-
27
-
28
-
29
-
30
-
31
-
32
-
33
-
34
-
35
-
36
-
37
-
38
-
39
-
40
-
41
-
42
-
43
-
44
-
45
-
46
-
47
-
48
-
49
-
50
-
51
-
52
-
53
-
54
-
55
-
56
-
57
-
58
-
59
-
60
-
61
-
62
-
63
-
 64
64 -
 65
65 -
 66
66 -
 67
67 -
 68
68 -
 69
69 -
 70
70 -
 71
71 -
 72
72 -
 73
73 -
 74
74 -
75
-
76
-
77
-
78
-
79
-
80
-
81
-
82
-
83
-
84
-
85
-
86
-
87
-
88
-
89
-
90
-
91
-
92
-
93
-
94
-
95
-
96
-
97
-
98
-
99
-
100
-
101
-
102
-
103
-
104
-
105
-
106
-
107
-
108
-
109
-
110
-
111
-
112
-
113
-
114
-
115
-
116
-
117
-
118
-
119
-
120
-
121
-
122
-
123
-
124
-
125
-
126
-
127
-
128
-
129
-
130
-
131
-
132
-
133
-
134
-
135
-
136
-
137
-
138
-
139
-
140
-
141
-
142
-
143
-
144
-
145
-
146
-
147
-
148
-
149
-
150
-
151
-
152
-
153
-
154
-
155
-
156
-
157
-
158
-
159
-
160
-
161
-
162
-
163
-
164
-
165
-
166
-
167
-
168
-
169
-
170
-
171
-
172
-
173
-
174
-
175
-
176
-
177
 |
 |